Preventing the Spread of Norovirus

Cruise Ship in PortIt seems like every couple of months we hear about a cruise ship that came back to port because of an illness outbreak on board. Does this make you want to think twice (or three times) about getting on a cruise ship?

We went on a fairly long cruise last year that had very few ports of call. We knew that once we got on the ship we were going to be there for the duration.

Yes, I gave this a second thought. What if we got sick? It could be miserable. There’s nothing worse than being stuck in a small ship’s cabin when you have diarrhea and vomiting.

Quite frequently the illness found on cruise ships is a norovirus. It can be introduced into a cruise ship by passengers or crew members alike. Why cruise ships? Well, on a cruise, lots of people from all over the world come together to live in confined areas with shared dining rooms and close living quarters.

Norovirus is highly contagious and one of the most common pathogens to cause a foodborne illness. Norovirus is frequently transferred by food handlers dealing with ready-to-eat food.

The symptoms of norovirus include vomiting, diarrhea, nausea, and abdominal cramps. These symptoms can develop within a few hours or a few days after a person is infected and can last for a couple days. People with norovirus are contagious from the moment they begin feeling ill, and they can remain contagious for up to two weeks after the symptoms appear.

Most norovirus illnesses happen when infected people spread the virus to others. It can also be spread through contaminated food or water, or by touching things that have the virus on them.

You think this is scary for a cruise passenger — think how concerned the cruise companies are about it! Turning a ship around because of a norovirus outbreak could cost them plenty, not only financially but also in terms of reputation.

I have to say that I was very impressed with the efforts the staff of our cruise ship made to prevent the spread of an infectious virus.

Sinks for WashingFor example, we saw our cabin steward the first day and then not again. I asked about him and was told he was sick and confined to his cabin for the rest of the cruise. Employees exposed to norovirus need to be restricted from work with food for at least 48 hours from the time of exposure.

Moreover, the cruise directors announced that officers would not be shaking hands at the special Captain’s Reception. This abstention helps to prevent passing the virus from person-to-person — very proactive.

However, I did make a mistake one morning.

I was heading to a container of ice water to refill my water bottle and was stopped by a crew member. He said that I could transfer germs from my previously-used water bottle to the tip of the water container, and then that could spread to others. I hadn’t thought of that — what a good catch!

Here are some more steps that the ship took to help reduce the spread of disease.

  • Signs around the ship and on the television constantly reminded passengers to wash their hands.
  • There were sanitizer dispensers throughout the ship. Some were strategically placed outside the entrances of dining rooms and buffets. While sanitizers should not be used in place of proper handwashing, it was a better option than doing nothing.
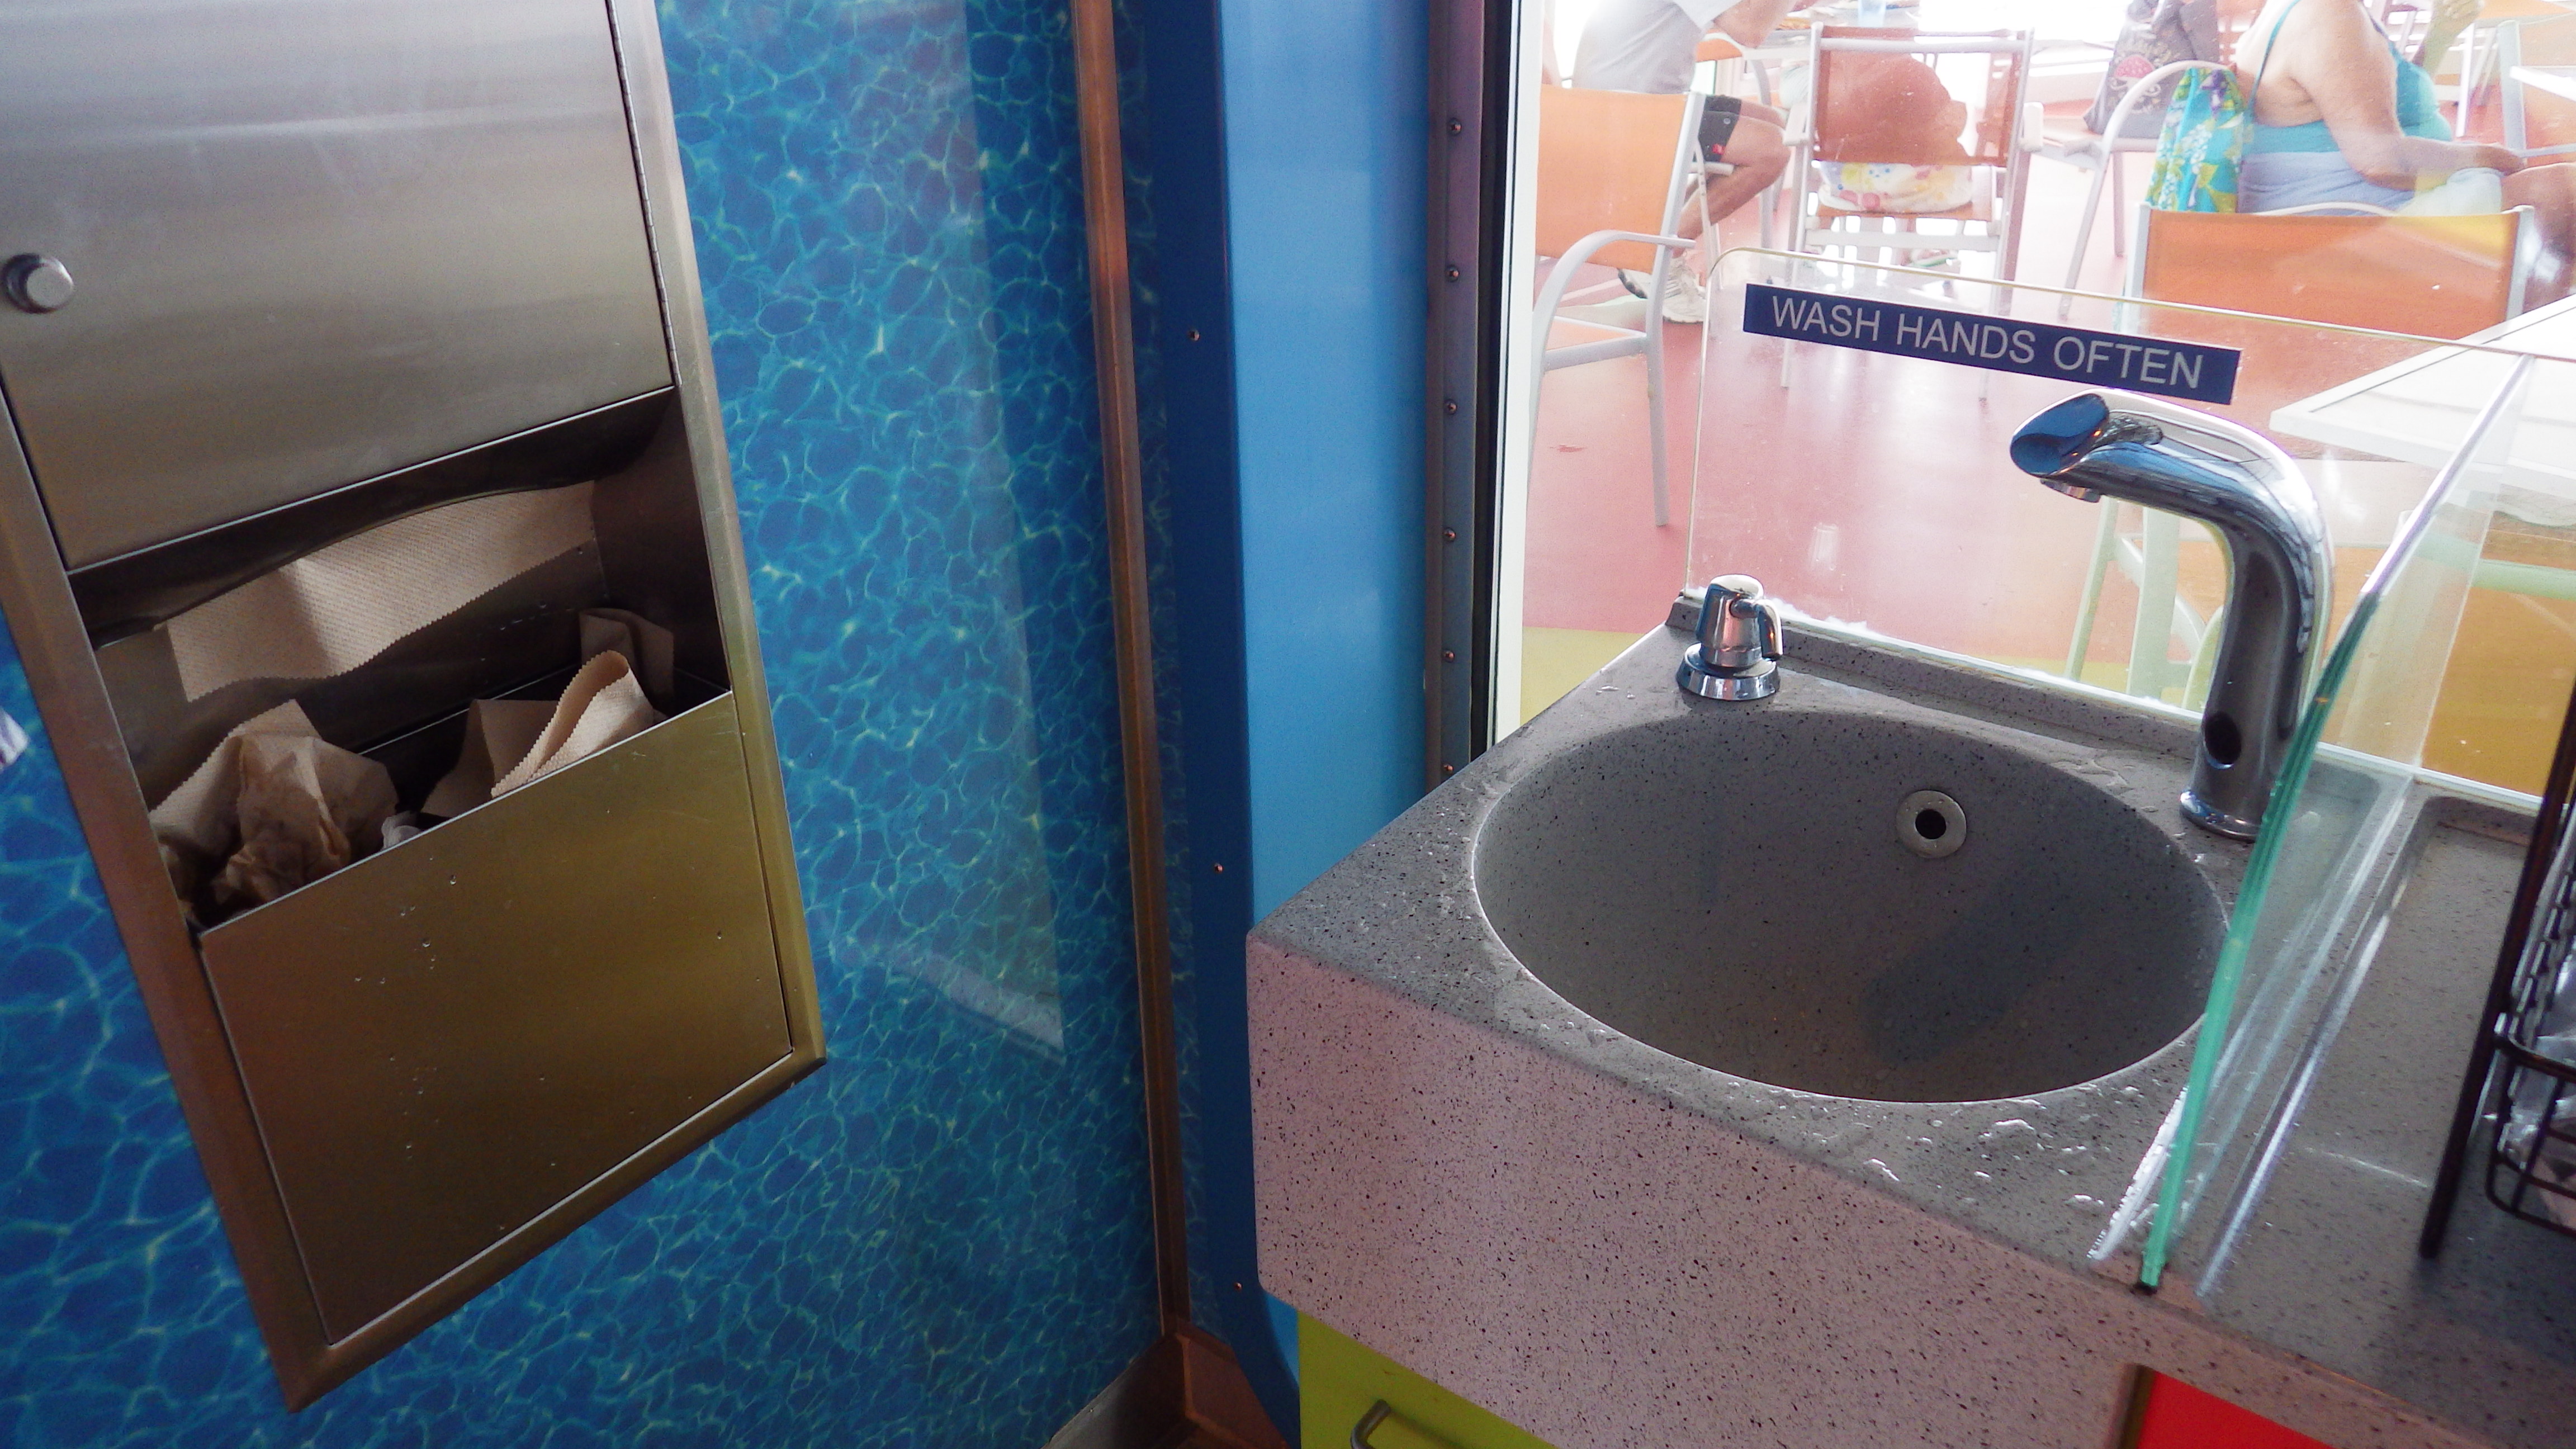
  • I found handwashing sinks near some of the out-of-the way eating locations.
  • The burger place near the pool had a sink inside the restaurant and encouraged folks to wash their hands before selecting food and eating. (Unfortunately I didn’t see many people using it).
  • When a higher-than-expected number of passengers or crew become sick, ships implement additional cleaning procedures and use disinfectants to stop the illness. The staff worked tirelessly to keep on top of this.

I didn’t hear of any illnesses on our ship. In reality, only about 1% of all reported norovirus outbreaks are on cruise ships. Visit this website to see the sanitation records of most of the cruise ships that dock in the United States. You’ll want to check it out before you commit to a specific cruise line or ship.

Now let’s take those lessons into day-to-day life.

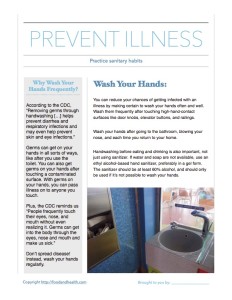
You can reduce your chances of getting infected with norovirus by making certain to wash your hands often and well. Wash them frequently after touching high-hand-contact surfaces like doorknobs, elevator buttons, and railings.

Wash your hands after going to the bathroom, blowing your nose, and each time you return to your home.

Handwashing before eating and drinking is also important, not just using sanitizer. If water and soap are not available, use an ethyl alcohol-based hand sanitizer, preferably in a gel form. The sanitizer should be at least 60% alcohol.

I hope this helps you avoid illness this year!

By Cheryle Jones Syracuse, MS, Professor Emeritus at The Ohio State University

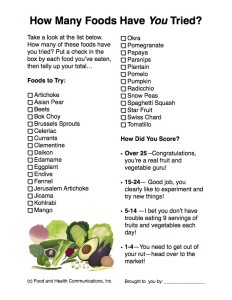
Here’s a free printable handout with ways that you can reduce your risk of contracting norovirus and other ills!

Avoid Norovirus

And here are some other amazing resources from the Nutrition Education Store!

Nutrition Poster

Flu Prevention PowerPoint

Nutrition Stickers

Sponge 101: Keeping Your Kitchen Safe

Don't Put Your Sponge in the MicrowaveKitchen sponges. Some people love them and others wince at the thought of that bacteria-breeding creature in their kitchen.

(With that statement I bet you know my thoughts on the subject).

Sponges are great for wiping up spills and absorbing liquid. Some even have a scrubby side that helps clean grime from pots, pans and dishes. However, in the course of performing these services, sponges also absorb harmful foodborne pathogens along the way. There have been some scientific studies that show that kitchen sponges (and/or dish rags) are the germiest places in most homes. If they’re not cleaned between uses, then they can be a prime spot for germ growth.

If you love your sponge, here are some ways to keep it clean…

  • Clean it daily and replace it frequently. If it starts to smell, pitch it.
  • Wring the sponge out completely after each use and wash off any loose food or debris.
  • Try to allow it to dry out.
  • Don’t use the sponge to wipe up meat or poultry juices. Clean these types of spills with paper towels or something that you can throw away.
  • Don’t use sponges on countertops. Germs and bacteria can easily spread from the sponge to the counter, and then you spread it all around. Paper towels or disinfectant wipes are better to use on countertops.

BleachNow let’s talk about sanitizing the sponge.

Several reputable organizations and websites recommend heating sponges in a microwave on high for one to two minutes. These sites say that this process kills 99% of possible bacteria.

However, there are a couple of concerns here. According to the American Cleaning Institute, microwaving a sponge could be risky. Unless the sponge is soaking wet, there is the possibility of starting a fire inside the microwave. In addition, the size of the sponge and the amount of power in the microwave are variables that influence how long you would need to zap it to kill germs.

If you “nuke” that sponge and think you’ve solved the bacteria problem, you may need to re-think that process.

A better way of keeping a sponge clean is to soak it for five minutes in a solution of one quart water to three tablespoons of chlorine bleach and then let the sponge air-dry.

A pro-active approach to cleaning that kitchen sponge is to put the bleach and water solution into my sink and soak the sponge in it as well as swish it around the sink. This helps with a couple of different potential dirty areas and will help clean the sponge, the sink, and the drain. Oh, and here’s a tip from my own experience, use caution with this beach solution or you’ll end up with bleach spots on your clothes.

By Cheryle Jones Syracuse, MS,  Professor Emeritus at The Ohio State Univeristy

But wait, there’s more! At the Nutrition Education Store, that is!

Art of Health Poster

Kitchen Math and Measuring DVD

Healthy Kitchen Poster Set

Water Fitness — It’s Not Just for Seniors

Water Fitness ClassWe all know that regular exercise is important for good health. We also know that it’s vital to find something you like or you won’t continue it. If you’re struggling with finding a program that works for you, needing to mix it up a little, or looking for a change, why not try my favorite activity?

Water fitness.

You may think that this is something just for older people (yikes!) but there are different programs and types of classes for all ages and fitness levels. Water fitness (or water aerobics) programs and classes can help develop flexibility, muscular strength and endurance, and even deliver cardio-respiratory benefits. Other physical benefits include increased range of motion, improved balance and coordination, and a chance for some relaxation.

Exercising in water is different than land exercise. These differences create a great environment for a fitness program.

Resistance. Since the viscosity of water is greater than that of air, the resistance to movement is greater. Water provides 12 to 14 times more resistance than air during exercise. This resistance is also evenly distributed. As an added bonus, water works the opposing muscles too. Kickboards, water weights (or hand buoys), or water noodles are often used to create additional resistance for strength building.

Using ResistanceInertia. This is the force needed to move from a stopped position or to change direction. In water fitness, the inertia is against both the water and current. Once the momentum in one direction has been achieved, it takes additional energy to reverse the direction of motion.

Body Surface Area. The water itself creates drag as it moves against the body, which can add intensity to the workout. Moving through the water creates more drag. Equipment such as webbed gloves and paddles increase these drag forces of the water, which can help build fitness.

Thermal Regulation. Water maintains the core temperature and establishes a balance between metabolic heat production and heat loss. The water naturally cools the body down and therefore your core temperature tends to be lower and you don’t even realize you’re sweating.

Intensity. The intensity of a workout can be increased or decreased with speed. Also, moving/traveling or working in deeper water increases intensity.

Yay for water fun!Buoyancy. This is one of the major positive aspects of water fitness. In water, the body has buoyancy. This makes water fitness easier on joints and bones. Because of the buoyancy, participants can jump without the limitation of gravity and the fear of falling and getting hurt. Being submerged or partially-submerged gives more and enhanced range of motions and freedom of movement. All of this allows workouts to become less painful.

Water fitness is something you can do alone, with a friend, or in a class. On top of all these good things, the water can relax your body — enjoy that water massage! With water fitness, you’re sure to have fun!

By Cheryle Jones Syracuse, MS, Professor Emeritus at The Ohio State University

Here are more fitness resources, fresh from the Nutrition Education Store!

Calorie Balance Poster

Home Exercise PowerPoint and Handout Set

Exercise Poster

And finally, last but not least, here’s a free PDF handout with great information from today’s post!

Water Fitness

A New Path to More Fruits and Vegetables

Star fruitHave you ever seen the book 1001 Foods to Die For (2007 Madison Press Books)? A friend gave me this book, which features a collection of unique foods, rare ingredients, and exquisite recipes. We’ve had a lot of fun looking at the pictures and counting how many of these foods we’ve eaten. I’m only on 276 of the 1,001, so I’d better get busy.

Fruits and vegetables make up most of the items in this book. Some are exotic and others are more common, but all are considered special by the authors. I consider myself a “foodie” and even I have barely heard of many of these!

This got me thinking about what fruits and vegetables we do eat regularly.

Like most Americans, my grocery cart usually has bananas, apples, lettuce, tomatoes, carrots, broccoli, and the occasional bundle of asparagus, avocados, or peppers. Over time, I’ve found myself in a bit of a shopping and cooking rut. No wonder people have trouble filling half their plates with fruits and vegetables at each meal! As much as I like these foods, eating them over and over again can get boring.

So how can we encourage people to eat more fruits and vegetables?

How about with a new checklist or quiz? The book 1001 Foods to Die For has over 75 entries in the Fruits, Nuts and Vegetables chapter, and I’ve narrowed the list down to 30. How many of these foods have you tried? How many have your clients tried?

New Food Checklist

You can also use this list to inspire your clients. Have your students make their own lists of 12 foods they’d like to try this year. That could be just one new food each month!

The “I want to try list” doesn’t have to be from this list, feel free to let them add some of their own foods and leave space for “surprises” or yet-unknown foods.

Who knows, they might just add a new favorite to their you see something you haven’t tried before, buy it and try. Who knows, you might just add a new favorite to your fruits and vegetable repertoire of foods they like.

By Cheryle Jones Syracuse, MS, Professor Emeritus at The Ohio State University

We’re here to help you look your very best, right now. Here are some other fun resources to help your clients try new fruits and vegetables…

Fruit and vegetable posters

New products:

Fruit and Vegetable Challenge

Market Adventures: Dragon Fruit

PitayaWhen I travel, I love to check out what the locals are eating.

One way to do this is by visiting grocery stores and farmers’ markets in different cities and countries. I especially enjoy looking at the unique fruits and vegetables that I don’t usually find near my home.

Here are a few photos from a market we visited in Spain. Do you know what the top picture features? Hint: it’s a fruit.

The answer is pitahaya, also known as pitaya. In the United States, it’s commonly called dragon Fruit, and at this market you could get one for a little over $6. There, these fruits are often sliced in half and sold with a spoon for an easy snack on the go. There were a couple varieties and all were beautiful — red ones with white or pink or even red flesh or a yellow variety that had white flesh.

And in case you were wondering, yes, I bought one. I was told that the ones with pink flesh were sweeter, but I didn’t get a chance to compare them. My purchase tasted like a combination of a melon and a kiwi, and the black seeds provided a nice crunch.

More Dragon FruitSo I decided to do a little research about this amazing fruit. Want to see what I found?

The sign at the Spanish market said that their fruit came from Vietnam. Dragon fruit is commercially grown in South and Central America, Southeast Asia, and Israel. Dragon fruit is technically a cactus and peels easily — like a banana. And just like with a banana, you don’t eat the skin.

Nutritionally, 3 ½ ounces of dragon fruit (about ½ of 1 fruit) contains 1 gram of fiber and 9 milligrams of vitamin C. That’s about 15% of the amount of vitamin C that’s recommended daily for women. Dragon fruit with pink or red flesh is also known its lycopene content. Like many other fruits, dragon fruit is low in calories.

When selecting a dragon fruit, choose one that you know is ripe. You can tell when it’s ripe because it will give a little when squeezed, like a ripe avocado or peach. If it’s firm, then it needs a few more days at room temperature to ripen. When ripe, dragon fruit should be stored in the refrigerator and eaten within a week. Once cut, it should be refrigerated. Dragon fruit can be eaten alone, as part of a fruit salad, or juiced.

These certainly gave us nice taste memories from our trip.

Yellow Dragon FruitNow, am I suggesting that you go out and spend $6 for a piece of fruit every day? Not at all.

Instead, I like to encourage people to be adventurous with food. Go out on a limb and try something different every now and again. Everyone knows that we should be eating more fruits and vegetables, but the ordinary bananas, apples, green beans, and broccoli can get boring. No wonder it’s hard for people to get the 9 servings of fruits and vegetables a day that are recommended by the Dietary Guidelines for Americans. If you’re going to fill half your plate with fruits and vegetables, you’ll have to do something about variety. Occasionally, try something fun, like dragon fruit.

Oh, and if you’re a health educator, consider planning a group trip to a local grocery store. People can look for something that the other members of the group haven’t tried before. Purchasing and/or sharing some unique fruits and vegetables with your clients or students can expand horizons, and who knows, maybe it’ll get them to eat more fruits and vegetables.

Wouldn’t that be great?

By Cheryle Jones Syracuse, MS, Professor Emeritus at The Ohio State University

And as a little bonus, here’s a free dragon fruit fact sheet, just for you!

Dragon Fruit

Remember, there are lots of great materials in the Nutrition Education Store!

Fruit and Vegetable Poster Set

Interactive MyPlate Shopping Presentation

Fruit Bulletin Board Kit

All Over But The Leftovers

Thanksgiving TurkeysThanksgiving is tomorrow! Are you ready for it? Here’s a fun post from Cheryle Jones Syracuse that will remind your clients about food safety for leftovers, helping them keep their holiday celebrations safe and festive. Don’t miss the free quiz handout!

It takes hours — days if you count the shopping, planning, and chopping — to cook a Thanksgiving dinner. Then it usually takes less than one hour for the bountiful holiday meal to be eaten.

So, what’s left to do? The guests are watching football and it’s time to clean up (already?). This isn’t the time to forget about food safety. While overindulging can cause an upset stomach, so can eating food that was improperly handled or stored. Don’t get careless with those leftovers!

Here’s a quick quiz to use with your students or clients that can help reinforce some basic Thanksgiving (and year round) leftover practices.

Answer TRUE or FALSE to the following questions…

  1. TRUE or FALSE. Since it cooked for a long time, and you checked the temperature when it was done, and the refrigerator is so full, it’s okay to leave the turkey (and all the other goodies) to sit out for hours after the meal so that people can pick at it and make sandwiches.
  2. TRUE or FALSE. Food should be allowed to cool before you put it in the refrigerator.
  3. TRUE or FALSE. Leftover packs for guests should be refrigerated as soon as possible.
  4. TRUE or FALSE. Leftovers will keep for a week after Thanksgiving.
  5. TRUE or FALSE. A quick “zap” in the microwave is good enough to warm up your leftovers.

Answers:

  1. FALSE. Just because it’s a holiday and your refrigerator is full does not mean that the “two-hour rule” isn’t in effect. Food should not be allowed to sit at room temperature for more than two hours. Two hours is enough time for bacteria to multiply to the quantity that could cause foodborne illnesses. This is cumulative too. If you leave the leftovers on the dining room table for one hour, then later leave them out on the counter for 30 minutes to make sandwiches, you will only have a half-hour window left.
  2. FALSE. See above for the “two hour rule.” If you have a large amount of hot food, then it’s best to divide it into smaller portions and put them in the refrigerator as soon as possible. Or, better yet, cool the food by putting it in an ice bath or cold water bath before putting it into the refrigerator. On the same note, don’t store the stuffing inside the turkey.
  3. TRUE. It’s wonderful that you’re sharing the leftovers with your guests, but make sure that this food is safe too. Think about the two-hour rule. If they won’t be leaving for several hours, make sure this food is refrigerated. If they’re traveling for more than two hours, make sure that they have a cooler or way to keep the food cold for the trip.
  4. FALSE Leftovers should be eaten within 3 to 4 days. Keep them in the coldest part of your refrigerator (not the garage or the back porch). If you have more leftovers than can be eaten within the recommended leftover time (Monday), then you can freeze them. Frozen turkey, plain, will keep for 4 months at 0 degrees F or below. Turkey covered with broth or gravy will keep for 6 months at the same temperature. Stuffing and gravy will only be good for about a month. These foods will be safe for a longer time, but may become dry, lose flavor, or drop in quality. This goes for that turkey carcass too! If you don’t have time to make soup out of it right away, wrap it carefully and freeze it. Then it will be there to make soup when you have more time.
  5. FALSE Reheat leftovers thoroughly. Merely warming leftover gravy, sauces, and soups will not get them hot enough to kill bacteria. These foods should be simmered or boiled until they’re steamy hot throughout. If you’re using a microwave, cover your food while cooking and then allow standing time for a few minutes so that the temperatures inside can even out. Leftovers should reach at least 165 degrees F.

And there you have it! A quick quiz to help your clients celebrate Thanksgiving safely and happily, leftovers and all.

By Cheryle Jones Syracuse, MS, Professor Emeritus at The Ohio State Univeristy

Here’s an easy-to-print PDF copy of the quiz! Enjoy!

Leftovers Quiz

There are tons of holiday resources in the Nutrition Education Store — which will you try first?

Holiday Secrets Cookbook

Holiday Survival: Keep Off the Pounds PowerPoint and Handout Set

Holiday Poster Set

You Want to do What with that Turkey?

Happy Thanksgiving!Nutrition, food safety, and cooking educators are always singing the same song before Thanksgiving. We talk about how to keep that large bird safe, standing on our soap boxes with research-based information about how people can get a foodborne illness from some common practices. But does anyone listen?

Common responses include “this is how I’ve always done it” and “no one’s died, yet.” Facing that kind of attitude, it’s hard to encourage change.

So, I’ve decided to turn the tables. Here’s a fun quiz that addresses some of the common mistakes people make when cooking a large meal at home. Perhaps if you make people laugh at their mistakes, then give them some practical answers about why they should respect food safety rules, they might change their attitude and practices.

Believe it or not, these are questions and responses from real people that I’ve heard over the many years I’ve been teaching food safety. I couldn’t make this stuff up!

Pick the best answer to each question.

1. The turkey in your freezer has been there since last Thanksgiving. What should you do with it?

a. Throw it out!
b. Feed it to your in-laws.
c. Go ahead and use it on Thanksgiving.
d. Leave it in there and buy another one for Thanksgiving.

2. Your turkey is frozen solid. How do you thaw it?

a. Put it in the dryer with lots of towels.
b. Run it through a cycle in the dishwasher.
c. Put in a cooler in the garage.
d. Find a spot in the refrigerator.

3. It’s the day before Thanksgiving and your turkey is still frozen. What can you do?

a. Cancel the holiday dinner.
b. Let the turkey sit in the laundry tub overnight.
c. Cook the frozen turkey.
d. Put the turkey under running water for 10 hours.

4. Your family loves stuffing/dressing that’s baked inside the turkey. You know that isn’t recommended, but you’re going to do it anyway. What’s the best way to proceed?

a. Mix and prepare the stuffing just before you put into the turkey. Stuff it lightly just before it goes into the oven and use a thermometer to make sure it reaches 165 degrees before serving.
b. Since they like it so much, put as much stuffing into the turkey as you can fit, just before you put it in the oven. You might need to lace it closed with twine to hold all that stuffing inside.
c. Stuff the turkey the night before and have it ready to go into the oven in the morning.
d. Get the stuffing ready to go the day before and stuff the turkey in the morning, this will help you get it in the oven quickly.

5. The turkey’s been in the oven for several hours. How do you know if it’s done?

a. The pop-up thermometer has popped. It’s done.
b. A thermometer reads at least 165 degrees F in several spots on the bird.
c. You calculated the time vs. pounds on the instructions, that time has come and gone and it’s brown all over. It’s done.
d. The juices are running clear and the drumstick wiggles.

ANSWERS:

  1. C. A turkey that has been kept solidly frozen for an entire year will be safe to eat. The quality may be lower than a turkey kept in the freezer for a shorter time. One suggestion is to prepare it for a family meal before Thanksgiving. This will give you a recent turkey-cooking experience, so cooking on the big day won’t be so intimidating. Actually, answers B and D could also be correct, since there would be no reason not to invite your in-laws to your practice dinner or the holiday. You really could save the older turkey for after the holiday, but the longer it sits in the freezer, the lower the quality will be.
  2. D. Thawing the turkey in the refrigerator is the safest method. It takes one day for each four to five pounds of turkey to thaw. The other answers don’t keep the outside of the bird cold enough while the inside is still frozen. Also, it’s really best to use home appliances for their originally-designated purposes. Some of those ideas are just yucky!
  3. C. Turkeys can be cooked directly from the freezer; the cooking time may be as much as 50% more than a thawed turkey. There also won’t be an opportunity to stuff it. Instead, you could bake your stuffing in a casserole dish. Now what about those giblets in the bag? Check the turkey throughout the cooking process, and when it has defrosted enough, you can carefully remove the giblet bags with tongs. You could also thaw a turkey by submerging it in cold tap water. The water should be changed every 30 minutes, and this method will take 10-12 hours for a 20-pound turkey. It also requites lots of water. The turkey should be cooked immediately after thawing. Oh, and if you purchased a pre-stuffed turkey, then it should always be cooked directly from its frozen state.
  4. A. The ingredients can be prepared the day before, but keep the wet and dry ingredients separate. Make sure that the wet ingredients (chopped vegetables, broth, and cooked meats) are safely stored in the refrigerator. Mix the wet and dry ingredients together just before filling the turkey cavity, and even then, only fill it loosely. Cook the turkey immediately after stuffing it. Use a food thermometer to make sure the center of the stuffing reaches a safe minimum internal temperature of 165 °F.
  5. B. The only way that you can be absolutely sure that the turkey is done is to use a thermometer. The minimum temperature to which a turkey should be cooked is 165 degrees Fahrenheit. Check the internal temperature at several locations, including the thigh and the thickest part of the breast. Pop-up timers may pop too early because of fat pooling at the tip, so always use another thermometer to double check. The National Turkey Federation recommends cooking turkey to a higher temperature than the minimum. While 165 degrees F is the minimum safe temperature, they say that people like the quality more (and it will be easier to carve and slice) if it’s cooked to a higher temperature. They frequently suggest 180 degrees F instead.

I hope you and your clients have as much fun with this quiz as I had writing it. Have a safe and wonderful Thanksgiving!

By Cheryle Jones Syracuse, MS, Professor Emeritus at The Ohio State University

Here’s a free PDF handout of the quiz, just for you!

Thanksgiving Quiz

There are lots of other holiday resources in the Nutrition Education Store! Which ones will make your life easier?

Holiday Health Challenge Toolkit

Holiday MyPlate Poster

Holiday Train Game

Looking for Healthy Meals

Healthy MealOkay, I’ve got a story for you today. My husband and I were recently eating lunch — I had made us each a quick salad with lettuce, apples, some thawed frozen berries, avocado, leftover grilled chicken and homemade balsamic vinaigrette. As we ate, my husband commented, “It’s amazing that you look in the refrigerator and see salad; when I look in the refrigerator I just see soda.”

That seems to capture a common sentiment in a nutshell. How do people plan menus and think about turning what’s available into a healthful meal? Is this something that’s intuitive or can it be learned?

For me it’s easy, because I love to cook and experiment with food. But what about people who really don’t like to prepare meals or don’t have these skills?

All home management experts say that planning meals ahead of time is the number one way to save time, have balanced meals, control the food budget, avoid food waste, and reduce trips to the grocery store. However, I’m realistic enough to know that most families don’t do this.

So, how can we, as health educators, make this easier for our clients?

Here are a few of my latest ideas…

  • Try planning just a few meals a week instead of setting up a program for all seven days. If this works, then perhaps you could develop a menu rotation.
  • Have everyone in the family contribute their menu ideas and meal likes and dislikes.
  • If other members of your family are just learning to cook, or don’t yet have a wide recipe repertoire, having menus posted can help them learn and develop their cooking and menu-planning skills.
  • Keep MyPlate in mind as you go. We all know the concept of trying to fill half the plate with fruits and vegetables at each meal, so now it’s time to put it into action. Remember to fill the other half with a lean protein and a whole grain, then add low-fat dairy on the side to round out the meal.
  • Post your planned menus. That way, everyone in the family knows what’s for dinner. This could help the first one home to get dinner started too!
  • Make sure that the refrigerator, freezer, and pantry are stocked with the foods that you need for these menus. It’s especially important to have a variety of fruits and vegetables available for meals and snacks. After all, how can you fill half your plate with fruits and vegetables if there aren’t any fruits and vegetables in the house?

Try these tips and who knows? Maybe the next time your family looks into the fridge, they’ll see dinner!

By Cheryle Jones Syracuse, MS, Professor Emeritus at The Ohio State University

Here’s a free PDF handout with a few of the top tips from today’s post…

Healthy Meals

Here are some more healthy meal resources, brought to you by the Nutrition Education Store!

Healthy Kitchen Poster Set

Learn to Cook Workbook

Heart Smart Cooking PowerPoint Presentation

Temp That Burger!

Thermometer and BurgerMy brother-in-law always teases me about “temping” food. I’ve never heard it called that, but what he loves to joke about is my use of a thermometer when I’m cooking.

It’s true — I can’t resist “temping.” I even use my thermometer when I’m cooking on the grill.

Yes, there are lots of ways to judge doneness, but they’re not equally effective. I know that many people use the meat’s color as their guide, but you can’t really rely on meat’s appearance to tell whether it’s done. The color of cooked ground beef can be quite variable. At 160 degree Fahrenheit (F), a safely-cooked patty may look brown, pink, or somewhere in-between. When a patty is cooked to 160 degrees F throughout, it can be safe and juicy, regardless of color.

How do I know this?

Well, recently I was cooking burgers on the grill and using their appearance as my guide to “doneness.” Honestly, I thought they needed more time. I pulled out my thermometer to check, and I found that the burgers had already surpassed the recommended 160 degrees F. I could have easily overcooked those burgers!

Anyway, the moral of the story is that, when it comes to cooking meat, you can’t always tell doneness by the color.

The only way to be sure a ground beef patty is cooked to a high enough temperature to destroy any harmful bacteria that may cause a foodborne illness is to use an accurate instant-read thermometer.

Thermometers and a BurgerHere’s exactly how to do it…

  • For ground meat patties, insert the thermometer at least ½ inch into the thickest part of the patty near the end of the cooking time.
  • If the burger is not thick enough to check from the top, the thermometer should be inserted sideways.
  • If you’re not sure if you got into the center, you can take a second reading in a different part of the burger.

All ground beef, veal, lamb or pork patties should be cooked to 160 degrees F. If you’re making a ground turkey or chicken burger, ensure that the patty reaches 165 degrees F.

I know lots of people will disagree with this. How many times have I heard people insist that they like their beef burgers rare or cooked below 160 degrees F? This is a personal choice that you can make, but know that you are putting your own health at risk when you eat those burgers. You’re also endangering anyone else who might eat one of your undercooked creations. I especially don’t consider this an acceptable option for poultry burgers.

Here’s why.

Rare hamburgers are far riskier to your health than a rare steak. If any pathogens are present on the outside of a whole piece of meat — like a steak — the high heat that sears and cooks the outside will destroy the dangerous bacteria. But when meat is ground up, any bacteria on the surface are mixed throughout the meat. Therefore, heat needs to get all the way into the middle of the burger to destroy these harmful bacteria.

The real concern here is a foodborne bacteria commonly known as E. coli. This bacteria and the illness it causes have been linked to the consumption of undercooked ground beef. Don’t let E. coli stay in your food — cook it out!

Oh, and here’s a special word of caution: while a healthy adult may not feel the effects of an undercooked burger, guests or other family members may be more at risk. The very young, the very old, and those with immune systems that have been weakened by cancer, kidney disease, and other illnesses are the most vulnerable to sicknesses associated with contaminated food. This is especially true with E. coli. These bacteria have been known to cause long-term illnesses including potentially fatal kidney failure.

Why take the risk?

By Cheryle Jones Syracuse, MS, Professor Emeritus at The Ohio State University

Here is a free step-by-step food safety handout for grilling ground beef.

Grill Ground Beef

There are lots of food safety resources in the Nutrition Education Store!

Food Safety Poster: Safe Cooking Temperatures

Food Safety Handout and PowerPoint Set

Food Safety Poster

Eggplant Cooking Tips

Eggplant!I recently got the best gift from a friend — 4 small eggplants from her garden. This is the same friend who brought me several pomegranates a couple years ago. I feel so lucky that I have friends that bring me wonderful fruits and vegetables — what great gifts!

Anyway, back to the eggplant.

I don’t usually buy eggplant, largely because I really don’t know what to do with it. My husband likes eggplant Parmesan, but he usually orders it in restaurants. I’d heard so many rumors and old wives’ tales about how to cook eggplant, and found myself baffled by all the conflicting information. For example, do I need to salt the eggplant? I remember my husband’s aunt always salting her eggplants and then weighing them down with books. On the other hand, according to an archived article from Food and Health Communications, you don’t have to bother with this if the eggplants are very fresh.

So how should I treat my eggplants?

Since salting can help remove the bitterness from an eggplant, I decided to salt mine. If you’d like to salt your eggplants before you cook them, first you need to slice or dice the eggplant into the shape you want to use. Sprinkle everything with about half a teaspoon of salt (not the half cup my husband’s aunt used to use) and then let everything sit in a colander for 30-60 minutes while the eggplant drains. Once that time is up, press out any excess liquid and dry the eggplant with a clean towel. You can also rinse the eggplant to remove extra salt before drying it.

So, there I was with salted eggplant. How did I want to cook it?

Grilled EggplantI dug further into the Food and Health Communications recipe archive and found a few articles about eggplant, along with several healthful recipes. Here are some of my favorites…

With time running short, I decided that I wanted to preserve my eggplants to cook later.

According to the National Center for Home Food Preservation, eggplant can be frozen. As far as I could tell, there is not a research-tested recipe for safely canning eggplant.

So, freezing it was!

To freeze eggplant, fill a large pot with 1 gallon of water and half a cup of lemon juice (the lemon will keep the eggplant from darkening). Bring the mixture to a boil. While you’re waiting for the water to heat up, wash, peel, and slice the eggplant into discs that are half an inch thick. Since eggplant does discolor quickly, prepare only what you you can blanch at one time. When you’re ready, place the eggplant slices in the boiling water for 4 minutes. Pluck the slices out of the water with a slotted spoon and drop into an ice bath for another 4 minutes. Then drain and pack up your eggplant. If you want to fry the slices or layer them into eggplant Parmesan or vegetable lasagna, consider placing freezer wrap between the slices before freezing.

RIMG4637RIMG4670RIMG4677RIMG4732

That’s basically what I did, with one little twist. I put the well-drained eggplant slices on a tray and froze them individually. Then I transferred everything to a freezer bag. Hooray! Now I have two quart bags full of sliced eggplant for later this year!

My research also led me to discover a bunch of great eggplant cooking tips. If you ever find yourself with a spare eggplant or two, consider the following…

  • To avoid browning, wait to cut into the eggplant until you absolutely have to — don’t prep that part a few hours in advance!
  • Leave the skin on! This will help color, shape retention, and optimal nutrition. You can find anthocyanins in the purple skin of an eggplant, and since anthocyanins have a positive impact on blood lipids, it would really be a shame to remove the skin.
  • Eggplants do have a tendency to soak up oil during cooking. To keep your dish light and healthful, sauté eggplant in a small amount of very hot oil in a nonstick pan.
  • Want a quick eggplant side? Spray slices with olive oil cooking spray and roast, grill, or broil them.

Anyway, that’s a brief recap of my eggplant adventures. I hope you liked it!

By Cheryle Jones Syracuse, MS, Professor Emeritus at The Ohio State University

Here’s a handout that features the most helpful points from today’s post. Get your copy today!

Eggplant Handout

And for more fun with eggplant, drop by the Nutrition Education Store!

Fruit and Vegetable Activity Set for Kids

I Heart Fruit and Veggies Bookmark

Vegetable Chopping Guide Poster