Healthful Holiday Substitutions

It’s totally possible to have healthful and fun holiday celebrations.

Just don’t eat everything in sight.

CookiesI know this seems like a no-brainer, but the holidays are all about balance. Overindulgence is the actual pitfall.

What got me thinking about this? Well, I’ve seen several Facebook posts this past week about cookie baking. Two different friends posted photos of their families baking together.

While you may expect me to say “Bah Humbug” to these events, I actually think they’re wonderful. What a great way to spend time together, and what a delightful holiday tradition!

I’m also not going to say “don’t eat those cookies, they aren’t good for you.”

Okay. I admit that that thought did go through my mind, but I’m trying to be realistic.  You can’t give up all your favorites. I’ve seen several articles already recommending that you go ahead and eat some cookies or other holiday treats — just do so in moderation. Feeling like a martyr about food tends to backfire.

Now I’m not suggesting that you make every food “free” or  “no calorie,” but go ahead and have a little bit of your holiday favorites.

And what about the rest of the holiday foods? Well, that’s where substitution comes in.

There are plenty of ways to replace particular ingredients in order to make holiday treats more healthful. With these substitutions, I promise, no one will know the difference. In some cases it’s not even what you’re taking out but what you’re putting in that counts.

Let’s look at an example. A couple of weekends ago, we had some friends over for brunch. The featured item was waffles. These weren’t just any old waffles from a mix, and they were definitely not freezer waffles. Instead, these were yeasted waffles that needed time to rise. You have to wake up early to get them going before your guests get up. The recipe calls for eggs, milk, sugar, flour, yeast, and lots of butter.

I did not destroy these waffles. I did not replace every ingredient. Instead, I made a few slight tweaks. I used skim milk instead of whole milk, and I substituted part whole grain flour for some regular white flour. These waffles were so good that they didn’t need butter or syrup. Instead I topped mine with fresh fruit.

Here’s another example. I recently made stuffing using slightly different ingredients. I began with whole grain bread instead of white bread. Then, instead of the eggs and butter from my mom’s traditional recipe, I tried adding leftover mashed pumpkin.

The stuffing was amazing. The changes I made increased the fiber content of each serving, added a vegetable to the mix, and boosted the flavor too. Who would have guessed that I could make such great changes to a previously fat-loaded family favorite without a single complaint?

Looking for more modifications? Try these…

Replace heavy cream with fat-free half-and-half or evaporated skim milk.

Replace a portion of white flour with 100% whole wheat flour. White whole wheat flour, by King Arthur, has the best results and can almost be replaced 100%.

In most recipes, you can slightly reduce the amount of sugar. Compensate with an extra dash of sweet flavorings like vanilla extract or cinnamon. These give a hint of sweetness without the calories.

Use fewer chocolate chips or substitute dried fruits or nuts instead.

Did you know that two large egg whites can replace one whole egg?

Combine 1/4 cup Greek yogurt with ½ cup butter to replace 1 cup of butter in a recipe.

What else am I up to in our holiday kitchen? Well actually, our family requested a really non-traditional holiday food this year for Christmas. They want low-country  “Shrimp and Grits.”

I’m exploring ways to make this dish a little lighter. Right now I’m planning to use broth instead of butter, more onions, and maybe some celery.  I think I’ll add more seasonings for flavor and use a little less bacon. Of course, there will still be shrimp and it will still be served on stone-ground grits.

There are lots of tips out there for ways to modify recipes, make changes, and eat healthfully, even during the holidays. Be mindful. Just don’t eat everything in sight.

By Cheryle Jones Syracuse, MS, Professor Emeritus at The Ohio State University

Lean Protein Spotlight: Turkey

The other day, I roasted a 15-pound turkey, but I was only serving two people. What was I thinking?

Actually it’s a simple answer.

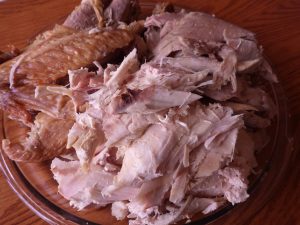
Before Thanksgiving last year, our grocery store offered whole turkeys at $0.37 per pound if you bought $35 worth of groceries. I had to take them up on that deal, which meant that I had two turkeys in the freezer. Recently, I decided to cook one of them for guests, but they cancelled. Since I already had the turkey thawing in the fridge, I cooked it anyway. That’s the easy part: no dressing, no basting, cook until the thickest parts reach 165 degrees F. Results: a lot of food for two people.

Frozen turkeys will keep for a long time if held below zero degrees. They’re usually packed in air- and water-resistant plastic wraps that help prevent loss of quality during freezer storage. The general recommendation for freezer storage is one year, if the food has been frozen that whole time. This is a quality recommendation and not a food safety deadline.

According to the National Turkey Federation, removed bones typically reduce the weight of the turkey by 25% and my turkey was fairly true to that estimate. I weighed the bones after I cooked them down for soup and picked the meat off, and I had 3.3 pounds of “waste” (there was additional fat and moisture I couldn’t weigh) from my 15-pound turkey. We ended up with about 10 pounds of meat at around $0.50 a pound. What a deal!

The usual recommendation is to purchase one pound of turkey (on the bone) for each person served. This is geared for holiday meals with all the trimmings and to save leftovers too. With my February turkey, we had a few meals of roast turkey and then two big pots of soup. We also had lots of leftovers for sandwiches at a much better price, taste, and quality than that expensive processed turkey meat in the deli. Plus, I froze a few packages of cooked turkey for quick meals later. The recommendation for frozen cooked turkey is to eat it within three months.

The US Dietary Guidelines suggest choosing lean or low-fat meat and poultry as your protein source. Turkey is lower in fat and calories than many other foods in the protein group and can be a good choice. According to the USDA Nutrient Database, 3 ounces of whole turkey (meat only) contains 135 calories, 24 grams of protein, and only 3.26 grams of fat.

Even if you can’t get as good a price as I did, roasting your own turkey or turkey parts any time of the year can be an easy job with lots of nutritional benefits.  Why wait until Thanksgiving?

By Cheryle Jones Syracuse, MS, Professor Emeritus at The Ohio State University

Spring Farmers’ Market Tips

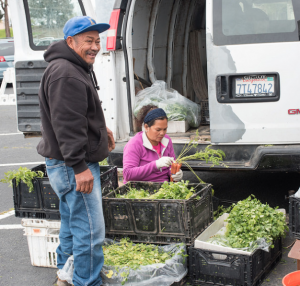
Spring is a time for the farmer’s markets to come to life. This early season often brings many kinds of greens that are delicious in salads, soups, pasta, and steamed dishes.

Here are a few tips to make the most of the spring markets…

  • Take cash. Most of the farmers accept cash. Small bills are always a good idea and will help you move quickly through the market.
  • Go early. Getting there early ensures close parking, great selection, happy farmers, and the ability to walk through the stalls at your desired pace.
  • Bring sturdy reusable bags. A grocery store bag (or five) is always a good idea. With these study bags, you can easily carry what you purchase without juggling an armload of produce or ripping thin plastic bags.
  • Stock your kitchen. If you are buying greens, make sure you have oil, vinegar, onions, garlic, and other flavoring agents to use with them once you get home. While at the market, consider the fresh young green onions and garlic, lemons, and flavored vinegars to use these culinary nutrition prizes in your cooking as well.
  • Grab some greens. Many greens can do double duty as fresh salad greens and steamed greens. Serve them raw when you first get home and cook them later in the week as they age. Spinach, kale, chard, and arugula are examples of these multi-tasking champions.
    • For a fresh salad, rinse your greens well and spin them dry. Shred or chop them, then toss with oil, vinegar, grated carrots, and a few of your favorite seasonings. Citrus such as lemons and limes, along with fresh herbs, can bring delightful flavors that accent the bitterness of the greens. Sweet carrots, acidic vinegar, and bitter greens are a culinary delight. 
    • Steaming greens is also very easy. Why not sauté some fresh garlic or onions in a little olive oil and then add the rinsed greens to the pan, tossing quickly for a minute? That’s all you need to do for a tasty spring side dish!
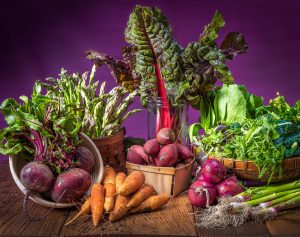
  • Explore roots and tubers. Take a look at the carrots, beets, and other baby root vegetables and bring some home to add to salads and meals during the week. Don’t be afraid to try something new. Tips and recipes are but a Google search away. You can also contact us if you need help!

I hope this helps you and your clients make the most of spring markets!

Boost Spring Fruit and Vegetable Consumption with Greens!

Recently I presented my spring portfolio to my photography class, and it got me thinking about helping your audience eat more spring fruits and vegetables.

After all, what could be more enticing than spring produce?

Here’s the artist statement that I submitted for my photos.

Spring beckons flora to burst forth from the earth. In the context of California farmers’ markets, spring brings new and bright greens, fresh young tubers, and juicy citrus fruits.

This photography exhibition celebrates the unique season that transitions us from winter to summer. The produce you see in the photos comes from local farmers who sell in community markets, and the pictures are designed to inspire people to choose locally-grown fruits and vegetables.

In the farmers’ markets, farmers become entrepreneurs while buyers gain access to fresh and nutritious foods — a community comes together. Accompanying the artistic representation of spring’s seasonal produce is a tribute to the farmers who grew it.

The offerings of a farmers’ market change each week and month as the seasons ebb and flow. This is but a moment in time during one season’s passage, and I hope you enjoy the beauty of spring.

And here’s a collection of engaging images of tasty spring foods.

These images would be fantastic in a display or email blast, or even as decoration for a spring vegetable cooking demonstration.

And speaking of cooking, to help inspire your audience to eat more spring produce, I’d like to share this recipe for a bright kale salad. This is a great way to present spring to your clients and help them focus on fresh and tender greens.

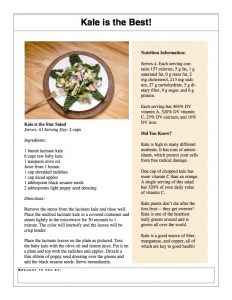
Kale is the Star Salad
Serves: 4 | Serving Size: 2 cups

Ingredients:

  • 1 bunch lacinato kale
  • 6 cups raw baby kale
  • 1 teaspoon olive oil
  • Juice from 1 lemon
  • 1 cup shredded radishes
  • 1 cup diced apples
  • 1 tablespoon black sesame seeds
  • 2 tablespoons light poppy seed dressing

Directions:

  1. Remove the stems from the lacinato kale and rinse well. Place the undried lacinato kale in a covered container and steam lightly in the microwave for 30 seconds to 1 minute. The color will intensify and the leaves will be crisp tender.
  2. Place the lacinato leaves on the plate as pictured.
  3. Toss the baby kale with the olive oil and lemon juice. Put it on a plate and top with the radishes and apples.
  4. Drizzle a thin ribbon of poppy seed dressing over the greens and add the black sesame seeds. Serve immediately.

Nutrition Information:

  • Serves 4. Each serving contains 157 calories, 5 g fat, 1 g saturated fat, 0 g trans fat, 2 mg cholesterol, 213 mg sodium, 27 g carbohydrate, 5 g dietary fiber, 9 g sugar, and 6 g protein.
  • Each serving has 464% DV vitamin A, 320% DV vitamin C, 23% DV calcium, and 16% DV iron.

Did You Know?

  • Kale is high in many different nutrients. It has tons of antioxidants, which protect your cells from free radical damage.
  • One cup of chopped kale has more vitamin C than an orange. A single serving of this salad has 320% of your daily value of vitamin C.
  • Kale plants don’t die after the first frost — they get sweeter! Kale is one of the heartiest leafy greens around and is grown all over the world.
  • Kale is a good source of fiber, manganese, and copper, all of which are key to good health!

And here’s a PDF copy of the recipe handout that you can use however you’d like!

Easter Eggs: What You Need to Know

Eggs are a fun and traditional Easter staple. Did you know that at one time they were banned during Lent and became a treat to eat on Easter? Eggs also symbolize fertility and renewal. They are associated with the end of winter and the coming of spring.

Here’s another bit of egg trivia: the average person consumes one-and-a-half dozen eggs at Easter, and the average family eats about four dozen eggs during the holiday.

It’s always fun to color Easter eggs, but remember that these eggs should not be left at room temperature for longer than two hours. If you’re thinking of having an egg hunt, it would be safer to use plastic eggs instead of real eggs. Why? Well, if the shells are cracked, then they can easily be contaminated by dirt and moisture from your yard. Plus, there’s always the concern that the hunt will take longer than two hours.

And speaking of food safety, if you are putting colored eggs into a braided bread or Easter pastry, remember to eat or refrigerate the pastry within 2 hours of pulling the pastry out of the oven. If you plan to store it for longer, then you can keep the pastry in the refrigerator for three to four days.

The food safety fun doesn’t end there!

For some families, pickled eggs are an Easter tradition. This usually involves placing hard-cooked eggs into a vinegar or pickled beet solution. Despite the pickling, these eggs should still be refrigerated. Use pickled eggs within seven days of preparing them.

And finally, the week after Easter is often considered “egg salad week” because one the most popular ways to use up all those hard-cooked eggs is by making egg salad. Remember, hard-cooked eggs should be kept refrigerated and eaten within seven days of cooking.

Now let’s talk about preparing the tastiest and prettiest Easter eggs.

The green ring that sometimes appears around the yolk of a hard-cooked egg is usually caused by hard boiling and over cooking. This is the result of a reaction between the sulfur in the white and iron in the yolk, which interact when combined with high heat. This green part is safe to eat — it’s just a little unappetizing. For best results, try this method instead:

Recipe: Hard-Cooked Eggs

For a kinder and gentler way to cook eggs, place them a pan and fill it with cold water until you have about  1” covering the tops of the eggs.

Bring everything to a full boil, put a lid on the pan, and then take it off the heat. Set a timer and let the pan stand for 12 minutes (for large eggs) to 15 minutes (for extra-large eggs).

When the time is up, drain the pan and cool the eggs under cold running water or in an ice bath.

Refrigerate when cool.

Not only does this method eliminate the green ring, the whites will be less rubbery! Plus, this approach helps prevent the shells from cracking. Remember, eggs are easiest to peel right after cooling.

And speaking of peeling, did you know that the fresher your eggs are, the harder they’re going to be to peel when cooked?

This is because the airy space between the shell and the egg itself increases as an egg ages. The shell becomes easier to peel as this air space increases. If you want eggs that will peel more easily, buy them a couple weeks before Easter and keep them in the fridge.

Shopping Tip: Eggs are usually on sale close to Easter. This may be a good time to buy a couple extra dozen. The “use by” dates on the egg cartons indicate the date before which the eggs should be eaten for best quality, not food safety. Usually eggs can be safely eaten for 2-3 weeks beyond the sell-by date. That said, eggs should be refrigerated at the store, so avoid displays of eggs that are not kept cold.

I hope these tips and tricks come in handy as you prepare your spring celebrations!

By Cheryle Jones Syracuse, MS, Professor Emeritus at The Ohio State University

Make Great Grilled Salads at Home!

Sliced RomaineI’m always on the lookout for ways to eat, serve, and enjoy more vegetables. Salads are winners, but sometimes the toppings tend to pile on more calories and sodium than I want.

Caesar salad is a great example. It sounds healthy in the beginning, but the high-fat dressing, huge dose of cheese, and heaps of croutons frequently outweigh the benefits of the dark green leafy Romaine lettuce. A tablespoon of a typical Caesar dressing contains around 8.5 grams of fat and roughly 80 calories. This can be cut a little by using a lower-calorie version, but then you increase the amount of sugar and maybe even sodium.

But the foundation is sound. Romaine is a great green, high in vitamins K, A and folate. Like other greens, it’s almost fat-free and low in calories, with about 50 calories in a half a head and a bonus of dietary fiber (6.5 grams that same half head). Romaine is usually the basis for the Caesar salad, so let’s capitalize on it.

How?

By putting it on the grill.

Recently my husband and I went to a new restaurant in our community. I was surprised to see a “grilled Caesar salad” on the menu.  It brought back memories of a similar salad I had in a restaurant in Baltimore over 15 years ago. I was so glad to be reminded of something I had enjoyed, and that in turn inspired me to give my own twist on this other way to enjoy a salad.

I fired up the grill and decided to try a grilled salad of my own. It’s so simple and a winner! Plus, it really doesn’t need dressing or croutons and a small amount of cheese goes a long way! When I served it for the first time, I had guests going back for seconds on salads. Now how often does that happen?!

Want to try it for yourself?

Here’s what I did.

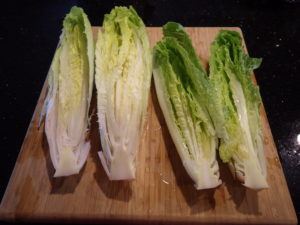
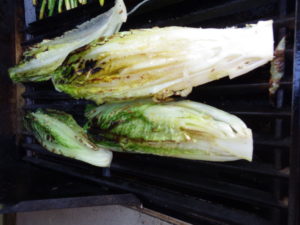
On the grill!I started with full heads of Romaine lettuce. I washed and pulled of any wilted leaves, leaving much of the core intact so that the leaves still clung together. (Nutrition tip: keep as many of those dark green outer leaves as possible).

I then cut the heads in half and washed them again. After that, I put a small amount of olive oil (about one tablespoon) and some (about 1 ½ teaspoon) dried garlic seasoning into a large zip-top bag and shook it around. I used garlic seasoning since it’s in a Caesar salad, but you could experiment with anything. Then I added the Romaine heads and refrigerated them in the marinade, shaking the bag a couple of times to coat the lettuce with the oil and seasoning.

I’ve seen recipes online that didn’t put the lettuce in a bag and brushed the leaves with oil just before putting on the grill.  I’m guessing this would work well, too. This was just my way of getting the work done early. It also eliminated a brush and allowed me to take the seasoned lettuce straight to the grill.

Once you’ve got the Romaine on the grill, the key is timing. It doesn’t take long:three to four minutes on each side at the most. The lettuce should be slightly charred and a little smoky. I topped each head with grated Parmesan cheese and served it to my guests. I don’t think it needed any other dressing, but a small amount of low-fat Caesar dressing could be added. Yum!

By Cheryle Jones Syracuse, MS, Professor Emeritus at The Ohio State University
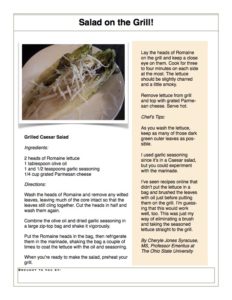
And here’s a printable handout with the recipe! How will you use your copy?

Grilled Caesar Salad

Don’t miss these other amazing salad resources from the Nutrition Education Store!

You Want to do What with that Turkey?

Happy Thanksgiving!Nutrition, food safety, and cooking educators are always singing the same song before Thanksgiving. We talk about how to keep that large bird safe, standing on our soap boxes with research-based information about how people can get a foodborne illness from some common practices. But does anyone listen?

Common responses include “this is how I’ve always done it” and “no one’s died, yet.” Facing that kind of attitude, it’s hard to encourage change.

So, I’ve decided to turn the tables. Here’s a fun quiz that addresses some of the common mistakes people make when cooking a large meal at home. Perhaps if you make people laugh at their mistakes, then give them some practical answers about why they should respect food safety rules, they might change their attitude and practices.

Believe it or not, these are questions and responses from real people that I’ve heard over the many years I’ve been teaching food safety. I couldn’t make this stuff up!

Pick the best answer to each question.

1. The turkey in your freezer has been there since last Thanksgiving. What should you do with it?

a. Throw it out!
b. Feed it to your in-laws.
c. Go ahead and use it on Thanksgiving.
d. Leave it in there and buy another one for Thanksgiving.

2. Your turkey is frozen solid. How do you thaw it?

a. Put it in the dryer with lots of towels.
b. Run it through a cycle in the dishwasher.
c. Put in a cooler in the garage.
d. Find a spot in the refrigerator.

3. It’s the day before Thanksgiving and your turkey is still frozen. What can you do?

a. Cancel the holiday dinner.
b. Let the turkey sit in the laundry tub overnight.
c. Cook the frozen turkey.
d. Put the turkey under running water for 10 hours.

4. Your family loves stuffing/dressing that’s baked inside the turkey. You know that isn’t recommended, but you’re going to do it anyway. What’s the best way to proceed?

a. Mix and prepare the stuffing just before you put into the turkey. Stuff it lightly just before it goes into the oven and use a thermometer to make sure it reaches 165 degrees before serving.
b. Since they like it so much, put as much stuffing into the turkey as you can fit, just before you put it in the oven. You might need to lace it closed with twine to hold all that stuffing inside.
c. Stuff the turkey the night before and have it ready to go into the oven in the morning.
d. Get the stuffing ready to go the day before and stuff the turkey in the morning, this will help you get it in the oven quickly.

5. The turkey’s been in the oven for several hours. How do you know if it’s done?

a. The pop-up thermometer has popped. It’s done.
b. A thermometer reads at least 165 degrees F in several spots on the bird.
c. You calculated the time vs. pounds on the instructions, that time has come and gone and it’s brown all over. It’s done.
d. The juices are running clear and the drumstick wiggles.

ANSWERS:

  1. C. A turkey that has been kept solidly frozen for an entire year will be safe to eat. The quality may be lower than a turkey kept in the freezer for a shorter time. One suggestion is to prepare it for a family meal before Thanksgiving. This will give you a recent turkey-cooking experience, so cooking on the big day won’t be so intimidating. Actually, answers B and D could also be correct, since there would be no reason not to invite your in-laws to your practice dinner or the holiday. You really could save the older turkey for after the holiday, but the longer it sits in the freezer, the lower the quality will be.
  2. D. Thawing the turkey in the refrigerator is the safest method. It takes one day for each four to five pounds of turkey to thaw. The other answers don’t keep the outside of the bird cold enough while the inside is still frozen. Also, it’s really best to use home appliances for their originally-designated purposes. Some of those ideas are just yucky!
  3. C. Turkeys can be cooked directly from the freezer; the cooking time may be as much as 50% more than a thawed turkey. There also won’t be an opportunity to stuff it. Instead, you could bake your stuffing in a casserole dish. Now what about those giblets in the bag? Check the turkey throughout the cooking process, and when it has defrosted enough, you can carefully remove the giblet bags with tongs. You could also thaw a turkey by submerging it in cold tap water. The water should be changed every 30 minutes, and this method will take 10-12 hours for a 20-pound turkey. It also requites lots of water. The turkey should be cooked immediately after thawing. Oh, and if you purchased a pre-stuffed turkey, then it should always be cooked directly from its frozen state.
  4. A. The ingredients can be prepared the day before, but keep the wet and dry ingredients separate. Make sure that the wet ingredients (chopped vegetables, broth, and cooked meats) are safely stored in the refrigerator. Mix the wet and dry ingredients together just before filling the turkey cavity, and even then, only fill it loosely. Cook the turkey immediately after stuffing it. Use a food thermometer to make sure the center of the stuffing reaches a safe minimum internal temperature of 165 °F.
  5. B. The only way that you can be absolutely sure that the turkey is done is to use a thermometer. The minimum temperature to which a turkey should be cooked is 165 degrees Fahrenheit. Check the internal temperature at several locations, including the thigh and the thickest part of the breast. Pop-up timers may pop too early because of fat pooling at the tip, so always use another thermometer to double check. The National Turkey Federation recommends cooking turkey to a higher temperature than the minimum. While 165 degrees F is the minimum safe temperature, they say that people like the quality more (and it will be easier to carve and slice) if it’s cooked to a higher temperature. They frequently suggest 180 degrees F instead.

I hope you and your clients have as much fun with this quiz as I had writing it. Have a safe and wonderful Thanksgiving!

By Cheryle Jones Syracuse, MS, Professor Emeritus at The Ohio State University

Here’s a free PDF handout of the quiz, just for you!

Thanksgiving Quiz

There are lots of other holiday resources in the Nutrition Education Store! Which ones will make your life easier?

Holiday Health Challenge Toolkit

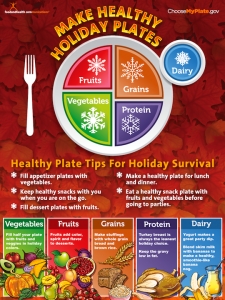
Holiday MyPlate Poster

Holiday Train Game

Looking for Healthy Meals

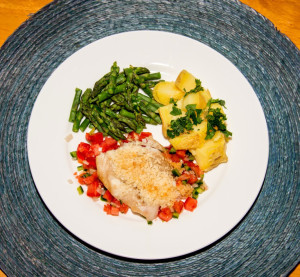
Healthy MealOkay, I’ve got a story for you today. My husband and I were recently eating lunch — I had made us each a quick salad with lettuce, apples, some thawed frozen berries, avocado, leftover grilled chicken and homemade balsamic vinaigrette. As we ate, my husband commented, “It’s amazing that you look in the refrigerator and see salad; when I look in the refrigerator I just see soda.”

That seems to capture a common sentiment in a nutshell. How do people plan menus and think about turning what’s available into a healthful meal? Is this something that’s intuitive or can it be learned?

For me it’s easy, because I love to cook and experiment with food. But what about people who really don’t like to prepare meals or don’t have these skills?

All home management experts say that planning meals ahead of time is the number one way to save time, have balanced meals, control the food budget, avoid food waste, and reduce trips to the grocery store. However, I’m realistic enough to know that most families don’t do this.

So, how can we, as health educators, make this easier for our clients?

Here are a few of my latest ideas…

  • Try planning just a few meals a week instead of setting up a program for all seven days. If this works, then perhaps you could develop a menu rotation.
  • Have everyone in the family contribute their menu ideas and meal likes and dislikes.
  • If other members of your family are just learning to cook, or don’t yet have a wide recipe repertoire, having menus posted can help them learn and develop their cooking and menu-planning skills.
  • Keep MyPlate in mind as you go. We all know the concept of trying to fill half the plate with fruits and vegetables at each meal, so now it’s time to put it into action. Remember to fill the other half with a lean protein and a whole grain, then add low-fat dairy on the side to round out the meal.
  • Post your planned menus. That way, everyone in the family knows what’s for dinner. This could help the first one home to get dinner started too!
  • Make sure that the refrigerator, freezer, and pantry are stocked with the foods that you need for these menus. It’s especially important to have a variety of fruits and vegetables available for meals and snacks. After all, how can you fill half your plate with fruits and vegetables if there aren’t any fruits and vegetables in the house?

Try these tips and who knows? Maybe the next time your family looks into the fridge, they’ll see dinner!

By Cheryle Jones Syracuse, MS, Professor Emeritus at The Ohio State University
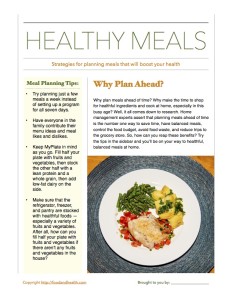
Here’s a free PDF handout with a few of the top tips from today’s post…

Healthy Meals

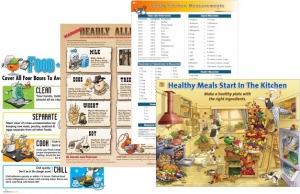
Here are some more healthy meal resources, brought to you by the Nutrition Education Store!

Healthy Kitchen Poster Set

Learn to Cook Workbook

Heart Smart Cooking PowerPoint Presentation

Eggplant Cooking Tips

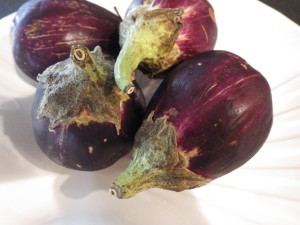
Eggplant!I recently got the best gift from a friend — 4 small eggplants from her garden. This is the same friend who brought me several pomegranates a couple years ago. I feel so lucky that I have friends that bring me wonderful fruits and vegetables — what great gifts!

Anyway, back to the eggplant.

I don’t usually buy eggplant, largely because I really don’t know what to do with it. My husband likes eggplant Parmesan, but he usually orders it in restaurants. I’d heard so many rumors and old wives’ tales about how to cook eggplant, and found myself baffled by all the conflicting information. For example, do I need to salt the eggplant? I remember my husband’s aunt always salting her eggplants and then weighing them down with books. On the other hand, according to an archived article from Food and Health Communications, you don’t have to bother with this if the eggplants are very fresh.

So how should I treat my eggplants?

Since salting can help remove the bitterness from an eggplant, I decided to salt mine. If you’d like to salt your eggplants before you cook them, first you need to slice or dice the eggplant into the shape you want to use. Sprinkle everything with about half a teaspoon of salt (not the half cup my husband’s aunt used to use) and then let everything sit in a colander for 30-60 minutes while the eggplant drains. Once that time is up, press out any excess liquid and dry the eggplant with a clean towel. You can also rinse the eggplant to remove extra salt before drying it.

So, there I was with salted eggplant. How did I want to cook it?

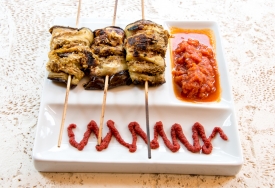
Grilled EggplantI dug further into the Food and Health Communications recipe archive and found a few articles about eggplant, along with several healthful recipes. Here are some of my favorites…

With time running short, I decided that I wanted to preserve my eggplants to cook later.

According to the National Center for Home Food Preservation, eggplant can be frozen. As far as I could tell, there is not a research-tested recipe for safely canning eggplant.

So, freezing it was!

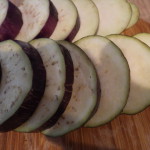
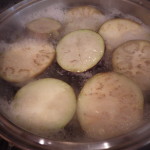
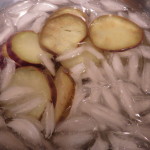
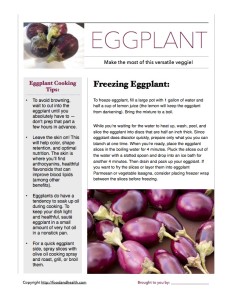
To freeze eggplant, fill a large pot with 1 gallon of water and half a cup of lemon juice (the lemon will keep the eggplant from darkening). Bring the mixture to a boil. While you’re waiting for the water to heat up, wash, peel, and slice the eggplant into discs that are half an inch thick. Since eggplant does discolor quickly, prepare only what you you can blanch at one time. When you’re ready, place the eggplant slices in the boiling water for 4 minutes. Pluck the slices out of the water with a slotted spoon and drop into an ice bath for another 4 minutes. Then drain and pack up your eggplant. If you want to fry the slices or layer them into eggplant Parmesan or vegetable lasagna, consider placing freezer wrap between the slices before freezing.

RIMG4637RIMG4670RIMG4677RIMG4732

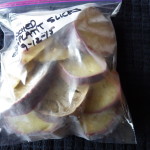
That’s basically what I did, with one little twist. I put the well-drained eggplant slices on a tray and froze them individually. Then I transferred everything to a freezer bag. Hooray! Now I have two quart bags full of sliced eggplant for later this year!

My research also led me to discover a bunch of great eggplant cooking tips. If you ever find yourself with a spare eggplant or two, consider the following…

  • To avoid browning, wait to cut into the eggplant until you absolutely have to — don’t prep that part a few hours in advance!
  • Leave the skin on! This will help color, shape retention, and optimal nutrition. You can find anthocyanins in the purple skin of an eggplant, and since anthocyanins have a positive impact on blood lipids, it would really be a shame to remove the skin.
  • Eggplants do have a tendency to soak up oil during cooking. To keep your dish light and healthful, sauté eggplant in a small amount of very hot oil in a nonstick pan.
  • Want a quick eggplant side? Spray slices with olive oil cooking spray and roast, grill, or broil them.

Anyway, that’s a brief recap of my eggplant adventures. I hope you liked it!

By Cheryle Jones Syracuse, MS, Professor Emeritus at The Ohio State University

Here’s a handout that features the most helpful points from today’s post. Get your copy today!

Eggplant Handout

And for more fun with eggplant, drop by the Nutrition Education Store!

Fruit and Vegetable Activity Set for Kids

I Heart Fruit and Veggies Bookmark

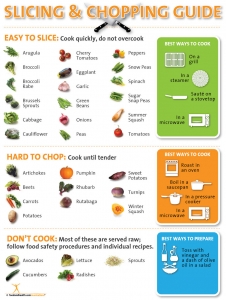
Vegetable Chopping Guide Poster

The Truth about Blanching

PeppersDuring a recent food preservation class, the topic of freezing vegetables came up. The big question of the day was “do you really always have to blanch vegetables before freezing them?”

Today I want to share my answer to that question with you.

But first, a quick review.

Blanching is the process of quickly heating fresh vegetables in boiling water or steam. This process is recommended for almost all vegetables when you’re going to stash them in the freezer. The amount of time that you need in order to heat a vegetable depends on the type of vegetable, its shape, and its size. Visit the homepage for the National Center for Home Food Preservation to find a complete list of recommended blanching times. A quick dip in boiling water or steam is followed by an immediate ice bath, which stops the cooking process. And that’s blanching in a nutshell.

Now, is this step necessary? Can’t you just throw raw vegetables into the freezer?

For best flavor and texture, the answer is no. Blanching improves the quality of the frozen vegetables. Vegetables that have been blanched before freezing will have better color, texture, flavor, and nutrition over the long haul than ones that have not been blanched.

So, what about vegetables that aren’t blanched? Are they safe to eat?

There is nothing mysterious or dangerous about vegetables that have not been blanched before freezing. These vegetables are safe to eat. To blanch or not to blanch is a quality issue, not a food safety issue.

TomatoesThat being said, there are some foods that seem to freeze very well without blanching. Want to know what they are? The short list features tomatoes, onions, and peppers.

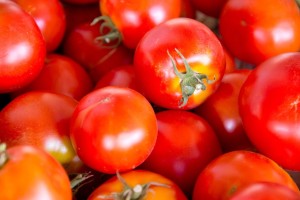
  • Tomatoes can be frozen raw, either cut-up or whole. You can remove the skins, but if that feels like too much work, you can also freeze whole and well-washed tomatoes with their skins on. Thaw the frozen tomatoes under warm running water and the skins will slip right off. The texture of thawed tomatoes will be soft, but they can still be used for cooking.
  • Do you have too many leftover chopped onions? I like to pack them up in ½ cup portions that are just right for soup or that work well as an addition to ground meat. Like tomatoes, frozen onions will have a softer texture, but they’re still good in cooked foods.
  • Peppers can also be frozen without blanching. I like to freeze them in quarters or strips in single layers on a tray and then, once they’re solid, put them into freezer bags. This allows me to grab as many as I need for a recipe. If you have enough freezer space, raw peppers can be frozen whole and thawed just slightly to be used for stuffed peppers. Be sure to use freezer-quality bags or packaging — this helps keep the quality top notch (and it also keeps the pepper odors from transferring throughout the freezer).

Time is a critical component here. The longer an unblanched food is kept in the freezer, the lower its quality will be. Unblanched items should be used within 6 to 8 months of freezing.

By Cheryle Jones Syracuse, MS, Professor Emeritus at The Ohio State University

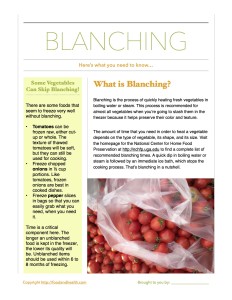
Here’s a free blanching handout that you can offer your clients today!

Blanching

For more cooking and kitchen resources, check out these top-sellers from the Nutrition Education Store

Nutrition Apron

Cook for a Better Weigh Poster

25 Ingredients into 15 Meals DVD, CD, and PowerPoint