Quick & Easy Ideas for National Nutrition Month

Did National Nutrition Month (NNM) sneak up on you this year?

Don’t worry! Here’s a quick and easy guide to NNM, including resources (some free!) you can use with messaging from the Academy of Nutrition and Dietetics (AND).

Week 1: Eat a variety of nutritious foods.

  • Learn to read food labels.
  • Include healthful foods from all food groups.
  • Incorporate your favorite cultural foods and traditions.

Resources:

Week 2: See a registered dietitian.

  • Ask your doctor for a referral to an RDN.
  • Find an RDN who specializes in your unique needs.
  • Receive personalized information to meet your health goals.

Resources:

Week 3: Plan your meals and snacks.

  • Choose healthful recipes to make during the week.
  • Use a grocery list to shop for nutritious food.
  • Make healthful food and drink choices when away from home.

Resources:

Week 4: Create tasty foods at home.

  • Learn cooking and meal prep skills.
  • Try new flavors and foods from around the world.
  • Enjoy your meals with friends or family, when possible.

Resources:

By Hollis Bass, MEd, RD, LD

Reduce Food Waste with Meal Planning

According to the U.S. Department of Agriculture, the average American family of four loses $1,500 to uneaten food each year. Food waste can impact your budget, but also the environment. One way to reduce food waste is to plan your meals. Of course, meal planning has many more benefits – it can help with eating on a budget, weight management, eating more family meals, following MyPlate, and more.

Here are some ways to teach your students, clients, or other groups about meal planning and reducing food waste:

  1. Zero-based food plan: Have you ever heard of a zero-based budget? You basically plan where every dollar of your income will go for the month – savings, rent, utilities, food, clothing, coffee, postage stamps, etc. (Learn more by reading this Nerd Wallet blog post.) How about applying this concept, in general terms, to the food you buy? By planning your meals, you can buy just as much food as you need. When leftover food is planned into future meals, food isn’t wasted (we call these planned-overs!). Knowing where every ounce of frozen broccoli will go isn’t such a big deal, because whatever you don’t use can go back into the freezer. But if you’re buying fresh vegetables for a recipe, either buy the exact amount you’ll use, or make a plan to use what’s left over. Try zero-based food planning with fresh produce, eggs, dairy products, bread, and other perishables.
  2. Fruit & veggie stock up: Use meal planning to make sure you have enough fruits and vegetables to fill up half of your plate for every meal, every day. Avoid food waste by planning on meals with fresh produce for the first few days after food shopping. Then start using frozen vegetables, and frozen fruits, too (add some to yogurt or oatmeal, heat some in the microwave to use as a topper for toast or pancakes). As you get to the very end of the week, use canned vegetables if you’re out of frozen. Canned fruit, applesauce, and raisins can fill in for fresh fruit.
  3. Meal styles: A more general meal plan with meal styles can make weekly meal planning easier. You have a different style for each day of the week. For example, Monday can be beans (burritos, chili, or soups). Saturday can be salads (entree salad with different proteins and veggies). See our free handout for seven different meal styles and ideas for each. These make the basis for meals, then you can add your own favorites, try new recipes, etc.
  4. Keep it simple: If meal planning makes you think of the perfect pictures of perfect meals you see on social media, think again! Meal planning is whatever YOU want it to be. Maybe you just want to plan breakfast for the week. It’s all fine – check out our free Meal Planning Ideas handout to get started.
  5. Menu planning tool: In our store, we have a great tool to use no matter how you decide to teach menu planning. Use the Menu Planning Dry Erase poster to walk individuals or groups through planning a week’s worth of meals. We also have a larger Menu Planning Dry Erase Wall Decal. And people can take home our smaller Menu Planning Tearpad to practice what they’ve learned.

Remember, planning meals can help you buy the right amount of food and use it before it goes bad. That’s good for you, your family, and the world!

Your bananas, my bananas…Yonanas!

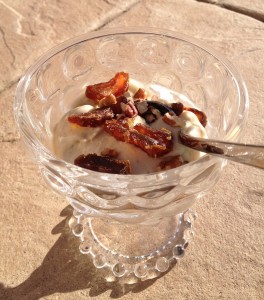
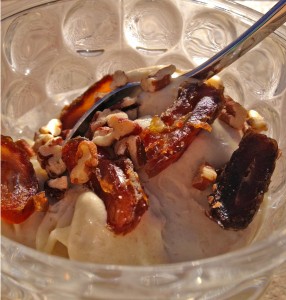
Banana Date Yonananas

Banana Date Yonananas

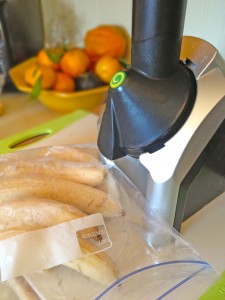
We’ve had a lot of fun with Yonanas! Don’t know what I’m talking about? Yonanas is a small kitchen appliance that takes frozen bananas and other fruit and quickly processes them into a creamy frozen dessert-type product that looks like it came out of the machine of your favorite frozen yogurt place.

We had friends over for dinner one evening and we pulled out the Yonanas machine to make dessert. The friend admitted that she thought to herself “there’s a sucker born every day, what is this thing?” But after eating the Yonanas she wanted one for herself.

The joy of Yonanas is you’re eating pure fruit. Although the name implies bananas , you can use any fruit or combination of fruit. It is recommended to use a banana every time because it helps make the creamy consistency— I personally  like the combination of bananas, mango and strawberries. The combinations are endless and it comes with a recipe book.

Just think of all the calories and fat calories you can save by eating Yonana instead of ice cream? Two bananas, 1/2 cup strawberries and a half of a mango makes more than enough Yonana for three people for only 112 calories each. Yonanas satisfies the craving for ice cream without the added cream, sugar or preservatives. It’s a fun way to encourage kids to eat more fruit. Plus bananas are a good source of potassium, dietary fiber, manganese and vitamins B6 & C.

A couple tips: the fruit needs to slightly thaw (5-8 minutes) before putting through the Yonana machine to get a creamy texture. It doesn’t take long. If it thaws out too much, your final product will be mushy. The machine also comes with popsicle forms to refreeze any leftover product. I haven’t been real successful with this; you may need to experiment a little.

Another plus…it’s a great money saver. Fruit that would otherwise get tossed (over 40% of food in the US is discarded) is now saved for the Yonana! Simply freeze those very ripe bananas or buy the “mark down” bananas for Yonanas. No more wasted fruit or feeling the need to make even more banana muffins or nut bread. Plus kids can come up with their own flavor concoctions or toppings. It would take an older child or adult to push the fruit through because some exertion is needed.

A word of caution: as with any small appliance, it’s only good if you’ll use it. It’s easy to clean. I put it in the dishwasher.

Check out their website at www.yonanas.com (note: you can get a refurbished machine for 20% off with Amazon’s Warehouse Deal).

Banana Yonananas "Ice Cream" Tropical

Cheryle Jones Syracuse, MS
Professor Emeritus, The Ohio State University

Check out the savings:

Food: Calories per half cup: Fat (g) Calories per week for a year:
Yonanas 112  0  5,824
Ice cream 250 16 13,000
Savings  82 16  7,176

15 Chef’s Ideas To Help Kids Love Healthful Foods

You can make all of the healthful dishes in the world, but if your kids don’t want to eat them, it feels like you are spinning your wheels. As the Chef and Founder of Food & Health Communications, Inc., I am keenly aware of what foods my son and I need to eat for optimal health. I also know that this is easier said than done, even for me as a chef because it is hard to find the time.

My son, Nicholas, was one of the pickiest eaters around as a child. He didn’t want any foods on his plate to touch, he wouldn’t try anything “mixed,” he didn’t like any kind of sauce, he only liked a few vegetables, he wouldn’t try soup, and he wouldn’t even look at a salad. At first, the whole thing was baffling and I didn’t know where to start. I ate a wide variety of healthful foods, and I exposed Nicholas to them at a very young age because I made a lot of his baby food from scratch so how could he be so picky? I felt that I should do something to help him expand his repertoire and enjoy more fruits and vegetables. I did notice that whenever he helped me cook something, he was more likely to eat it, so that is where I started and just expanded to these projects:

1) We started a simple, inexpensive herb garden. Nicholas and I spent quality time together learning about herbs, buying them, growing them, harvesting them, and using them in our cooking. During the evenings and on weekends, we would stop and look at the garden, pick some herbs, or care for them. Before bed, I would read him a funny cooking book called Warthogs in the Kitchen. Herbs are amazing because they have a wonderful smell. Mint was like his gum; rosemary is like a tree; basil smells like pizza sauce; thyme is a little like the woods. I used the herbs as a way to get Nicholas to try new foods, and I was met with instant success. We made herb-flavored vinegars that could be used on salad, which prompted him to start eating salads. I also used the herbs in new and healthful dishes like beans and rice, taco salad, tortilla pizzas, stews, etc. When herbs from our garden were in play, Nicholas would usually try the new food that featured them. He didn’t like every dish, but I?never gave up on getting him to try healthful foods.

2) We started doing more physical activities together. I noticed that whenever Nicholas’s activity level increased, so did his appetite! Instead of watching TV after dinner, we went for a bike ride or a walk with the dogs. Whenever I ran, he would ride beside me on his bike. When I swam, he joined me for the last few laps. He even did a triathlon and won first place!

3) Healthful food was always available. I kept 3 or 4 different types of fruit ready to eat in the refrigerator at all times. Salad was always cut and ready, along with potatoes, frozen vegetables, and baby carrots. And fruit was served in the most creative desserts.
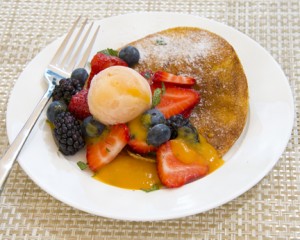
4) No bribes, just snack platters slipped in. I never bribed him to eat healthful food. Food is not a reward. It is nourishment. But I did slip a fruit plate in his room while he was playing video games  (screen time was never in excess, though, because we always had a lot of fun outside toys plus dogs to walk). A bowl of baby carrots usually appeared on his desk during homework. The best time for fruits and veggies is when they are busy and you just “make them appear.”

5) Food and meals were always pleasant. I didn’t force him to eat anything he didn’t like nor did I punish him for not eating a particular food. I offered a wide variety of healthful foods and he chose what he wanted to eat. I did not keep a whole pantry full of chips, crackers, cookies, and sweetened cereals, either. When we wanted to eat cookies, we make them from scratch. I did buy cookies or crackers as an occasional treat. That way, we established that those foods weren’t forbidden — they just weren’t mainstays. I always make a big deal about dinner – it takes little effort to set a beautiful table with placemats, cloth napkins, nice water goblets and bone china or any neat china. We have a candle that is battery operated and it comes on every night!

6) Let’s cook! He helped me with meal preparation on most days. This is not always easy when you are tired or in a hurry, but it does make a difference. Here is our special chocolate chip cookie recipe along with age-appropriate kids tasks.

7) Backups count, too. The after school babysitter had a menu and recipes so that she could prepare healthful snacks and meals. Our babysitter really loved the cooking lessons and she just wrote that she is getting married and she is so happy she can make so many good things!!

8) Shopping is a fun activity. We grocery shopped together and visited farmers’ markets, too. The focus was what to put on our list and we always stuck to it in the store.

9) Dine fancy. I took him to fancy restaurants and let him choose whatever he wanted. This is a situation that really promotes the opportunity to try new things because it is their choice. He picked the most adventurous things like stuffed zucchini blossoms when we were dining in Greens, the famous vegetarian restaurant in San Francisco! It makes the child feel special when  you take them to a nice place to eat. When he was young we dressed up and I would talk about how he was expected to act. It wasn’t always perfect in the beginning but now he is a perfect gentleman.
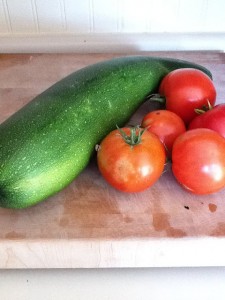
10) Grow more. He planted a vegetable garden when he got older. The items to plant were his choice and he was so proud of his tomatoes, potatoes and huge zucchini.

11) Teach them to cook. He learned a whole repertoire of items he can prepare that included: cookies, salad, pizza, macaroni, bean quesadillas, salsa, pasta and much more. I bought kitchen equipment like quesadilla makers, bread machines and waffle makers that help him succeed. His favorite dish right now is a vegetarian pannini.

12) Chef’s table. He created a chef’s table in his room for my birthday and he planned the menu and cooked!

13) Summer camps can enrich knowledge. His last summer camp was at Stanford for 2 weeks where he and his classmates at Stanford’s OHS worked on a multi-disciplinary topic, “The Problem of Food.” They were required to read “An Omnivore’s Dilemma”, plan menus, visit farms, calculate kitchen math and cook for an audience. Other summer camps have taught him to program iPhone Apps and he is the programmer for Salad Secrets and Holiday Secrets, two of the food apps we made together. The important thing is to find one that a child will love.

14) His list, too. Now he helps me with the meal planning and grocery list. We have a list that stays on the refrigerator and whenever he requests an ingredient, he puts it on the list and I buy it! Usually his requests include black beans, tortillas, salsa and bottled waters, because he is still riding his bike to the pool and swimming!

15) Have fun and don’t worry. When he was a toddler he would eat watermelon for 3 days in a row. I likened that to reading the same book over and over. And once, when I was practicing for the ProChef II test, he discovered chocolate eclairs and wanted them for breakfast, lunch and dinner. He even put them in his lunch box. That was the only time I made them and it a good memory.

As you can see, the possibilities for kids and food are endless. It usually only takes 10 more minutes each day to make something special for dinner together and the memories are priceless.

If you have questions, please click “Contact Us” from the link below.

By Judy Doherty, PC II

Chef and Founder

Food and Health Communications, Inc.

Communicating Food for Health

NutritionEducationStore.com

Judy is a graduate from the Culinary Institute of America and the Fachschule Richmont in Luzern, Switzerland. She spent over 20 years in foodservice. She was the executive pastry chef for the Grand Hyatt Westshore in Tampa, FL and The Hyatt on Gainey Ranch in Scottsdale, AZ. She has received the ACF Chef of the Year, ACF Bronze Medal and ACF Gold Medal. She holds the ProChef II Credential from the Culinary Institute of America. She has authored 12 books including Salad Secrets, Holiday Secrets, No Battles Better Eating, Cooking Demo Ideas and a new one coming up called the Art of the Lowcal Dessert. Her work has appeared in Chocolatier Magazine, Bon Appetit and Great Chefs of the West.

What’s Your Cooking Style?

Different things can draw people to participate in meal preparation. In the kitchen, there’s really something for everyone! Take a look at some of the examples below to find strategies for getting your kids involved with family meals.

  • The builder is like the engineer. She or he may become enamored with kitchen gadgets and equipment that does a specific job, so make the builder’s gadget requests and use a part of your time in the kitchen.
  • The artist, on the other hand, might not want to make a whole meal. Set him/her to work making an elaborate table setting, a beautiful plate for the main meal, or a pretty salad. Plating meals can be fun for artists too, especially if you have sauces in squirt bottles, ready to be “painted” on the plates.
  • Let the musician listen to music while cooking or choose the music that is played during dinner!
  • Have kids who are interested in writing make lists of meal ideas, write recipes, or create their own cookbook.
  • Allow the aspiring chef as much freedom in the kitchen as possible. You may be amazed at some ingredient combinations or gourmet preparations.
  • Give the gardener opportunities to grow herbs or vegetables for the kitchen.
  • The shopper might like to buy pots and pans, kitchen equipment, plates, or neat produce at the farmers market.
  • The social butterfly might like inviting friends to dinner and posting pictures of meals on Facebook.

Excerpted from No Battles Better Eating, by Chef Judy Doherty, PC II

Feeding People with Allergies: Avoiding Cross-Contact

Things change.

I looked around the dinner table this past holiday and realized that things were different. We had a wonderful group of people, both family members and friends… all people that we enjoyed spending time with in the past. Nothing about that has changed. However, what had changed was what we were eating. Some of the people around the table had illnesses over the past year that changed what they were “allowed” to eat. Another person had been diagnosed with a food allergy. And then there were the frequently-heard statements about certain foods that just don’t “agree” with people.

Overall we had:

  • One nut allergy (no tree nuts for sure, maybe peanuts, too!)
  • One seafood allergy
  • One person with lactose intolerance
  • Three people that didn’t eat any peppers (red, yellow, or green)
  • One person that recently had bariatric surgery and didn’t want sugar
  • One person who didn’t “do” any refined or carbohydrate-based foods.

So, how do you feed a group like this?

Here are some basics:

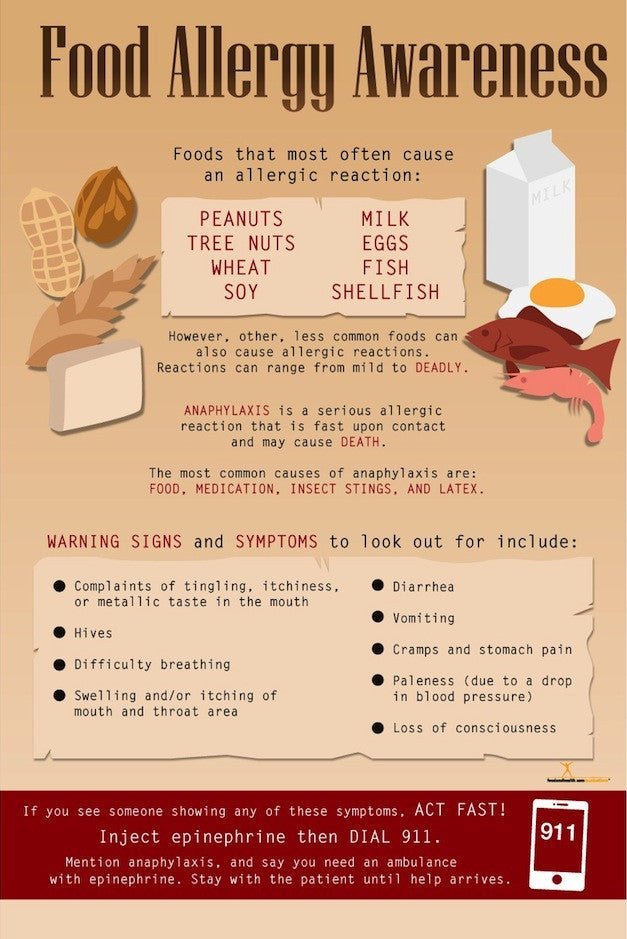
An allergy happens when a person’s immune system reacts to proteins in food. Major allergy foods include: eggs, wheat, peanuts, tree nuts (almonds, pecans, walnuts, hazelnuts), soybeans, milk, fish, and crustacean shellfish. We had several of these to consider at our latest gathering. Another thing to remember about allergies is that cooking a food does not reduce or eliminate the chances of a reaction.

A food intolerance is when someone’s body can’t digest certain chemicals properly. Common intolerances involve lactose and gluten. These usually result in vomiting, nausea, cramps, and diarrhea. People with Celiac disease can have long-term problems when they consume even small amounts of  gluten.

It’s really hard to please everyone, but of more concern to me were those allergies that could really result in major reactions, including a rash, hives, breathing problems, cardiac arrest, and maybe even death. This is not something that you should brush off or ignore. Sometimes it’s even hard to trust that people with these allergies won’t eat the wrong foods.

How do you handle a situation like this? First, we asked each person or family to bring something that they knew they could eat. That way, everyone had at least something.

Then, when asked, we were able to provide the ingredient label or recipes for most of the other meal items. I was surprised that one bakery item from the grocery store didn’t have an ingredient label, but a sign by the cash register cautioned about nuts and gluten.

Another key is to watch out for cross contact. What’s cross contact?  This is when the allergy food is inadvertently put in contact with a non-allergy food.  Just a fork or spoon being transferred from one food to another may put enough of the allergy protein in the second food that could cause a problem for the person with the allergy. This could be something as simple as mixing food with fingers, on counter tops, in serving spoons, frying pans, dishes, or even “double dipping” a chip or cracker touching one food and then another. It gets even more hectic when there are larger numbers of people and several of them are trying to prepare food in a kitchen at the same time.

We were much more aware of these allergies and food intolerances this year. This is something for everyone to think about when groups get together to eat. I’ve been at buffet lines and pot-luck dinners where people have been good to share recipes and add signs if there is a known “allergy food” in the dish, but it’s also good for people to be concerned about that cross contact, too. While people with food allergies need to be “on the alert” and ever-vigilant, we can all help each other by paying closer attention to the details.

By Cheryle Jones Syracuse, MS, Professor Emeritus at The Ohio State University

And for a few other helpful allergy resources, don’t miss these materials…

Farmers’ Markets Dos and Don’ts

I have a problem at farmers’ markets.

In the fieldsYou see, I absolutely adore farmers’ markets. The problem is that I tend to get carried away when I visit them. I’m always so excited to see all the fresh fruits and vegetables that I end up buying much more than I really need. My eyes are bigger than my refrigerator.

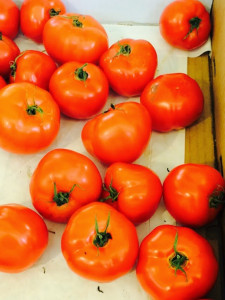
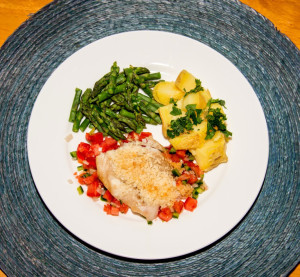
After a visit to the farmers’ market the other day, we had fresh tomatoes, green beans, tiny new potatoes, and corn on the cob for dinner. I served all that with oven-baked walleye from the freezer. Even the fish had been caught locally — we got it last summer on a trip to Lake Erie.

You can’t get much more of a local meal than that.

Since I go to farmers’ markets so often and have been going for so many years, I’ve learned quite a few “dos and don’ts.” Now I’d like to share them with you…

Farmers’ Market Dos:

  • Do eat fruits and vegetables.
  • Do enjoy the fresh, local availability of a wide range of foods.
  • Do try something new and different.
  • Do make a quick trip around the market before you make any purchases.
    • This allows you to see what’s fresh.
    • It also helps you get a sense of how much each kind of food will cost.
    • Once you’ve made your lap, go back to the stalls that offer the items you want at the best prices.
  • TomatoesDo bring cash. Growers don’t always accept credit cards.
    • Keep your money easily accessible.
    • This will make your transactions easier and faster.
  • Do wear a hat, sunglasses, sunscreen, and comfortable shoes.
  • Do bring water to drink.
  • Do bring a reusable or recycled bag to help carry your purchases.
  • Do put a cooler with ice in your car.
    • This will help the items you buy stay fresh until you get home.
  • Do go early in the day.
    • If you’re there at the start of the market, then you’ll get the best selection and quality.
    • Yes, you might get a good deal on any items left near closing time, but you also might miss out on what was available.
  • Do get to know the vendors.
    • Many are your neighbors.
    • Become a regular.
    • Spend some time talking with the growers. They can let you know what’s in season and what to expect in upcoming weeks.
  • Do ask about bulk purchases.
    • If you’re planning on purchasing a few items to preserve (freeze, can, or pickle) then you might get a deal if you buy large quantities.
    • Again, this is the time to talk with the grower and arrange for these large orders ahead of time.
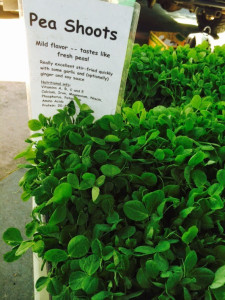
  • Pea Shoots Do keep food safety in mind.
    • While you may be tempted to taste a bite of fresh melon or tomato, look around and make sure that the person offering it has used good practices.
    • Good practices include washing the produce, wearing clean gloves, offering toothpicks, using a clean knife, and keeping the food items cold if necessary.
    • Don’t take risks.
  • Do be considerate of the farmer and the next customer.
  • Do keep control of your kids and dogs.
  • Do come back next week.

Farmers’ Market Don’ts:

  • Don’t sample anything if the food isn’t offered to you or labeled as a sample.
  • Don’t expect the farmers to deal with you on price.
  • Don’t pinch, squeeze, drop, peel (like corn), or stick your fingernails in foods and then leave said foods for someone else.
    • Respect the food and your fellow customers.
    • By messing with the food, you may be making it unsellable.
  • Don’t block a vendor if you’re not buying.
    • If you’re visiting with a friend, move away from a display so others can get by and shop.
  • Don’t get carried away (like I do).
    • A deal isn’t a deal if the food goes to waste.
    • Be sure to only purchase what you’re able to eat while the food still has good quality.
  • Don’t forget, you can always go back next week.

Cheryle Jones Syracuse, MS, Professor Emeritus at The Ohio State University

Find more farmers’ market educational resources in the Nutrition Education Store. The most popular ones include…

Farmers’ Market Photo Posters

Enjoy Your Farmers’ Market Handout

Real Food Grows Banner

PS Have you visited the free clipart library? Check out the fruit and vegetable clipart, try an infographic, or just browse the full selection!

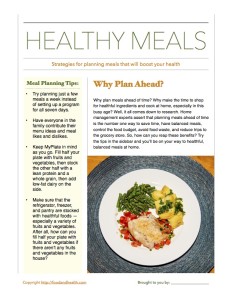
Looking for Healthy Meals

Healthy MealOkay, I’ve got a story for you today. My husband and I were recently eating lunch — I had made us each a quick salad with lettuce, apples, some thawed frozen berries, avocado, leftover grilled chicken and homemade balsamic vinaigrette. As we ate, my husband commented, “It’s amazing that you look in the refrigerator and see salad; when I look in the refrigerator I just see soda.”

That seems to capture a common sentiment in a nutshell. How do people plan menus and think about turning what’s available into a healthful meal? Is this something that’s intuitive or can it be learned?

For me it’s easy, because I love to cook and experiment with food. But what about people who really don’t like to prepare meals or don’t have these skills?

All home management experts say that planning meals ahead of time is the number one way to save time, have balanced meals, control the food budget, avoid food waste, and reduce trips to the grocery store. However, I’m realistic enough to know that most families don’t do this.

So, how can we, as health educators, make this easier for our clients?

Here are a few of my latest ideas…

  • Try planning just a few meals a week instead of setting up a program for all seven days. If this works, then perhaps you could develop a menu rotation.
  • Have everyone in the family contribute their menu ideas and meal likes and dislikes.
  • If other members of your family are just learning to cook, or don’t yet have a wide recipe repertoire, having menus posted can help them learn and develop their cooking and menu-planning skills.
  • Keep MyPlate in mind as you go. We all know the concept of trying to fill half the plate with fruits and vegetables at each meal, so now it’s time to put it into action. Remember to fill the other half with a lean protein and a whole grain, then add low-fat dairy on the side to round out the meal.
  • Post your planned menus. That way, everyone in the family knows what’s for dinner. This could help the first one home to get dinner started too!
  • Make sure that the refrigerator, freezer, and pantry are stocked with the foods that you need for these menus. It’s especially important to have a variety of fruits and vegetables available for meals and snacks. After all, how can you fill half your plate with fruits and vegetables if there aren’t any fruits and vegetables in the house?

Try these tips and who knows? Maybe the next time your family looks into the fridge, they’ll see dinner!

By Cheryle Jones Syracuse, MS, Professor Emeritus at The Ohio State University

Here’s a free PDF handout with a few of the top tips from today’s post…

Healthy Meals

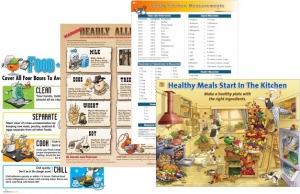
Here are some more healthy meal resources, brought to you by the Nutrition Education Store!

Healthy Kitchen Poster Set

Learn to Cook Workbook

Heart Smart Cooking PowerPoint Presentation

Eat your jack-o-lantern?

Kids love Halloween, costumes and carving pumpkins. Extend the fun by serving dinner in a pumpkin. This meal could be made ahead and served before the goblins go out trick-or-treating or have it in the oven while passing out treats at home.  I made this for family friends a couple of years ago and they still talk about the time I put a pumpkin on the table.

Get the kids involved in this meal. Make it a family outing to select the pumpkin or pumpkins.  The large round pumpkins that make great jack-o-lanterns are not the best for eating, they are usually stringy and tasteless. Smaller flatter pumpkins are best for cooking. Look for  sugar,  pie pumpkin or cooking pumpkins.

I could only find small orange pie pumpkins at our farmer’s market. There was also a hybrid pumpkin variety called a Buck Skin. This was a tan  on the outside rather than orange but bright orange inside.  This is one of the varieties of  pumpkins used by commercial canneries use to make canned mashed pumpkin and pie filling.  So, it’s a great eating pumpkin.

A word of caution when it comes to selecting pumpkins to fill for a meal. Don’t get one that’s too big.  It might not fit in your oven or may be too heavy once filled.  If you can’t find a nice medium-sized cooking pumpkin, you might want to go with individual smaller pumpkins.  Everyone could have their own pumpkin for dinner.

It may be tempting to try to do “double duty” with a pumpkin, to first have it as a jack-o-lantern and then make it into a pie. Let’s not go there. Like any other food, once it has been cut, pumpkin needs to be kept refrigerated. You should plan to eat or refrigerate pumpkin the same day you cut into it. You could use the whole pumpkins for yard decorations, just don’t cut them until you’re ready to cook them.

The bright orange color is a dead give-away that pumpkins are full of important nutrients and antioxidants and beta-carotene. Pumpkin is an excellent source of vitamin A, which is an essential nutrient for proper health of eyes, respiratory tract, skin and tooth enamel.

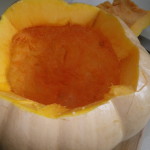
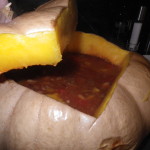
IMGP1753IMGP1769IMGP1773

Tips for making a meal in a pumpkin:

  • Make a recipe of your favorite soup, chili or meal-in-one casserole.  Cook that recipe almost complete.
  • Wash the outside of the pumpkin. Cut off the top as if you were making a jack-o-lantern and thoroughly clean out the seeds and strings, leaving the pumpkin shell.  This can be a great job for the kids.
  • Preheat oven to 350 degrees. Spoon the hot filling into the cleaned pumpkin shell, replace pumpkin top and place entire pumpkin with filling on a baking sheet in oven.
  • Bake for 1 hour or until pumpkin is tender.
  • Carefully place the pumpkin on a serving platter (this may be difficult or impossible if your pumpkin is very large.) Remove the pumpkin lid and serve the contents. For your vegetable, scoop out the cooked pumpkin and serve.
  • Add a cold glass of milk and toasty bread and this provides a complete meal.

Food safety notes:

  • The soup, chili or casserole should be hot and almost completely ready to eat when put into the pumpkin shell. 
  • Do not put raw ingredients, especially meats or poultry into the pumpkin shell, the heat will not penetrate the hard shell enough to cook these items.
  • Ingredients such as rice that need a long cooking time should be almost tender when placed inside the pumpkin.

Cheryle Jones Syracuse, MS
Professor Emeritus, The Ohio State University

IMGP1780

Strawberry Time Somewhere

It’s strawberry time! It’s hard for this Ohio girl to say this in May.

No, I don’t have special strawberries that ripen early, I’ve moved south and I’m just getting accustomed to having foods ripen earlier than I’ve known my whole life. Needless to say, no matter what the date, when they’re ripe I like to get out and pick a few pounds for fresh eating and put some in the freezer.

Picking my own strawberries is an annual excursion and a great feeling of accomplishment. I love being in the outside in the patch enjoying the weather and smelling the fresh fruit. I also feel good about buying locally because the fruit is fresher and I support my community. Pick-your-own prices around us have been about $1.30 a pound. I always wonder if it’s cheaper to buy the already picked quarts selling at the farmer’s market or to do-it-myself.

It’s easy to do some quick math to answer that question. It’s not exact, due to the moisture, size and variety of the strawberries, but usually you get about 1.5 pounds of berries in every quart. Give or take a few. So, if you’re picking your own, you can multiply the cost per pound by 1.5 to get the amount per quart of the berries. At $1.30 a pound, pick-your-own berries are a little less than $2 a quart. Don’t forget you should also consider your time, gas and energy as part of the cost. But sunshine and physical activity are also the benefits!

I remember a couple years ago I stopped by a local discount store after picking berries and the price of their berries per quart were less than what I picked per pound. But, I felt good about buying my local berries. I had a wonderful outside activity, too. I knew my pick-yourself berries were fresher, tasted better, and had more nutrition. I was supporting a local farmer and economy. If you’re interested learning about the value of purchasing locally, the University of Nebraska Lincoln has a great resource on the topic, check it out at:  http://food.unl.edu/web/localfoods/why-buy-local

A couple tips if you’re picking your own:

  • The berries should have a full, red color, bright luster and firm, plump flesh.
  • Choose only fully ripe berries—unlike some other fruits, berries do not ripen after being picked.
  • Get the berries home as soon as possible; don’t let them set in the trunk of your car while you do other errands. If you need to be out longer consider bringing a cooler to store them until you can get them home.
  • For longest shelf life, take them out of large buckets and pails and gently arrange in shallow containers and put in the refrigerator immediately.
  • Don’t wash or remove the green cap until just before you’re ready to use.
  • Use berries as soon as possible after getting them home.

No matter where you live, when it’s strawberry time,   I highly recommend getting out and enjoying it!  If the pick-your-own growers allow, take the kids or grandkids with you to help.  What a great way to show them how food is grown.  Just think how proud you’ll all be when they say “I picked these myself.”

Here are great berry recipes

A favorite is Berries with Custard Sauce – so easy to make and so rich!

Berries With Vanilla Custard Sauce

Cheryle Jones Syracuse, MS
Professor Emeritus, The Ohio State University

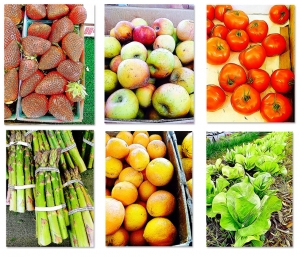
Check out the beautiful fruit and veggie posters in our store: