Activity Idea: Making MyPlate Plates

MyPlate is an excellent tool to encourage balanced eating.

For visual learners, having an image of MyPlate is a great starting point on the road to healthful eating habits. You can take this image even farther in an interactive project. Not only will this project help cement the basics of MyPlate in the minds of your visual learners, but it will also draw in your kinetic learners as well. Almost everyone can benefit from learning by doing!

So, what’s the project? Making a physical MyPlate plate.

There are a bunch of ways to approach this, but I want to point you toward a few of my favorite styles…
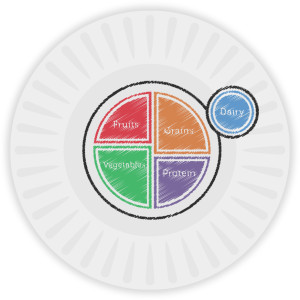
Color a Paper PlateApproach #1: Color a Paper Plate

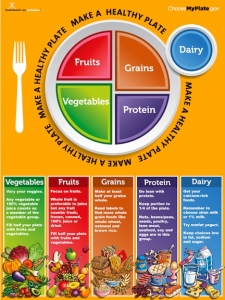
This one is pretty self-explanatory. Display an image of MyPlate and walk your clients through the basics of how and why the plate is divided. After that, you can distribute paper plates to each of your participants and let them create their own MyPlate plates with crayons or markers. They can draw their designs right on the plate!

Be sure to choose crayons or markers that are safe for kids — these won’t have harmful chemicals that could be dangerous to ingest. Not that a lot of anything would transfer from the plate to the food placed on it, but it’s best to play it safe.

If you’re distributing food as part of the activity, have people use their plates to portion out what they eat. They may want to make several MyPlate plates so that they can use the guide a few times. After all, paper plates don’t last past one meal.

Materials needed: A MyPlate image example, paper plates, and markers or crayons

Use the Plates Again and AgainApproach #2: Create Melamine Plates

To help your clients make MyPlate plates that they can use again and again, create melamine plates. These plates are embedded with the images that people draw, and they’re reusable. In fact, they can be treated just like regular plates — without fear of flaking, fading, or general destruction.

To create these plates, you’ll need a Make-A-Plate Kit with specialized markers. Hand out the plate papers from the kit to your clients after your discussion of MyPlate, and then let them use the markers to create their own MyPlate images.

This is a relatively inexpensive project that produces long-lasting results.

There is one thing to be aware of, however, and that is production delays. It often takes 2-3 weeks to return the MyPlate drawings as physical plates, so be sure to plan for this holdup.

Materials needed: A MyPlate image example, melamine plate kits, melamine plate markers, materials for shipping the plates

Approach #3: Paint Pottery Plates

For more immediate results and a long-lasting plate, there’s always painting pottery. Yes, this is a generally more expensive and involved approach than the other two, but it also often produces beautiful results. You can turn the project into a festive outing or party, and it makes a great end-of-session finale.

Hanging a MyPlate poster or enlarged drawing in the studio can help inspire your participants as they work. It also offers a great example to guide their painting.

Materials needed: MyPlate image example, a pottery studio, potted plates, paints and brushes

Try Word ArtDetails: Creating the Plates

Now that we’ve discussed a few general ways for your clients to make their own MyPlate plates, let’s get into the specifics of plate creation.

Make sure that there is an image of MyPlate available for your participants to look at as they create their plates. After all, the goal is to have an accurate guide to balanced eating available for their reference. A MyPlate with the wrong proportions on it is not helpful.

Now, when it comes to drawing the plate within the guidelines set forth by the USDA, there is plenty of room for innovation.

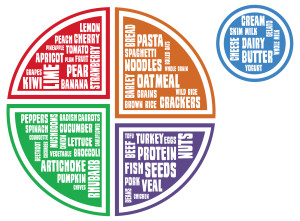
Yes, clients could copy the MyPlate image exactly “as is” from the USDA website, but they could also innovate when it comes to decorating the plates. For example, some participants could use pictures to highlight what goes in each section, drawing images of their favorite foods from each food group. Or each section of MyPlate could become a word cloud (as pictured here). This word cloud can also feature the foods that fit into each food group.

The possibilities are endless!

Examples, Giveaways, Prizes, Shortcuts, or Take-Home Ideas for Clients

Of course, if you’re looking for examples, giveaways, prizes, shortcuts, or take-home ideas for clients, then you need look no further than the Nutrition Education Store. At the store, you can purchase…

These are wonderful examples that people can pass around while they create their own MyPlate plates. The plates also make perfect prizes for giveaways and can be distributed as take-home ideas for clients. Plus, if you don’t have the time, budget, or resources to have participants make their own plates, these plates offer a fantastic shortcut.

So. There you have it. A bunch of ideas for a great MyPlate project. Enjoy!

By Judy Doherty, PC II and Founder of Food and Health Communications, Inc

There’s always more in the store. Check out these fantastic MyPlate resources!

MyPlate Poster

MyPlate Wristbands

MyPlate PowerPoint Presentation

MyPlate Handout for Kids

MyPlate Apron

Eggplant Cooking Tips

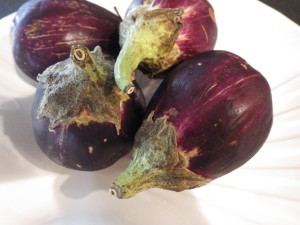
Eggplant!I recently got the best gift from a friend — 4 small eggplants from her garden. This is the same friend who brought me several pomegranates a couple years ago. I feel so lucky that I have friends that bring me wonderful fruits and vegetables — what great gifts!

Anyway, back to the eggplant.

I don’t usually buy eggplant, largely because I really don’t know what to do with it. My husband likes eggplant Parmesan, but he usually orders it in restaurants. I’d heard so many rumors and old wives’ tales about how to cook eggplant, and found myself baffled by all the conflicting information. For example, do I need to salt the eggplant? I remember my husband’s aunt always salting her eggplants and then weighing them down with books. On the other hand, according to an archived article from Food and Health Communications, you don’t have to bother with this if the eggplants are very fresh.

So how should I treat my eggplants?

Since salting can help remove the bitterness from an eggplant, I decided to salt mine. If you’d like to salt your eggplants before you cook them, first you need to slice or dice the eggplant into the shape you want to use. Sprinkle everything with about half a teaspoon of salt (not the half cup my husband’s aunt used to use) and then let everything sit in a colander for 30-60 minutes while the eggplant drains. Once that time is up, press out any excess liquid and dry the eggplant with a clean towel. You can also rinse the eggplant to remove extra salt before drying it.

So, there I was with salted eggplant. How did I want to cook it?

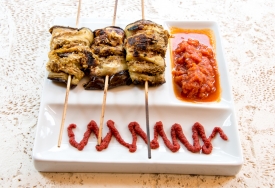
Grilled EggplantI dug further into the Food and Health Communications recipe archive and found a few articles about eggplant, along with several healthful recipes. Here are some of my favorites…

With time running short, I decided that I wanted to preserve my eggplants to cook later.

According to the National Center for Home Food Preservation, eggplant can be frozen. As far as I could tell, there is not a research-tested recipe for safely canning eggplant.

So, freezing it was!

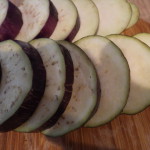
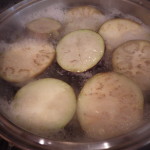
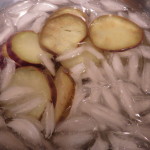
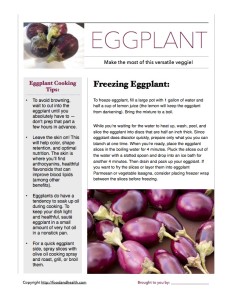
To freeze eggplant, fill a large pot with 1 gallon of water and half a cup of lemon juice (the lemon will keep the eggplant from darkening). Bring the mixture to a boil. While you’re waiting for the water to heat up, wash, peel, and slice the eggplant into discs that are half an inch thick. Since eggplant does discolor quickly, prepare only what you you can blanch at one time. When you’re ready, place the eggplant slices in the boiling water for 4 minutes. Pluck the slices out of the water with a slotted spoon and drop into an ice bath for another 4 minutes. Then drain and pack up your eggplant. If you want to fry the slices or layer them into eggplant Parmesan or vegetable lasagna, consider placing freezer wrap between the slices before freezing.

RIMG4637RIMG4670RIMG4677RIMG4732

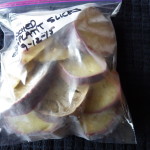
That’s basically what I did, with one little twist. I put the well-drained eggplant slices on a tray and froze them individually. Then I transferred everything to a freezer bag. Hooray! Now I have two quart bags full of sliced eggplant for later this year!

My research also led me to discover a bunch of great eggplant cooking tips. If you ever find yourself with a spare eggplant or two, consider the following…

  • To avoid browning, wait to cut into the eggplant until you absolutely have to — don’t prep that part a few hours in advance!
  • Leave the skin on! This will help color, shape retention, and optimal nutrition. You can find anthocyanins in the purple skin of an eggplant, and since anthocyanins have a positive impact on blood lipids, it would really be a shame to remove the skin.
  • Eggplants do have a tendency to soak up oil during cooking. To keep your dish light and healthful, sauté eggplant in a small amount of very hot oil in a nonstick pan.
  • Want a quick eggplant side? Spray slices with olive oil cooking spray and roast, grill, or broil them.

Anyway, that’s a brief recap of my eggplant adventures. I hope you liked it!

By Cheryle Jones Syracuse, MS, Professor Emeritus at The Ohio State University

Here’s a handout that features the most helpful points from today’s post. Get your copy today!

Eggplant Handout

And for more fun with eggplant, drop by the Nutrition Education Store!

Fruit and Vegetable Activity Set for Kids

I Heart Fruit and Veggies Bookmark

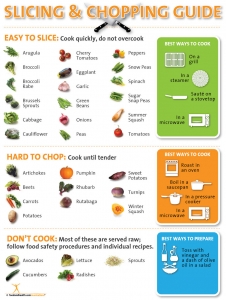
Vegetable Chopping Guide Poster

How to Make A Rainbow Salad

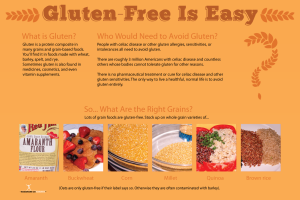
We love special requests. Here is a recent one for a Gluten Free Information Poster which shows the safe, gluten-free grains that are common:

Gluten free template-1

Gluten free is not always easy but hopefully we have made it easier. Thanks to Pat Hunter, MS, RD, for her request.

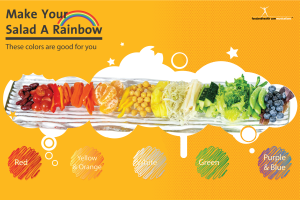
Here is another request from Goleta School District. They wanted a sign to jazz up their salad bar. So we did a little research here in the Boulder school district to find out what they are doing. They taped together a sign like a table tent. So we set out to design a big table tent that is the length of a salad bar or about 3 feet long. And Goleta School District wanted a rainbow salad. So we worked on a 3 foot salad.

The real salad was indeed 3 feet long. But you can’t take a great closeup photo of a 3 foot long salad so we took multiple shots and hand-stitched them together for the best results. This salad, in our Photoshop file, was over 300 inches long. It took up hundreds of meg on our computer. It had to be right-sized and then set into the poster:

36x24 Rainbow

We liked it so much we made a 18X12 Rainbow Salad poster and a large 2X3 vinyl Rainbow Salad banner. So anytime you want to promote eating LOTS of fruits and vegetables in all colors, these products are for you.

Or if you want to make a 3 foot long salad you can copy this one:

rainbow-small

We found a glass plank at Crate and Barrel – it was on sale. And we studied photos of real rainbows.

Then we arranged the vegetables and fruits like so:

  1. Kidney beans
  2. Cherry or pear tomatoes
  3. Red peppers
  4. Orange peppers
  5. Orange segments
  6. Yellow peppers
  7. Garbanzo beans
  8. Pineapple
  9. Cabbage
  10. Jicama
  11. Cucumbers
  12. Celery
  13. Broccoli
  14. Romaine
  15. Parsley
  16. Green lettuce
  17. Snow peas
  18. Blueberries
  19. Red baby romaine lettuce

This would make a great party platter or family style salad bar, too.

ENJOY!

If you have a special request, let us know – we make a lot of our special requests and always love more!

If you are looking for more healthy food photos, check out our new photo store: http://healthyfoodphotos.com