Doggy Bag Safety

I love “doggy bags.”

We don’t have a dog and most of the time those leftovers are for me.

With the size of many restaurant portions these days, it’s only wise to bring part of your food home for another meal… or possibly two. Whether you’re really taking the food home for the dog or yourself, it’s also important to keep it safe.

That’s where the “two hour rule” comes in.

Doggy Bag

Perishable food left at room temperature for more than two hours may become unsafe to eat. Remember, it becomes the “one hour rule” when temperatures are hotter than 90 degrees outside. Think about how hot the inside of a car can get. Bacteria grow very quickly at these temperatures.

If you’re planning on a movie or a little shopping after dinner, then it’s not safe to leave the food to sit in the car for that extra time. Bring a cooler with ice if you know you’re probably going to get a doggy bag… that’s a good thought whether you’re going straight home or not.

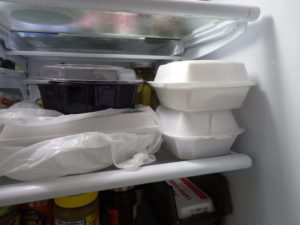
Once you get that doggy bag safely home, think about rewrapping those leftovers and putting them in the refrigerator as soon as possible. Those little foam boxes aren’t airtight and don’t do a great job of keeping the food moist and fresh.

The storage temperature of the leftovers is another key thing to think about. Refrigerators should be kept at 41 degrees or below.

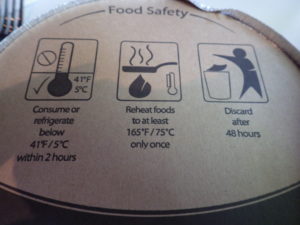
I was recently impressed when my container of restaurant leftovers came with food safety instructions. I think this was smart of them, wanting to keep their customers safe. This container was also sealed a little tigher than most.  As well as not spilling in the car on the way home, it helped to keep odors from other foods in the refrigerator from co-mingling with my leftover pasta. Their instructions for keeping the food safe were even a little more strict than I usually go by. But, less can be better in this instance.

Storage Instructions

Refrigerated food doesn’t keep forever. If you dine out a lot, then those little  containers tend to multiply uneaten in the refrigerator. The best recommendation is to plan on eating those leftovers within three to four days of bringing them home. Remember that you can’t always see, taste, or smell the bacteria in food that may make you sick.

For safety’s sake, leftover food should be heated thoroughly before eating.

This means to heat it to 165 degrees F. The only way to make sure you’re doing that is to use a food thermometer. When heating in a microwave, stir during cooking and allow some standing time for the temperatures to unify.

While it may seem wasteful, keep in mind the old saying: “when in doubt… throw it out!” Wasting a little food is not worth the risk of a foodborne illness. If you can’t keep the food safe, then you may as well leave it in the restaurant in the first place.

By Cheryle Jones Syracuse, MS, Professor Emeritus at The Ohio State University

Using a Doggy Bag for Calorie Savings:

Provided that you keep your doggy bag food safe, you can save some serious calories by cutting your restaurant entree in half.

Here are some examples:

  • The Lasagna Classico at Olive Garden weighs in at 930 calories per plate, with 470 of those calories coming from fat. If you split the meal and saved half for a different day, storing the rest in a doggie bag for later, then you would only consume 465 calories in the restaurant, which is a much more reasonable portion than the original.
  • The Ultimate Bacon Burger at Chili’s is another contender for the doggie bag approach. If you split the burger in half and save half for another meal, you’ll save 515 calories! Now if you ate the whole thing, the grand total for this meal (without fries!) would be 1030 calories. Do you see how a doggie bag can make a huge difference in portion control?
  • An All-American Slam breakfast at Denny’s has 990 calories per plate. If you only ate half, you’d bring the portion size down to a much more reasonable 495 calories.

If you were to make all 3 of these changes, you would save 1,475 calories over the course of those meals!

Plus, by putting the rest of a given meal in a doggy bag and following food-safe methods, you will have a whole other meal at your disposal. This in turn makes your restaurant choices stretch farther on a budget.

Here are some additional portion control resources…

And here’s a doggy bag safety handout, just for you!

Food Safety When Taking Restaurant Meals Home: A Handout

DoggieBagFoodSafety

Make Your Salad a Rainbow!

Did you know that four final rules for implementing the Healthy, Hunger-Free Kids Act (HHFKA) were just announced?

In a nutshell, the USDA finalized its rules for nutrition standards for all foods sold in schools, including breakfast, lunch, and snacks.

According to a press release sent out by the USDA, “As a key component of First Lady Michelle Obama’s Let’s Move! initiative to raise a healthier generation, the rules will ensure that children have access to healthy snacks and that nutrition standards for the foods marketed and served in schools are consistent. The rules will also promote integrity across the school meals programs.”

Want to help communicate the key nutrition lessons that are central to these new rules?

Check out this fantastic new salad bar sign!

After all, making healthful food available is only half the battle. We need to make it appealing to kids too.


This new salad bar sign is a better design and at a lower price than the previous version, and the video above offers some great inspiration on how to use it.

And that’s just the beginning. Here are some other “eat from the rainbow” resources that can help make healthful foods appealing to kids of all ages…

And here’s a free printable handout about eating a variety of healthful foods…

Rainbow Salad Handout

Display of the Month: Sugar Math

It’s time for a brand-new Display of the Month!

This month, I want to feature Sugar Math: an engaging and memorable way to teach valuable lessons about added sugars and good health.

Let’s dive right in!

The Materials:

The Activities:

August Sugar Math

The Details:

Set up your space as pictured above, adjusting your arrangements to fit the activities you’ve chosen and the space provided.

For the Sugar Quiz, pose the following questions to your group. You can divide them into teams and track points to declare a winner at the end or simply address volunteers individually. Don’t forget to offer Water WristbandsStickers, and Bookmarks as prizes for correct answers or for the winning team.

  1. True or false: A healthy diet should include no more than 10% of its calories from added sugars. (true)
  2. How many calories per day is the upper limit for added sugars for the average person? (200)
  3. And what is that in grams of sugar? (50)
  4. Where can you find added sugars? (on the new nutrition facts label, or point to the general list of sugars in a food and explore how to intuit how much of those sugars is added)
  5. Roughly how many teaspoons of sugar make up the average upper limit for daily added sugar intake? (12)

August Sugar Math Interactive

Now let’s talk about the Yogurt and Added Sugar Measurements Activity. You may need to rearrange your table for this one.

Gather your group around the table and hold up a clean, empty container that was once used to hold yogurt. Ask everyone how much sugar they think was in that container. Take guesses (if people are shy at first, use prizes like the Water WristbandsStickers, and Bookmarks as motivation for contributing), then show them where to find the answer on the label. Hold up a few more containers and repeat the process.

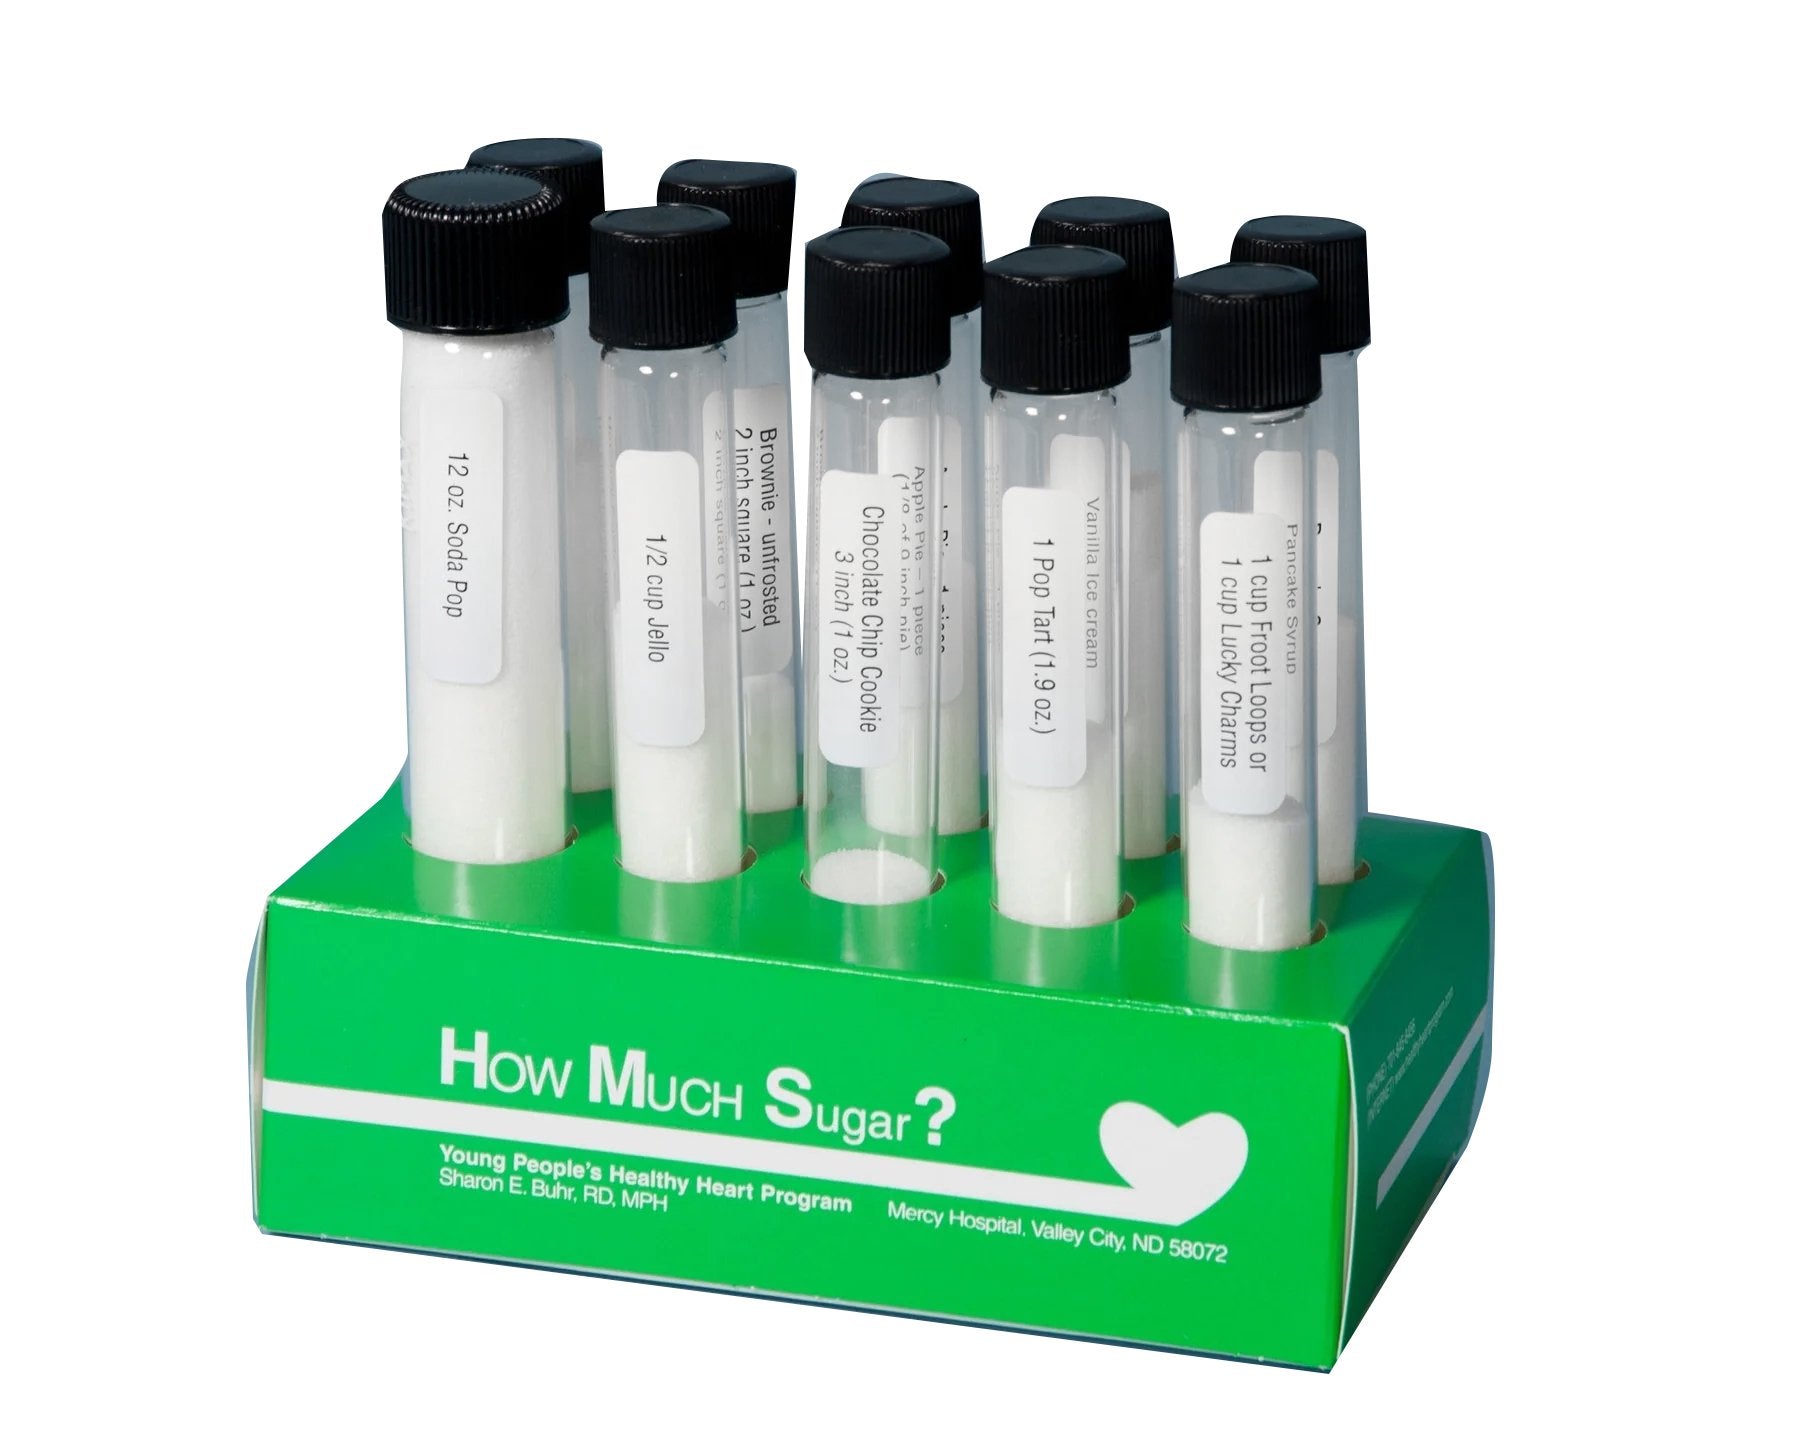
Pick a container of yogurt and have people use a teaspoon to measure out how much sugar is in that container (provide a dish of refined sugar and a few spoons for this purpose) assembling it all in a clear zip-top baggie. You can also use these amazing Sugar Test Tubes.

Do the same thing with the other containers of yogurt, discussing their findings as they go. How much sugar is in that yogurt? How much of it appears to be added sugar? Why?

If you have the resources, a Sugar Presentation is also a fun way to make lessons about added sugars more memorable. Cue up a projector (or your laptop) to show either the Added Sugars DVD or Sugar Scoop PowerPoint, or both! The PowerPoint comes with additional handouts, which you can distribute after the presentation.

Other Display Ideas:

Here is a collection of the past displays of the month. Which will make an appearance at your next health or wellness fair?

And here are some fantastic sugar resources, fresh from the Nutrition Education Store!

Free Nutrition Handout Program

Could you use a few more nutrition education handouts in your repertoire? Are you looking for ways to help your clients learn how to cook healthfully? Would you like to take a fresh look at key health topics? If you answered “yes” to any of the questions above (and honestly, even if you didn’t), then you’ll love this post! Why? Because today we’re announcing the start of a new free nutrition handout program. For absolutely no cost, you can download 10 brand-new handouts and distribute them as you see fit!

The first 5 handouts cover key cooking lessons for healthful meal preparation. Sometimes the hardest thing about making lifestyle changes to improve health can be figuring out where to start. These handouts address that issue by offering fun and accessible ways to prepare healthful meals. The 5 free cooking handouts cover…

  • Brown Rice
  • Easy Grilled Dinner
  • Fresh Pasta Sauce
  • Oatmeal
  • Steamed Vegetables

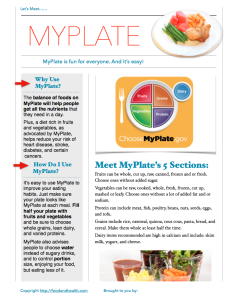
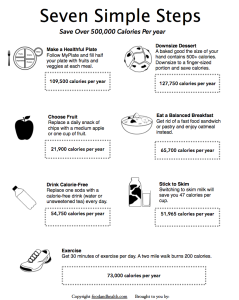
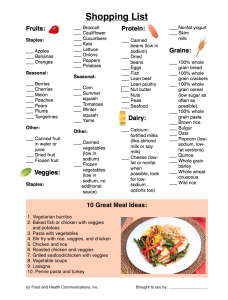
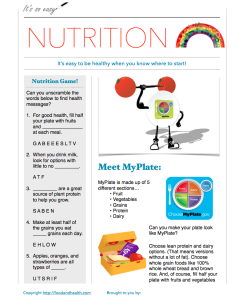
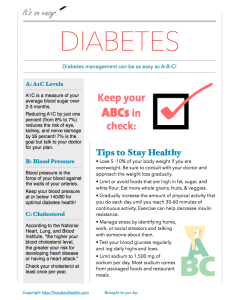
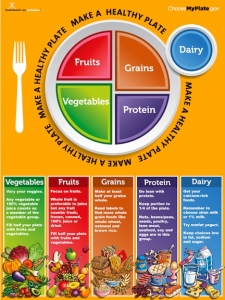
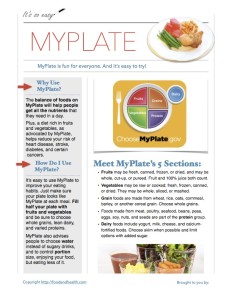
Each handout divides the preparation process into 3 easy steps and offers a discussion about why these foods are good for health. Free Handout Header Of course, that’s not all! There are 5 other free handouts that you can download in the same program. The first of the remaining nutrition handouts is all about MyPlate. It covers all 5 food groups, as well as the reasons why people can use MyPlate for good health. It even reviews strategies for getting started with MyPlate. This free MyPlate handout is versatile, colorful, and packed with great advice. MyPlate Handout There’s also a free version of our popular 7 Simple Steps handout. This great guide offers 7 ways that people can reduce their calorie intake. Each step is simple and supported by calculations of just how many calories a person would save/burn by following that advice over the course of a year. Last Free Handout   That’s not all! We made a guide to healthful shopping too! This handout has a list of key foods for good health and a balanced diet. Then it takes things to the next level with a list of 10 simple meal ideas. Your clients will love this one! Shopping List Of course, we don’t stop there! Check out this wonderful nutrition handout that’s just for kids! This page simplifies the key messages of MyPlate and uses fun games and word scrambles to make key points. What a great way to make learning fun! Kids NutritionAnd finally, last but certainly not least, is a free diabetes handout. Communicate the key messages of successfully managing diabetes with a single simple handout. This page covers A1C levels, blood pressure, cholesterol, and a guide to living healthfully with diabetes. What’s not to love? Free Diabetes Handout So, 10 great handouts, all for free! What do you say? Get more information or download the handouts today! Plus, there are tons of great handouts in the Nutrition Education Store. Check out these popular options!

MyPlate Handout Tearpad

Scale Down Your Portions Handout

Way to Eat with Diabetes Guide

How Much Fat is in That? Handouts

Fill Your Plate with Color!

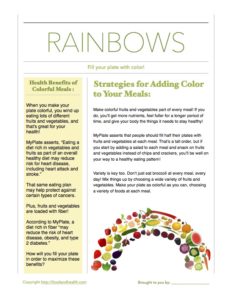
As a special treat today, I’d like to share the handout that is usually only available to people who’ve already bought the Rainbow Salad Floor Sticker! This handout is perfect for email blasts, displays, wellness fairs, and more! How will you use your copy?

Strategies for Adding Color to Your Meals:

Make colorful fruits and vegetables part of every meal! If you do, you’ll get more nutrients, feel fuller for a longer period of time, and give your body the things it needs to stay healthy!

MyPlate asserts that people should fill half their plates with fruits and vegetables at each meal. That’s a tall order, but if you start by adding a salad to each meal and snack on fruits and vegetables instead of chips and crackers, you’ll be well on your way to a healthy eating pattern!

Variety is key too. Don’t just eat broccoli at every meal, every day! Mix things up by choosing a wide variety of fruits and vegetables. Make your plate as colorful as you can, choosing a variety of foods at each meal.

Health Benefits of Colorful Meals :

When you make your plate colorful, you wind up eating lots of different fruits and vegetables, and that’s great for your health!

MyPlate asserts, “Eating a diet rich in vegetables and fruits as part of an overall healthy diet may reduce risk for heart disease, including heart attack and stroke.”

That same eating plan may help protect against certain types of cancers.

Plus, fruits and vegetables are loaded with fiber! According to MyPlate, a diet rich in fiber “may reduce the risk of heart disease, obesity, and type 2 diabetes.”

How will you fill your plate in order to maximize these benefits?

Here’s a printable copy of the handout that you can use however you’d like!

Rainbow Salad Floor Sticker Handout

And here are other great rainbow salad resources…

Confessions of a Juice Drinker

RIMG6810You would have thought I had committed a heinous crime when I admitted to a group of women that I frequently drink orange juice in the morning.  I know that eating whole fruit is a better choice, but I like juice.

Their astonished comments were accompanied by what they thought was a known fact that there was lots of sugar in juice. OK I admit this. One eight-ounce glass of juice contains 21 grams of sugar. However, if you drink only pure 100% juice, then that sugar is all from the fruit itself, not added sugar.

After their admonishments, I’m still trying to convince myself that drinking juice is acceptable. One of my rationalizations is that I make an effort to seek out juice that has added calcium and vitamin D. At least I’m getting those extra nutrients.

I also admit that I like lots of pulp. The pulp in orange juice is real orange pulp, but it doesn’t amount to any significant fiber. That said, I still like it. The majority of orange juice sold is pulp free, so the pulp is actually removed at the beginning of the process and then added back into juices that have pulp.

It takes about three oranges to make a cup of juice. Juice allows for a lot of calories to be consumed quickly. There are 71 calories in one orange, yet 8 ounces of orange juice provides 112 calories. If I ate three oranges instead of drinking the juice, I certainly would feel a lot fuller! Part of that is due to the three grams of dietary fiber in each orange.RIMG6848

It seems I’m not the only person who likes juice. According to the latest Dietary Guidelines for Americans, 1/3 of all fruit consumption in America is in the form of juice. The most commonly consumed fruit juices are orange, apple, and grape.

The Dietary Guidelines for Americans recommend that we “shift to mostly whole fruits, in nutrient-dense forms.” The guidelines also say that “although fruit juice can be part of a healthy eating pattern, it is lower than whole fruit in dietary fiber and when consumed in excess can contribute extra calories. Therefore, at least half of the recommended amount of fruit eaten daily should come from whole fruits.” They also go on to say that when juices are consumed, they should be 100% juice, without added sugar.

Here’s a tip when it comes to children and juice: the amount of fruit juice allowed in the USDA Food Patterns for young children aligns with the recommendation from the American Academy of Pediatrics. Young children should consume no more than 4 to 6 ounces of 100% fruit juice per day.

RIMG6844Let’s end with a comparison:

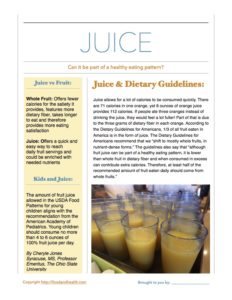
Whole fruit: offers fewer calories for the satiety it provides, features more dietary fiber, takes longer to eat and therefore provides more eating satisfaction

Juice: offers a quick and easy way to reach daily fruit servings and could be enriched with needed nutrients

Here are the take home messages:

  • Seek moderation in all things.
  • Watch the amount of juice consumed.
  • Make that “shift” to whole fruit whenever possible.

Some habits are hard to break.

By Cheryle Jones Syracuse, MS, Professor Emeritus, The Ohio State University

PS Here’s a printable handout that features the highlights of today’s post.

Juice

Make Great Grilled Salads at Home!

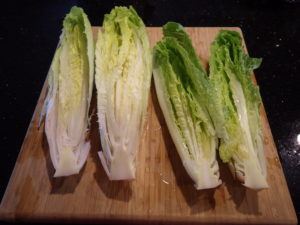
Sliced RomaineI’m always on the lookout for ways to eat, serve, and enjoy more vegetables. Salads are winners, but sometimes the toppings tend to pile on more calories and sodium than I want.

Caesar salad is a great example. It sounds healthy in the beginning, but the high-fat dressing, huge dose of cheese, and heaps of croutons frequently outweigh the benefits of the dark green leafy Romaine lettuce. A tablespoon of a typical Caesar dressing contains around 8.5 grams of fat and roughly 80 calories. This can be cut a little by using a lower-calorie version, but then you increase the amount of sugar and maybe even sodium.

But the foundation is sound. Romaine is a great green, high in vitamins K, A and folate. Like other greens, it’s almost fat-free and low in calories, with about 50 calories in a half a head and a bonus of dietary fiber (6.5 grams that same half head). Romaine is usually the basis for the Caesar salad, so let’s capitalize on it.

How?

By putting it on the grill.

Recently my husband and I went to a new restaurant in our community. I was surprised to see a “grilled Caesar salad” on the menu.  It brought back memories of a similar salad I had in a restaurant in Baltimore over 15 years ago. I was so glad to be reminded of something I had enjoyed, and that in turn inspired me to give my own twist on this other way to enjoy a salad.

I fired up the grill and decided to try a grilled salad of my own. It’s so simple and a winner! Plus, it really doesn’t need dressing or croutons and a small amount of cheese goes a long way! When I served it for the first time, I had guests going back for seconds on salads. Now how often does that happen?!

Want to try it for yourself?

Here’s what I did.

On the grill!I started with full heads of Romaine lettuce. I washed and pulled of any wilted leaves, leaving much of the core intact so that the leaves still clung together. (Nutrition tip: keep as many of those dark green outer leaves as possible).

I then cut the heads in half and washed them again. After that, I put a small amount of olive oil (about one tablespoon) and some (about 1 ½ teaspoon) dried garlic seasoning into a large zip-top bag and shook it around. I used garlic seasoning since it’s in a Caesar salad, but you could experiment with anything. Then I added the Romaine heads and refrigerated them in the marinade, shaking the bag a couple of times to coat the lettuce with the oil and seasoning.

I’ve seen recipes online that didn’t put the lettuce in a bag and brushed the leaves with oil just before putting on the grill.  I’m guessing this would work well, too. This was just my way of getting the work done early. It also eliminated a brush and allowed me to take the seasoned lettuce straight to the grill.

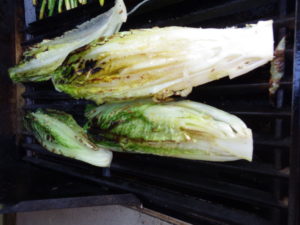
Once you’ve got the Romaine on the grill, the key is timing. It doesn’t take long:three to four minutes on each side at the most. The lettuce should be slightly charred and a little smoky. I topped each head with grated Parmesan cheese and served it to my guests. I don’t think it needed any other dressing, but a small amount of low-fat Caesar dressing could be added. Yum!

By Cheryle Jones Syracuse, MS, Professor Emeritus at The Ohio State University

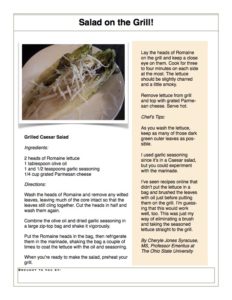
And here’s a printable handout with the recipe! How will you use your copy?

Grilled Caesar Salad

Don’t miss these other amazing salad resources from the Nutrition Education Store!

Display of the Month: Nutrition Month

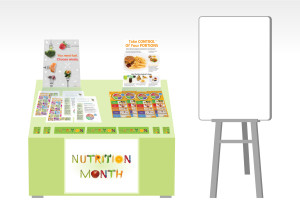
It’s National Nutrition Month, and to celebrate, I couldn’t resist making a Nutrition Month display for the Nutrition Education Store’s March Display of the Month! Can you blame me? Here’s what you need to make your own display…

Display for Nutrition MonthThe Materials:

The Activities:

  • Nutrition Month ABCs
  • Brainstorming: Ways to Savor the Flavor of Eating Right

The Details:

To set up your booth, grab a table and drape the front with the Nutrition Month Banner. Top it with the posters you like best from the Quality Nutrition Poster Set. They’re all great for Nutrition Month, but I especially like the Wise Choices and Portion Control posters for this particular display. Put each poster on a Tabletop Easel in order to make it easy to see. Intersperse the educational posters with some Nutrition from A to Z Handouts and MyPlate Brochure Cards, then line the front of your table with Nutrition Month Bookmarks and Nutrition Month Stickers. Toss a whiteboard up on a stand near your display and grab a few dry erase markers if you’re going to do the activities outlined below.

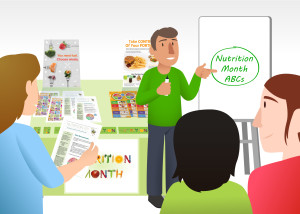
Display and ActivitiesFor the Nutrition Month ABCs activity, ask people to think up words that start with each letter of the alphabet, focusing on key health and nutrition information. For example, the letter “A” could feature words like “antioxidants,” “activity,” “anthocyanins,” and even “vitamin A” if the group is flexible. Discuss each word as it is offered and give prizes to the people who choose to participate. Pass out copies of the Nutrition from A to Z Handout to conclude the activity.

When it comes the the second activity, Brainstorming Ways to Savor the Flavor of Eating Right, your white board can come in handy again. Discuss this year’s theme for Nutrition Month. What are some healthy ways that people can follow that theme and “savor the flavor of eating right” in a manner that is balanced and fun? Record people’s answers on your whiteboard. If they need inspiration, point them to the MyPlate Brochure Cards and Nutrition Posters in your display.

Additional Resources:

If you’re looking for even more materials that you can use for Nutrition Month, don’t miss these additional nutrition education resources…

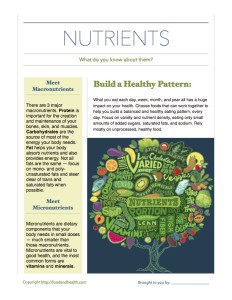
And here’s another installment of my free printable nutrition education materials — a PDF handout that covers the basics of nutrition

Nutrition Basics for Nutrition Month

More Displays of the Month:

Finally, here are some other fun materials from the Nutrition Education Store!

10,000 Steps Floor Sticker

Digital MyPlate Poster and Resource Collection

MyPlate Stress Relief Coloring Book

Nutrition Poster Guide

Today I want to try something a little different.

I’d like to offer a tour of a few lessons from some of the top posters in the Nutrition Education Store.

You see, 3 different posters have been extremely popular amongst health and nutrition educators recently, and now I want to draw them to your attention. After all, my job is to help you look your very best right now. So let’s take a look at the 3 top posters in the Nutrition Education Store.

Are you ready for this?

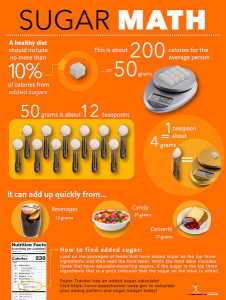
Sugar Math PosterPoster #1 is the new Sugar Math Poster. Its key lesson is to limit added sugars. 

How does it teach this lesson?

Through math problems!

You see, sometimes communicating important nutrition messages is a matter of breaking them down into manageable sections, making the information both accessible and memorable.

This poster manages that with varied representations of just how much added sugar people should limit themselves to each day.

Remember, the Dietary Guidelines for Americans advise people to “Shift to reduce added sugars consumption to less than 10 percent of calories per day.” That 10% is roughly 200 calories for the average person. That’s equal to 50 grams, which in turn is equal to about 12 teaspoons. The Sugar Math Poster features images of each of these amounts in an approach that’s bound to appeal to a wide range of learning styles.

The poster also highlights key sources of added sugars and spells out how to figure out how much added sugar is in a variety of packaged foods. No wonder it’s one of the most popular posters in the store!

Now let’s move on to the next poster.

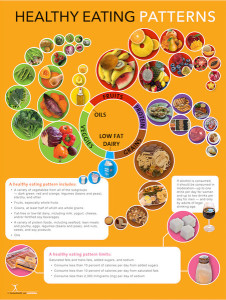
Eating Patterns PosterPoster #2 is the Eating Patterns Poster from the 2015 Dietary Guidelines for Americans series. Its key lesson is to shift into a healthier eating pattern.

As you can see, this poster focuses on what is and is not included in a healthy eating pattern. With beautiful photos placed in a uniquely eye-catching arrangement, this post rocketed to the top of our list practically as soon as it was released.

So why represent healthy foods visually?

The photos demonstrate that healthy eating doesn’t have to be plain and boring. By making the foods that people need to consume look their very best, the photos in this poster add appeal to the eating pattern they’re illustrating. Plus, they provide a pop of color that would be welcome in any office, cafeteria, or display.

How would you use this poster in your life?

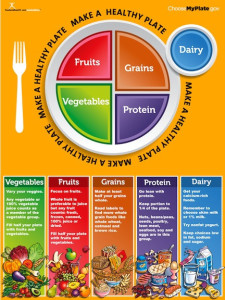
MyPlate PosterFinally, poster #3 is a classic — our very first MyPlate Poster. It teaches a fun way to balance your plate at each meal.

Ever since the USDA released MyPlate in 2011, it has been a popular tool to help educators teach their audiences about proper portions and proportions. As you know, My Plate offers a way to visualize a healthy and balanced plate at each meal, with half the plate filled with fruits and vegetables, grains taking up another quarter, and the remaining quarter of the plate filled with protein foods. A side of dairy rounds out the plate and completes the look.

Each food group has its own lessons and tips, and they all come together to create a healthy eating experience. This poster highlights the most important aspects of MyPlate, illustrating each food group and drawing attention to the key lessons associated with each section of the plate. Its as memorable as it is engaging, and the My Plate poster has been getting rave reviews since we first brought it to the store.

As an added bonus, I’d like to offer you an exclusive look at the handout that accompanies this MyPlate poster. Normally you could only get it if you bought the poster, but I want to make an exception today, so get your free copy of this handout now!

MyPlate Poster Handout

And finally, here are some more of the materials that are at the top of the Nutrition Education Store right now!

12 Lessons of Diabetes Kit

My Plate Handout Tearpad

Cooking Demonstration Kit: Set of 10 Cooking Demo Tools


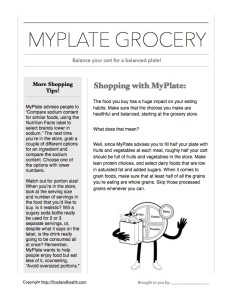
Shopping with MyPlate: A Handout

Balance your cart for a balanced plate!

Shopping with My Plate:

The food you buy has a huge impact on your eating habits. Make sure that the choices you make are healthful and balanced, starting at the grocery store.

What does that mean?

Well, since MyPlate advises you to fill half your plate with fruits and vegetables at each meal, roughly half your cart should be full of fruits and vegetables in the store. Make lean protein choices, and select dairy foods that are low in saturated fat and added sugars. When it comes to grain foods, make sure that at least half of all the grains you’re eating are whole grains. Skip those processed grains whenever you can.

More Shopping Tips!

My Plate advises people to “Compare sodium content for similar foods, using the Nutrition Facts label to select brands lower in sodium.” The next time you’re in the store, grab a couple of different options for an ingredient and compare the sodium content. Choose one of the options with lower numbers.

Watch out for portion size! When you’re in the store, look at the serving size and number of servings in the food that you’d like to buy. Is it realistic? Will a sugary soda bottle really be used for 2 or 3 separate servings, or, despite what it says on the label, is the drink really going to be consumed all at once? Remember, MyPlate wants to help people enjoy food but eat less of it, counseling, “Avoid oversized portions.”

Here’s a printable MyPlate handout that you can use however you see fit!

MyPlate Shopping Handout

And here are even more MyPlate educational materials, fresh from the Nutrition Education Store!

Art of Health MyPlate Poster

Health Hopscotch Floor Sticker and Game

Salt and Sodium Poster