Sleep Right for Health

Healthy eating and exercise go hand in hand. It’s hard to discuss one without touching on the other. The topics are interwoven.

Sleep is another thread to weave into your education sessions. In fact, sleep, nutrition, and exercise are often called the pillars of health.

Start spreading the news about sleep with our Sleep Right poster! This poster will catch people’s attention. It will get them to think more about their sleep habits and realize that sleep is just as important as healthy eating and exercise.

How can you incorporate the topic of sleep into your counseling sessions or classes?

1. Get information about sleep from a reliable source, like the National Institutes of Health (NIH) website. Check out the section on sleep deprivation and deficiency.

2. Find out if your clients are getting enough sleep. According to the NIH, you probably aren’t getting enough sleep if you often feel like you could doze off while …

  • Sitting and reading or watching TV.
  • Sitting still in a public place, such as a movie theater, meeting, or classroom.
  • Riding in a car for an hour without stopping.
  • Sitting and talking to someone.
  • Sitting quietly after lunch.
  • Sitting in traffic for a few minutes.

3. For people who are really motivated to change their sleep habits, suggest that they start by keeping a sleep diary (here’s one from NIH).

4. Offer a class on nutrition and sleep geared toward occupations where people often struggle with sleep issues, such as:

  • Shift workers
  • Truck drivers
  • Pilots
  • Factory workers
  • First responders
  • Health care workers

5. Provide diet and sleep education for these audiences:

  • Parents
  • Teachers & coaches
  • Teens
  • College students

Sleep fits right in when you’re talking about weight management, heart disease, diabetes, food and mood, healthy aging, mental performance, sports nutrition, and healthy eating in general. So start spreading the word about the importance of sleep!

Sodium Sneaks Up On You

I think most of us are aware of sodium in many canned foods and routinely purchase low sodium products. But sometimes it pops up where you least expect it.

I’m talking about commercially prepared salsa.

Salsa is running neck-to-neck with ketchup as the most popular condiment in the United States.  More and more I’m seeing recipes that use salsa as an ingredient in a recipe.  I recently made soup that used an entire jar of salsa to add a bolt of flavor.  The recipe encouraged cooks to purchase their favorite type of salsa—chunky, smooth, hot, mild, with beans or without…..whatever you wanted to add a punch to this soup recipe.

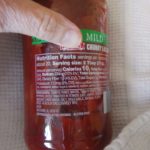
Not only did it add a punch —it added a lot of sodium. I sure was surprised. When was the last time you really read the Nutrition Facts on the label of a bottle of commercially made salsa? Yikes!  I think that it’s interesting to note that the word salsa comes from Latin for salt or salted.

Let’s get to the nitty-gritty—the Nutrition Facts label clearly read contains 210 milligrams of sodium per serving.  The kicker is the serving size.  Just two tablespoons is a serving. There were 24 servings in the bottle.  This is kind of like that old commercial for chips….who can eat just one serving of salsa?  Think about the last time you were at a Mexican restaurant and they put that basket of chips and bowl of salsa in front of you? Did you stop at two tablespoons?

The entire 24-ounce jar of chunky mild salsa contained 5250 milligrams of sodium.  The recipe made 12 one-cup servings—so the sodium provided by the salsa alone was 438 milligrams. This is on par with a serving of soup from a can.

So, what’s good about salsa?  It can be low in calories (10 per serving), low in sugar (1 gram) and contains some fiber (1 gram).

The amount of sodium in the diet has been linked to increased blood pressure and increased risk of cardiovascular disease in adults. The 2015-2020 US Dietary Guidelines tell us that adults and children ages 14 and older should limit sodium to less than 2,300 mg per day. This is about what you get in one teaspoon of salt.   For people with high blood pressure, a further reduction to 1,500 mg per day is recommended.

It sure is easy to grab a jar of salsa from the cupboard and use it as an ingredient. But like most processed food, it can backfire.  When shopping, read nutrition labels and try to find a product with less sodium per serving. Other obvious solutions would be to cut back on serving size. Another idea is to experiment and modify the recipe using low-salt tomatoes or tomato sauce and add your own herbs, peppers, and spices. At a restaurant opt for a fresh Pico de Gallo instead of an unknown (possible sodium bomb.) Trader Joe has a fire-roasted salsa that has no salt added and is especially nice for adding to dishes like soups (tip and favorite of Barbara Rice, RD, LD).

Making your own salsa can give you that flavor boost with limited (or no) sodium, too.  Not only do they provide fresh flavor but also some fresh vegetables to the diet.

Here is a free salsa recipe that is very easy to make and it contains no added salt:

https://foodandhealth.com/recipes.php/recipe/832

Cheryle Jones Syracuse, MS
Professor Emeritus, The Ohio State University


We Need to Talk About Vaping

Vaping has been getting a lot of press since last year’s outbreak of lung injuries related to e-cigarettes. But even before that, the Surgeon General called on health care providers and teachers to inform youth about the dangers of vaping. (1)

Our new Dangers of Vaping poster is a great starting point for these important conversations. Display this poster wherever kids or parents will see it – in cafeterias, gyms, classrooms, exam rooms, waiting areas, and offices.

We know you may not be familiar with vaping, so here’s some basic information about the topic and tips on where to find out more:

Where to find accurate information:

  1. Start by watching this video from MD Anderson Cancer Center. It touches on pretty much everything you need to know about vaping and is easy to understand.
  2. Next, check out these two websites for facts, tip sheets, infographics, and other resources:

Vaping basics you need to know:

  1. Vapes (e-cigarettes) are the most commonly used tobacco product among youth. The use of e-cigarettes is higher among high school students than adults.
  2. Vaping refers to the use of e-cigarettes, which are electronic devices that heat a liquid into an aerosol that the user inhales through a mouthpiece.
    • E-cigarettes come in all shapes and sizes. They are also known as e-cigs, vapes, vape pens, e-hookahs, mods, and tank systems.
    • Click here for a comprehensive glossary, including pictures. You can also see what the devices look like in the video mentioned above.
    • Juul is a very popular brand of e-cigarettes. Juuls are shaped like USB drives, making them easy for kids to hide. They also come in flavors that appeal to youth.
  3. The vaping liquid typically contains nicotine, flavorings, and other additives. E-cigarette devices can also be used with marijuana and other substances.
    • Besides nicotine, the liquid may also contain other harmful ingredients, such as:
      • Flavorants (like diacetyl, a chemical linked to serious lung disease).
      • Volatile organic compounds (like benzene, which is found in car exhaust).
      • Heavy metals (like nickel, tin, and lead).
  4. Many parents and youth don’t realize that most e-cigarettes contain nicotine, even though the label may not say so.
    • Nicotine comes from tobacco and is highly addictive.
    • Nicotine affects brain development. Since the brain is still developing until about age 25, the use of any tobacco product is particularly dangerous for youth and young adults.
  5. Other potential dangers from vaping include:
    • Increased heart rate and blood pressure.
    • Lung damage.
    • Stomach upset.
    • Worsened asthma.

Free downloads we like:

  1. Surgeon General’s parent tip sheet.
  2. Surgeon General’s health care provider conversation card.

(1) U.S. Department of Health and Human Services. E-Cigarette Use Among Youth and Young Adults: A Report of the Surgeon General—Executive Summary. Atlanta, GA: U.S. Department of Health and Human Services, Centers for Disease Control and Prevention, National Center for Chronic Disease Prevention and Health Promotion, Office on Smoking and Health, 2016. Accessed online February 2020.

Getting To Know Listeria

Most people know about Salmonella, E. coli and Botulism and are now, unfortunately, adding Listeria to their list of frequently heard of foodborne illnesses.

Listeria monocytogenes (L. monocytogenes) is not one of the top most frequently occurring foodborne illnesses, but it is one of the most costly and deadly. Listeria—the illness is called listeriosis– causes the third highest number of foodborne illness related deaths in the United States annually. The Center for Disease Control and Prevention (CDC) estimates 1,600 people get listeriosis each year, and about 260 die.

What makes Listeria scary is that it resists some of the things—salt, nitrates and acidity– that are usually used to control bacteria growth. What makes it extra scary is that Listeria can grow and live for a long time at refrigerator temperatures. These pathogens can easily hide in nooks and crannies of a refrigerator, cooler or manufacturing equipment for a long time. You can’t see, taste or smell Listeria in foods.

A good thing about Listeria is that it takes a large amount to make someone sick and most healthy people will not get sick from eating foods contaminated with Listeria. The people that are at the highest risk to get listeriosis are pregnant women because it could lead to miscarriage, stillbirth or septicemia or meningitis in the newborn. Others at risk are people with organ transplants, children, the elderly and those that are immune suppressed due to illnesses such as cancer, renal disease, diabetes and AIDS.

The good news is that proper cooking and reheating of foods can control Listeria. The bad news is many of the items that have been found to contain Listeria are foods that we don’t usually eat cooked. The most risky foods are those that are kept in the refrigerator for a long time (cheeses), cooked foods that have been further handled (lunchmeats, hot dogs, and meat spreads) and foods that are minimally processed (fresh fruits, vegetables and cold smoked seafood). In the past couple of years Listeria has been found in hummus, ready-made salmon salad, sliced cooked chicken, leafy greens, sprouts, fresh cut vegetables, ice cream, unpasteurized cheese, frozen produce, caramel apples, cantaloupe and even cat food.

What can you do to protect yourself from Listeria?

• Keep perishable foods refrigerated
• Prevent ready-to-eat foods from being cross contaminated by raw foods.
• Cook beef, pork and poultry to the recommended minimum internal temperatures.
• Wash raw fruits and vegetables before eating.
• Avoid unpasteurized milk or foods made from raw milk.
• Read and heed label instructions to “keep refrigerated” and “use by” dates on refrigerated foods.
• Only keep leftovers three to four days. Heat leftovers and “ready to eat foods” to at least 165 degrees F.
• Those especially at risk should avoid soft cheeses such as Feta, Brie and blue-veined cheeses, as well as unheated lunchmeats, hot dogs and frozen vegetables.
• Pay attention to food recalls.

Keep your refrigerator clean and as cold as possible (40 degrees or lower). Although Listeria can grow in the refrigerator, it grows more slowly under colder conditions. Use a refrigerator thermometer to double-check the temperature is below 40 degrees F. Clean and sanitize the shelves of your refrigerator regularly.

References:
Listeria, FSE 99-21, Pat A. Curtis, Ph.D and John E. Rushing, Ph.D, Department of Food Science, North Carolina State University. https://fbns.ncsu.edu/extension_program/documents/foodsafety_listeria.pdf
Barfblog, Benjamin Chapman, Ph.D, State Specialist, NCSU and Doug Powell, Ph.D, Barfblog publisher. www.barfblog.com
Listeria (Listeriosis) The Center for Disease Control and Prevention, https://www.cdc.gov/listeria/index.html

What don’t you eat?

I frequently teach food safety classes for food service managers. At the end of the first day of class—after sessions on foodborne illness pathogens and potentially hazardous foods— someone usually asks me if there are foods or places that I just don’t eat.  Local sanitarians are often guest speakers in this class—I like to ask them that same question. I think it gives the class members “food for thought” and makes the information we’ve taught more personal.


You may have seen the list that’s been published by several sources and frequently pops up on Facebook. It’s the six foods Bill Marler never eats (http://www.marlerblog.com/lawyer-oped/6-foods-bill-marler-never-eats/).  Marler is an attorney that frequently litigates foodborne illness cases. His six “NO GO” foods are:  unpasteurized milk, raw sprouts, undercooked meat, pre-washed or pre-cut fruits and vegetables, raw or undercooked eggs and raw oysters or shellfish.


My list is similar. Like him, I don’t do undercooked meats, unpasteurized milk, raw sprouts or raw oysters.  I also add to this list:  some raw fish, ceviche, unpasteurized cheeses, Hollandaise sauce, home canned foods and some foods at buffet lines.


I’m not as picky as Marler about the pre-washed fruits and vegetables.  While most of the time I do purchase unwashed and uncut items, I will occasionally buy pre-washed items to save time.  When I do, I watch the dates carefully and the refrigeration temps.


Also, I will occasionally eat an undercooked egg—but definitely opt for pasteurized eggs for recipes that require raw eggs, especially when serving to guests that may be immune compromised.


Why do I say “some raw fish”? Most fish that is used for sushi is frozen before use to kill potential parasites—so I don’t necessarily consider them risky.  There are other fish—like most of the tunas—that aren’t at risk for parasites and I have eaten them raw. But some “creative chefs” serve fish species that aren’t on the no parasite list. If I don’t know, I don’t eat. In general I usually opt for cooked or vegetable sushi. I consider the sushi chef more of a risk for cross-contamination than the fish itself. I watch to see how they handle the raw vs. cooked products, do they keep their ingredients cold and how often do they clean their tables.


I also won’t eat ceviche.  For some of the same reasons I don’t do “some raw fish”.  While many people consider the fish in ceviche “cooked” by the lime or lemon juice added to the raw fish—it isn’t heat treated.  The acids may reduce some of the bacteria—I just don’t know how much.  Some versions of ceviche are cooked, if I don’t know, I don’t eat. I frequently come across ceviche when traveling to locations that don’t have adequate refrigeration or where I have cross contamination concerns. It’s just something I avoid.


I also don’t eat home canned foods unless I know who made them and what recipe and process was used. If it’s an old recipe or not from USDA or National Center for Home Food Preservation I’m going not going to eat it. I also need to trust the person who did the canning….are they a rule and recipe follower? …if not…I’m not going to eat it.


I also questioned our own Chef Judy—what does she “not eat”.

While her is very similar to the others with oysters, undercooked ground meat, sprouts and raw dairy she interestingly adds chicken salad.


Having trained as a chef, she also adds a couple situations and locations that cause her concern. These include buffets, slow restaurants and places where prepared foods sit at room temperature.  All good thoughts.


When I ask this question of sanitarians their list always includes raw sprouts.  But also say that there are things they would eat themselves that they don’t feed their kids. These include undercooked eggs and undercooked meats.


Everyone’s list is a little different—based on their knowledge, experiences and education related to food safety.  No food can be completely risk free, but we can teach good food safety practices to help reduce these risks.  Everyone has to use their best judgement and make an educated decision for themselves (and their families) regarding what’s on their “don’t eat” list. What’s on yours? Send us a tweet @foodhealth or reply to the email that announced this post or click contact us below and let us know!

Cheryle Jones Syracuse, MS

Professor Emeritus, The Ohio State University

Resources:

CDC list of outbreaks

Foodsafety.gov list of recalls

Food Safety Education Materials

Is it TWO or FOUR?

This is something that’s been bugging me.  I teach food safety, primarily to food service managers and folks that work in restaurants.  Occasionally I do work with consumer groups. If you teach these topics you know that there are a couple differences in what we teach the restaurant folks vs. what we teach consumers.  Why?

According to the FDA Food Code food service operations are allowed to keep TCS (or potentially hazardous)  food in the temperature danger zone (TDZ) of 41 degrees to 135 degrees F for up to FOUR hours.

But, when you teach it to consumers it’s the TWO HOUR RULE.  According to the United States Department of Agriculture: “Never leave food out of refrigeration over 2 hours. If the temperature is above 90 °F, food should not be left out more than 1 hour.” https://www.fsis.usda.gov .

And if you really want to get “picky” their TDZ  is a bit different, too. They say 40 degrees to 140 degrees F.

Food doesn’t instantly go bad at either two hours or four hours. Again, according to the USDA  “leaving food out too long at room temperature can cause bacteria (such as Staphylococcus aureus, Salmonella Enteritidis, Escherichia coli O157:H7, and Campylobacter) to grow to dangerous levels that can cause illness. Bacteria grow most rapidly in the range of temperatures between 40 °F and 140 °F, doubling in number in as little as 20 minutes.”

Why the difference?  I don’t really have an “official” scientific reason. According to the folks at the USDA Meat and Poultry hotline they are leaving an abundance of caution with the conservative consumer recommendations.

While teaching I try to explain to folks that the four hours allowed for restaurants/food service is making the assumption that these folks are following recommended FDA food safety practices. These include lots of  hand washing and gloves,  use of sanitizers, working to prevent cross-contamination and using timers and thermometers.

This conservative approach might be a great idea for consumers. A lot of things can happen (or not happen) in a home kitchen.  I’m hoping that they do wash their hands before cooking and do use some good food safety procedures.  Not many folks in home kitchens use sanitizers but let’s hope they use lots of hot soapy water. Does the dog or cat climb on that counter when they are alone in the house?  Did mom get called away and thinks it’s two hours, when really it was more?  Food in restaurants are delivered in refrigerated trucks and put away quickly, while sometimes food stays in the TDZ longer than planned between the grocery store and the home refrigerator. I also wonder how many home refrigerators have thermometers.

What I  think is really important…if it’s two or four…. follow good food safety practices all of the time.

Cheryle Jones Syracuse, MS

Professor Emeritus, The Ohio State University


Health Fair Planning Guide

Health Fair Planning Guide – Health Fair Activities – Health Fair Banner

Freebie Alert! This post is packed with free health fair activity ideas, free health fair handouts, and free health fair planning resources. Use it to make your next health fair or wellness fair a success.

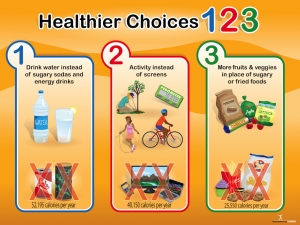
Cheryl Bachinski, a school nurse, is planning a health fair and she needs a banner to help people who are constrained by time and money to make better choices for their families who are struggling with their weight. She says they drink too many sweetened sodas, eat too many cupcakes and chips, along with other packaged snacks, and they never exercise. Wait until you see the new banner we created for her. Check it out and you can buy it on sale or use the display idea for your own.
How will you stand out from the crowd at the next health or wellness fair?

Ready for the answer?

It’s all about the booth.

Yes, there are totally committees, special presentations, and deals with vendors, but in our experience, a successful day at a health fair comes down to your booth.

So, that’s what we’re going to address — tips and tricks for putting together the best nutrition education wellness fair booth around.

Objectives:

Wellness and Health Fair Kit

Let’s begin by setting up some objectives for your day at the health fair. Which of the following is an objective you’d like to address? Does the health fair have a preexisting theme?

  • Health awareness
  • Health screenings
  • Immunizations
  • Marketing
  • Community event

If more than one objective applies to you, great! However, if all of them apply to you, you may want to narrow your focus to just 1 or 2 primary objectives that you can use your booth to address.

Resources:

When it comes to big events that require committees and multiple vendors, there are lots of resources to make life easier. Look through the following guides if you’re putting together your own large health fair or wellness event…

Now, back to the booths.

Use our new handy theme-picker to choose the theme that is right for you or read below for more ideas.

Theme Ideas for Children:

Wellness and Health Fair Kit for Kids

If your health fair booth is geared towards children, you will have the best results with simple, colorful, and engaging content. Coming up with those materials and then coordinating them will get a lot easier if you select a single theme for your booth. Some of the most popular themes that we’ve used or observed (and can therefore recommend to you) include…

Theme Ideas for Adults and Older Kids:
Salsa Wellness Fair Kit

Most wellness fairs appear to be geared towards adults these days, so if that’s what you’re working with, consider any of the following tried-and-true themes…

Theme Ideas for Families:

There are many ways that families can team up to improve their health together, but most people suffer from a crisis of imagination and can’t think of a way to implement a healthful habit as a family. Inspire them with these wonderful family-friendly health and nutrition themes.

Building a Great Booth and Activity Center:

So, once you have an overarching objective identified and a theme established, it’s time to get down to business.

Your booth.

Make Your Salad a Rainbow Banner

How can you make it engaging, with activities that draw and hold participants?

Establishing a theme was a great start. So was finding an objective. Use these to guide the nitty-gritty of your booth.

Based on the wellness fair we have participated in, observed, and/or discussed, the most successful booths have balanced a combination of the following…

  • Engaging banner
  • Interactive component
  • Giveaway
  • Resources for more information

If you don’t have space or resources for all four, pick as many as are reasonable and build your balance from there.

So, first up, the banner. There’s a comprehensive post about wellness fair displays, and it has everything you need to know about banners. Of course, you can also save yourself the headache (and multiple trips to the store for supplies) by buying a crowd-tested, scientifically-accurate, and utterly up-to-date banner that matches your vision for the booth.

Next we’re going to tackle the interactive component. Just kidding. We’re going to go really in-depth with that one, so it gets its own section further down. Stay tuned!

Real Food Grows Bookmark

The third element of an engaging wellness fair booth is a giveaway. You can either set up a raffle for a large prize or offer a selection of smaller prizes. Great prize ideas include…

  • Cookbooks
  • Bookmarks
  • App download codes
  • Recipe cards
  • Cooking utensils
  • Exercise equipment (like jump ropes, hula hoops, etc)

You know your audience. What resonates the most with them?

So. Why a giveaway? A giveaway will draw people to your booth, especially if you offer unique prizes and get the word out about your raffle or treat. Once people are at your booth, you can convey the messages that you want to communicate. It’s hard to get the word out if no one comes to your booth!

The final element of a successful wellness fair booth and/or activity center is a way to offer your audience more information. Often people would like to learn more about a topic at their leisure, rather than while standing in the middle of a busy nutrition fair. Handouts, lists of helpful websites, reference materials, or recipe cards are all great resources to have at your booth. That way, people can revisit the keys of your message, making it more likely to stick in their minds.

Great Wellness Fair Activity Ideas:

Prevent the Flu Poster

The interactive component for a wellness fair can be adjusted to fit your space, resources, and audience. Consider…

  • Having passers-by participate in an activity or game (examples below)
  • Setting out food samples. Especially if you’re putting together a healthful cooking or balanced lifestyle booth, little samples of healthful foods to sample (with recipes to match) can be a big hit at wellness fairs. You can also include a survey or do a taste test to have people evaluate different healthful foods.
  • Giving cooking demonstrations.
  • Surveying your audience about their health, habits, goals, etc.
  • Taking health readings. Offer the resources for participants to measure their BMI, waist circumference, blood pressure, etc. Follow-up materials here are a must.

So, want to do an activity? Here are some examples of our favorite health and wellness fair games…

Activity #1: MyPlate Trivia

Divide participants into balanced teams and bring on the trivia. The first team to answer each question correctly will earn a point, and the team with the most points at the end of the game wins.

Question #1: How much of your plate should be filled with fruits and vegetables at each meal?
Answer: Half

Question #2: What should you drink instead of sugary drinks?
Answer: Water or skim milk

Question #3: What are the five main MyPlate food groups?
Answer: Fruits, Vegetables, Grains, Protein, and Dairy

This activity idea offers the perfect way to merge the activity and giveaway elements of your booth. Offer prizes to all participants, or just to the winning team (if you want to incentivize engagement). In lieu of smaller prizes, you can also give away raffle tickets for one of your larger items.

Activity #2: Heart Health Taste Tests

About Your Blood Pressure Poster

Eating well for your heart doesn’t mean giving up all of your favorite foods to go on a taste-free diet, but some clients and patients don’t really understand that point. Bring the lesson home by having a taste test session right at your booth with some of your favorite heart-healthy products or recipes.

Consider a trans-fat-free margarine tasting, for example. Just bring in margarines that contain less than 2 grams of saturated fat and 0 grams of trans fat per serving. Have people who wander by your booth try these items, preferably spread on a bit of whole wheat bread or on a whole grain cracker.

You can also do taste tests with salads that feature veggies that are especially high in fiber, or with various types of quick-cooking oatmeal for a heart-healthy breakfast. You can tailor your tastings to fit the budget and equipment that you have.

Activity #3: What’s the Link?

This activity can be adapted to any theme you’d like. We’re going to outline it with an example — in this case, high-fiber foods.

Display beans, oatmeal, apples, brown rice, canned peas, shredded wheat and whole grain bread (and other high-fiber foods). The question for the display should be, “What do these foods have in common?” The answer of course, is “fiber”! Anyone who guesses correctly can receive a raffle ticket that is good towards a free prize — or a first look at the smaller prizes laid out on the table.

MyPlate Poster

Amazing Handouts for Wellness Fairs:

No wellness or health fair booth would be complete without a handout or five. These can be woven into your display or photocopied and laid out in stacks for people to take home. Today, because it’s Nutrition Month, and because we love you, here are links to 5 amazing and totally free handouts that you can use at your booth.

Want a hand getting started? Download this free health fair planning checklist today! This organizational checklist will help you efficient and make the best health fair.

And the best part?

It’s totally free!
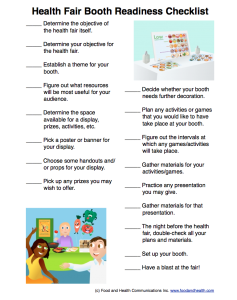
Health Fair Planning Checklist


Good luck with your health and wellness fair!

New Year Resource Rundown

Lots of people choose the new year as a time to start fresh. Here are some great links to help you offer your clients everything they need to make 2015 the best year yet!

New Year’s Resolutions:

General Health:

Exercise:

Weight Management:

Resources for You:

And, of course, there’s more in the store!

Real-World Strategies for Dealing with Office Treats

A couple of weeks ago a co-worker sent this email to everyone in the office:  “There are three types of pie and a can of whipped cream in the fridge!  Pumpkin, Apple, and Pecan, please help me get rid of them!!”

This is what’s being called: food dumping. Like most people, I’ve been guilty of food dumping, but also and I’ve also been the victim.

Food dumping is when you bring party leftovers, unwanted food gifts or just extra treats into the office break room. Sometimes it’s not really unwelcome food but a special treat for your co-workers or a neighboring office as a holiday gift. No matter why it’s there, it seems most office break rooms are filled with food this time of year.

First off I guess I need to congratulate my co-worker and all “food dumpers” for realizing that they really don’t want all that extra food sitting around their house.  But this doesn’t encourage or help your coworkers to eat more healthful.

OK, I don’t want to be a real humbug about this and say that no one should have special holiday goodies.  Being realistic, I know it’s going to happen. What can you do if you really are trying to be heathful?

Here are a couple thoughts to help you take control of the situation:

  • Encourage a “no dumping” policy at the office. If people do want to share special recipes or treat, perhaps set up a schedule or calendar of when each person or office is welcomed to bring something. This may eliminate the overflowing trays and possibly waste.
  • OUT OF SIGHT-OUT OF MIND. If they MUST bring candies and cookies, ask that they be hidden or at least covered.
  • If the snacks and goodies sitting around the break room are just too tempting for you, one solution is to try to avoid that room altogether.
  • If you’re co-workers aren’t on board, at least you can control your office and your desk. Have healthy snacks in your desk so you won’t be starved and tempted when you see a large plate of treats hanging out by the copier.
  • Start your day off right with a healthy breakfast so you won’t be as tempted as you might be when you head for the second cup of coffee. Keep the breakfast light and healthy so if you do want to snack there will be a place for it in your healthy diet.
  • Keep a pair of exercise shoes in the office to take walking breaks.

One more thing, I couldn’t let the idea of food sitting around go without mentioning some food safety issues:

  • Perishable foods should be kept at room temperature for no more than two hours. If it’s out longer than that the food should be pitched.
  • Label foods with ingredients—especially nuts and gluten—for those with allergies and intolerances.
  • Label foods with dates, too. This will eliminate “mystery foods” in a couple of days. Most perishable items should be pitched after four days.

There may be other options instead of food dumping. Could you share food gifts with charitable institutions, nursing homes or women’s shelters that may not have any treats? Unfortunately, due to food safety issues, many may not be able to accept homemade or opened food items.  Think about what foods would freeze well for later when they would be more appreciated and enjoyed.

Cheryle Jones Syracuse, MS

Professor Emeritus, The Ohio State University

Germy Water Bottles

Many people are conscientiously carrying refillable water bottles.  One key positive here is that drinking water  on a regular basis gives the  body the fluid it needs to keep itself healthy https://news.nutritioneducationstore.com/hydrate-for-health/.  Also using a refillable bottle helps keep more waste from plastic water bottles out of the trash. There’s also the cost savings of refilling your own bottle compared to purchasing bottled water whenever you’re thirsty.

But the question is:  how often do you need to wash these refillable cups and bottles?  This would be of even more concern if you put something in the bottle other than plain water—perhaps a sports drink, flavor packets or made infused water with cucumbers or lemons.

A recent study and on-line report in Treadmill Reviews http://www.treadmillreviews.ca/water-bottle-germs-revealed/  says that unwashed reusable water bottle could harbor bacteria.  Their team swabbed the lids of reusable water bottles and had the samples tested at an independent lab to determine the types and levels of bacteria present.

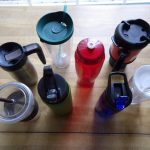
They looked at 12 different bottles and four different types. Each water bottle had been used by an athlete for a week and not washed.   The samples showed that these water bottles each had a unique combination of bacteria. Not all were “bad” germs, but some were the types known to cause illnesses.

The type of bottle made a difference. Slide-top bottles harbored the most bacteria.  This makes sense because these bottles have direct contact with the mouth and more nooks and crannies for bacteria to grow.  Bottles with squeeze-tops and screw-tops respectively had fewer bacteria.  Bottles with straw tops contained the least amount of bacteria.

The folks at Treadmill Review admit that they are not researchers or microbiologists.  Even though this topic could probably use a little more scientific research methods and the types of bacteria studied a little more, it does give us all some “food for thought”.

If you use a refillable water bottle or are thinking of buying one…here are five important tips to follow to avoid getting ill:

  1. Don’t let a half-full bottle of water set in your gym bag between uses, empty wash and dry between uses.
  2. Select one that uses a straw and replace the straw frequently.
  3. Check the label to see if both the bottle and the lid are dishwasher safe.
  4. Wash after every use in the dishwasher or with hot water and soap.
  5. Rinse well. Allow to dry.

Don’t let your quest for good hydration expose you to unnecessary risks.  Use some common sense when it comes to these water bottles.

Cheryle Jones Syracuse, MS

Professor Emeritus, The Ohio State University