SIX Healthy Tips for July 4th

It must be “human nature” but even those who do a good job of healthy eating at other times seem to resort back to “traditional” foods on holidays. These foods are typically chocked full of empty calories, fats and sugars.

Rethinking the menu and “tweaking” your shopping list a little can take your 4th of July meal from calorie overload to healthful.

July 4th Healthy Holiday Tip #1—Lighten up. Can you substitute some ingredients when making favorite recipes? Gotta have potato salad?  Use non-fat plain Greek yogurt, nonfat sour cream or low-fat mayo for part of the regular mayo in the dressing. Or look for a new kind of veggie salad that uses a light vinaigrette instead of one that is bathed in high fat mayo or salad dressing.

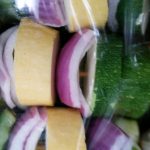
July 4th Healthy Holiday Tip #2- Double or triple-up on veggies. Set out a series of vegetable platters or arrangements instead of cheese or antipasto plates.  Make sure you have lettuce and tomatoes as sandwich toppers. Try roasted vegetables or vegetable kabobs on the grill. Corn-on-the cob (roast with olive oil and seasonings and forget the melted butter).

July 4th Healthy Holiday Tip #3 – Pick some whole grain products.  Select whole grain buns, whole grain tortillas or whole wheat pita bread for sandwiches.  Whole grain chips and salsa can be an alternative to fried potato chips and dip.

July 4th Healthy Holiday Tip #4—Look for lean protein. How about fish patties or crab cakes instead of burgers?  Grill salmon instead of steak. Instead of brats or hog dogs on the grill go for grilled skinless chicken. For a fun and colorful entrée put hunks of chicken on skewers with the vegetables—this also helps reduce portion sizes and cooking time—and adds even more vegetables to the meal.

July 4th Healthy Holiday Tip #5—Burn those calories. Don’t forget to pack games and balls. Start a new tradition of a family softball or volley ball game. Walking and/or throwing Frisbees are also great activities that can involve family members of all ages.

July 4th Healthy Holiday Tip #6—Enjoy the company of family and friends.  Remember what we’re celebrating at this holiday. Don’t just focus on food and eating. Be mindful of the non-food intangibles like music, games and fireworks.

Cheryle Jones Syracuse, MS

Professor Emeritus, The Ohio State University

Fall in Love with Salad

I was recently stuck at the airport on the way home from a trip to New Orleans. It was lunch time and after a weekend of jambalaya, etouffee, gumbo, bananas Foster, and beignets, what I really wanted was a big healthy salad.

Lucky for me, I found a pretty nice pre-made salad at an airport shop. That’s the great thing about salad – you can get one just about anywhere. The catch? When it comes to nutrition, not all salads are created equal. Teach your clients to build a healthy salad wherever they are with our beautiful Salad Themed materials.

Start with our Fall In Love With Salad poster. It’s a bestseller and the content is aligned with the Dietary Guidelines for Americans, MyPlate, and the Offer Versus Serve Program. And it comes with handouts, including salad fact sheets, fun puzzles, and recipes.

Use the poster’s key healthy salad messages for individual counseling or group sessions:

  • 6 Salad Lover Tips, like choosing darker greens, piling on colorful veggies and fruits, watching out for high fat toppings, adding protein, and using a healthy but tasty dressing.
  • 3 Reasons to Love Salad: it’s a great way to fit more veggies into your day, eat fewer calories, and get more nutrients and fiber.
  • How to spice up your salad with different ingredients, like Mandarin oranges, water chestnuts, or arugula.
  • Play “what should it be?”. Create a virtual salad using the audience’s favorite vegetables and writing these down on a dry erase board. Calculate the calories quickly by googling “calories for x” with x being the vegetable and let everyone in the audience help. Add them up. Most salads are less than 100 calories. Then go to the fast food websites and check out the calories for popular salads and check out those calories, which often go above the sandwiches and burgers. Why is there a greater difference? See if the audience can guess. By putting the dressing on the side and making smarter choices they can ensure that their salad is a low-calorie choice! Check out a visual comparison here.

To remind people to eat a healthy salad every day, give them one of our I Love Salad wristbands. What’s not to love about salad?

MyPlate Goes Anywhere

Did you know that 90 percent of adults don’t eat the recommended daily amount of fruits and vegetables?* Maybe if we saw MyPlate billboards as often as we see signs for fast food or soda, this number wouldn’t be so high. Since that’s not going to happen, it’s up to us to plant the MyPlate image into everyone’s minds.

The MyPlate Start Simple poster is a great discussion-starter for helping people find simple ways to fill half of their plate with fruits and veggies, whether they’re eating at home, at a restaurant, at work, or at school.

  • At home – this should be the easiest because you’re in charge. Keep lots of fruits and veggies on hand to fill up half of your plate. Bags of pre-washed baby spinach and spring mix make it easy to fix a salad every day. Stock your freezer with a variety of frozen vegetables to steam, microwave, or roast in the oven.
  • At restaurants – you don’t have as much control, but checking out the menu online ahead of time can help. Look for vegetable sides and order an extra serving. If you’re getting subs or burritos, visually deconstruct them to see how they would look on a plate, then decide if you need to add an extra veggie or fruit, choose a salad instead of sandwich, or go easy on the rice.
  • Packing lunch – keep that plate in mind as you put your lunch together. Pile all the veggies you can onto sandwiches. Add sides of raw veggies like baby carrots and cherry tomatoes, and a piece of fruit. Or pack lunch the easy way – leftovers from a MyPlate-friendly dinner make the perfect MyPlate lunch.

*Source: CDC (read more here).

Use this link to get 15% off all MyPlate Teaching Resources – this week only! Good through April 13, 2019

It’s Time to Change It Up!

We’re constantly bombarded with images of fast food, junk food, and processed food. Marketers know what they’re doing by getting these pictures into our subconscious minds. Well, let’s fight back! It’s time to Change It Up!

Our Change It Up theme features a gorgeous butterfly made up of real photos of fruit. Now, this is an image we want in our clients’ minds! The message is simple but impactful – transform your life with healthy food and regular physical activity. Go from a fast-food caterpillar to a healthy butterfly.

Our poster and banners come with the free Change It Up printable handout. One side provides general tips on changing up your diet (MyPlate, portion sizes, and fruits and vegetables) and every day activity. The other side offers more detailed suggestions for transforming your meals, snacks, and exercise routine.

How can you use the Change It Up materials in different settings? Glad you asked!

  • Display the banner or poster in the cafeteria, a hallway, or waiting room. (We also have a salad bar sign!) When people see the beautiful, colorful, fruit-filled butterfly every day, they’re bound to think more about healthy food.
  • Give out the stickers and bookmarks so people can take the picture and the message with them.
  • Set up a Change It Up table in the cafeteria or at a health fair. Engage visitors with questions: Are you more like the butterfly or the caterpillar? What changes can you make to transform yourself into the butterfly? Give away the Change It Up handout, stickers, and bookmarks.
  • Teach a Change It Up class. Depending on your audience, here are two lessons:
    • Focus on how small shifts in eating and activity will make everyone feel transformed.
    • Go with the caterpillar to butterfly theme. How does the image of the butterfly make you feel? How about the caterpillar? When you eat healthy food and are active, which one do you feel like? How can a healthy diet and regular exercise make you feel transformed?

Here is a handout called, 9 ways to make easy and healthy switches for a better diet and exercise plan: 9 Easy Healthy Switches Handout

Not quite spirals

Eat more vegetables.  I know I’m preaching to the choir here.

But even for real vegetable lovers,  eating the same vegetables over and over can get monotonous. Fortunately there are tools on the market that can help put fun vegetables on your plate.

One of these tools is the spiralizer.  Spriralized (is that a word?) vegetables are the “in” thing. The theory is that these noodle-like vegetables can be add variety meal and can replace higher-calorie pasta in recipes.

Listening to the ads on television and watching some YouTube videos on spiralizing they make it seem easy-to-do.  I’ve tried a couple different types of models–including hand-held, hand-crank and electric.  I have to admit that I’ve had limited success making my own spiralized vegetables.   I think some of this depends upon the type of spiralizer. Prices range from as low as $12 and as high as $300 for restaurant quality.

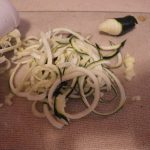
In my opinion, it’s difficult to get good results with the hand-held (hear: less expensive) spiralizers.  There is also  more of a chance of cutting yourself (note from personal experience).  I got fairly good zucchini and yellow squash noodles.  Admittedly, my carrots looked more like shreds.

There are some table-top spiralizers and others that attach to counter-top mixers.  These seem to have better results with heavier vegetables such as sweet potatoes, winter squash, jicama, carrots and rutabagas. Some have different sized and style blades so you can get strips, ribbons, spaghetti, fettuccini along with noodles.

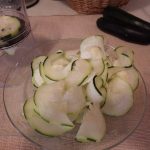
The shape and density of the vegetable has a lot to do with successful spiralizing. The longer and more uniform the shape of the vegetable the better results. Because of their shape, not all vegetables turn into great noodles.  Bell peppers, onions and cabbage can be cut with a spiralizer, but you might end up with slices and shreds, just due to the layers naturally in the vegetable. Cucumbers are usually not as firm as other veggies and need a little more skill–but with the electric sprializer I got beautiful cucumber ribbons.

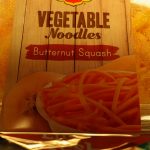
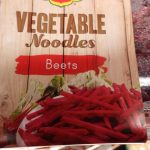
If you don’t own a spiralizer (or your skills are similar to mine) look for already made veggie noodles in the fresh produce section or the frozen vegetable aisle of your grocery store. Veggie noodles are becoming more popular and easier to find. I found beets, butternut squash and zucchini “noodles” cleaned, cut and ready-to-go….easy peasy.

If you try spiralizing, I hope you have better success than I did.  But no worries—this is one of those times that you can eat your mistakes.  All vegetables count! 

Cheryle Jones Syracuse, MS

Professor Emeritus, The Ohio State University

NOT Ready-to-eat

Except perhaps a quick glance at the recommended microwave cooking times, I’m betting that most people don’t look at the fine print on a bag of frozen vegetables. I’ve recently noticed that some packages now contain the food safety caution:

“Product is not ready to eat. For food safety, cook to an internal temperature of 165 degrees F as measured with a food thermometer. Refrigerate any leftovers.”

As a food safety instructor I’m really pleased to see these kinds of cautions on packages—now to get people to read and believe.

Most people think of frozen vegetables as relatively safe but, they are not intended to be consumed without cooking, because they may contain bacteria that are only killed when cooked properly and thoroughly. These bacterial pathogens are the biggest concern.  Several foodborne illnesses have been linked to frozen vegetables including  Listeria monocytogenes, Norovirus and Hepatitis A.

According to the Frozen Food Foundation  http://www.frozenfoodfacts.org/about-frozen-foods/helpful-hints   freezing does not kill all bacteria; some can live at freezing temperatures. Even frozen foods that were partially cooked by the producer may not have been cooked at temperatures high enough or long enough to kill all the bacteria that might have been present. They emphasize that it is important to prepare ready-to-cook frozen foods according to their cooking instructions.

The U.S. Food and Drug Administration (FDA) considers most frozen vegetables “ready-to-cook” NOT “ready-to-eat.”  As their name suggests, ready-to-cook foods must be cooked according to package instructions before eaten.  On the other hand,  ready-to-eat (RTE) foods are just that: foods that can be eaten right out of the refrigerator.

You might be asking yourself, why would someone eat frozen vegetables uncooked?  One thought that comes quickly to mind is when people pop veggies directly from their freezer into the blender for a smoothie. I also know several salad and salsa recipes that use frozen or partially thawed but not cooked vegetables as ingredients.

Remember that young children, the elderly and people that are immune compromised due to illness, transplants or HIV are more susceptible to a foodborne illness than others.  Pregnant women should be very cautious because a Listeria infection could lead to miscarriage, stillbirth or septicemia or meningitis in the newborn.

Cheryle Jones Syracuse, MS

Professor Emeritus, The Ohio State University


Reader questions onion safety

Question from a reader:  “What information do you have about the idea that onions pose a risk if left in the refrigerator after cutting?  It is something most of us have always done and now there is information floating out there in the internet world that this is not a safe practice.  Thanks for any insight!”

Don’t you just love the internet?  All of these “tales” can cause us to worry about everything!  According to Snopes, this one has been going around since 2008 and there isn’t any scientific proof to support this statement.

Nothing mysterious happens to onions once they are in the refrigerator. Like all fruits and vegetables, once cut, onions should be kept in the refrigerator (National Center for Home Food Preservation and National Onion Association).  I’ll refer you to another article I wrote about Keeping Fruits and Vegetables Safe.

Once a fruit or vegetable has been cut, the barrier to the outside world has been broken and the plant’s natural defenses have been compromised. This opens the food up to the environment. Plus, the moisture and natural sugars in fruits and vegetables help create a great place for bacteria to grow. Refrigerator temperatures, on the other hand, can help slow this development of bacteria. The biggest problem with onions in the refrigerator is the odor.  Be sure to wrap well or keep in a sealed container.

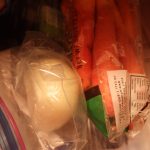
But don’t store your uncut onions in the refrigerator. Whole unpeeled onions should be kept in a cool, dry, well ventilated place. Don’t store them in a plastic bag. Sweet onions tend to have higher water content and are more susceptible to bruising and will have a shorter shelf life than yellow onions. Once peeled or cut, onions should be stored (well wrapped or covered) in the refrigerator at 41 degrees or below.  A peeled or cut onion will be of good quality for 7 in the refrigerator.

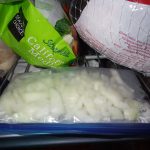
If you have a few too many chopped onions they can be frozen. I have frozen leftover chopped  onions (without blanching) for a short time, they are not crisp when thawed, but work great for cooking. Be sure to wrap well.  Use within 3-6 months for best quality. For longer freezer storage, The National Center for Home Food Preservation (nchfp.uga.edu) recommends they be blanched and cooled before freezing.

One final tip: according to the National Onion Association (www.onion-usa.org) it’s the sulfuric compounds  in the onions that cause us to cry when cutting onions. To help reduce this,they recommend chilling the onion before cutting and cutting into the root end of the onion last.

Cheryle Jones Syracuse, MS

Professor Emeritus, The Ohio State University


Are Your Holidays Healthful? A Quiz

Do you keep your holiday celebrations good for your health? Find out with this brand-new quiz!

Questions:

Dancing at a Party1. What is the most featured item in the display of foods at your holiday party?

a) Cookies
b) Meats
c) Fruits and vegetables
d) Cheeses

2. True or false? I make sure to get at least some physical activity during most days of the week.

3. Some smart ways to control portion size at meals include…

a) Making a healthy plate.
b) Sharing a meal
c) Being aware of the calorie content of the foods you purchase.
d) All of the above

4. True or false? I make sure to eat a healthful high-fiber breakfast every morning.

Answers:

Holiday Platter1. c) Fruits and vegetables
For the most healthful holiday celebration, make fruits and vegetables the start of any buffet you set up. You can keep things simple with crudités and some yogurt-based dips, or you can get fancy and roast up your favorite vegetables and serve them on a platter, drizzled with a little bit of sauce and garnished with parsley. Add bowls of berries and sliced fruit too!

2. True
To stay healthy during the holidays, it’s wise to sneak in a little physical activity whenever you can, even though things are busy. According to the Physical Activity Guidelines for Americans, “Being physically active is one of the most important steps that Americans of all ages can take to improve their health.”

Check the Label3. d) All of the above
If you’re having a holiday gathering at a restaurant or coffee shop, check out any nutrition information that’s available online. Make sure that the portion size of what you want to order is reasonable. If it’s not, look for alternatives. Then, if you want to get or make something that only comes in a large portion, share it with a friend or family member. Finally, if you’re picking up a treat for a holiday gathering, check the labels! Use the Nutrition Facts to calculate serving size, nutrient content, and much more! Making a healthy plate will help you put your foods in the right proportions, too.

4. True
Starting your day off with a balanced and high-fiber breakfast is a smart way to stay healthy this holiday season. After all, breakfast is associated with a lower BMI, fewer calories consumed during the day, and a better diet. Plus, a healthful breakfast not only gives you energy, but also increases cognitive function. Some ideas include high-fiber cereal with nonfat milk, and fruit, or lowfat yogurt and fruit, or egg whites and fruit. A smoothie made with fruit and skim milk is also a great start.

How did you do? Do you know the nuts and bolts of staying healthy during the holidays?

Fresh Local Corn–Enjoy While You Can

We all know that local corn-on-the-cob tastes the best. One of the reasons is that corn’s natural sugars change quickly after harvest causing the corn to lose its sweetness quickly. Corn is one of those great summer farm market treats.

When selecting sweet corn look for husks with good bright green color that are snug to the corn ear and the silk dark brown. Avoid silk with worms or decay. Select ears that are full of kernels. These kernels should be well developed and plump, tender and milky.  If they are too large or too dark they can be tough, chewy and pasty.

For best quality, store corn in the husks uncovered in the refrigerator. If you have corn without the husks, put them in a perforated plastic bag. Corn is best when eaten within two days. After removing the husks and silk, wash the corn in cool running water before eating, cooking or preserving.

Nutritionally corn is a good source of carbohydrates as well as small amounts of Vitamins A and C.  It is sodium-free and low in fat.  Depending upon the size, corn can yield 2/3 to 1 cup of corn per ear. One medium ear of corn contains about 90 calories. Corn provides folate and thiamin as well as fiber.  It can also be a source of zeaxanthin, an antioxidant that may protect against age-related eye disease, such as macular degeneration.

Even though corn is a starchy vegetable, it can still fit into a healthy balanced diet.  According the 2015-2020 Dietary Guidelines for Americans we should try to eat 2-2 1/2 cups of vegetables each day and this can include 5 cups of starchy vegetables a week. https://health.gov/dietaryguidelines/2015/guidelines/appendix-3/ The key here again is balance and moderation and an occasional ear of corn-on-the cob when it’s fresh adds variety.

Instead of the traditional boiled and slathered with butter and salt corn-on-the-cob, try roasting on the grill with a little olive oil. I recently placed husked corn in a zip-top bag with a small amount of olive oil and added an herb blend. I turned the bag over several times to coat the ears with the oil and seasoning.   Then I took the cobs out of the bag and placed the cobs directly on a hot grill turning them several times until the kernels were slightly charred and golden. The flavor was great and there was no need to add extra salt or butter. Do be careful to watch the corn as it cooks, you don’t want it to overcook and dry out.

Judy’s favorite method for grilled corn is to start in the microwave and then finish on the grill at the same time the other items are cooking. That keeps it sweet and from getting tough and burnt. She cooks it in husks or in a covered dish for 2 minutes per ear. See her recipe below for corn salad using leftover cooked corn.

Cheryle Jones Syracuse, MS
Professor Emeritus, The Ohio State University
Here is one of Food and Health Communication’s Favorite recipes for corn:

Fresh Corn Salad

Serves: 4 | Serving Size: 1 cup
Total Time: 15 min | Prep: 15 min | Cook: 0 min

Ingredients:

6 cups dark green lettuce, preferably red leaf
2 ears of corn, shucked and cooked
1 large, ripe tomato
1/2 medium-sized, ripe avocado
1 tablespoon olive oil
2 tablespoons flavored vinegar
Black pepper to taste

Directions:

Cut the lettuce into bite-sized pieces and soak in a large amount of cold water; allow to stand so the dirt sinks to the bottom. Drain the lettuce well in a colander. Place the lettuce in a salad bowl.

Cut the corn off the cob and place on top of the lettuce. Core and dice the tomato and place on top of the salad. Cut the avocado in half, remove the pit and scoop out the flesh from the rind. Dice the avocado and place it on top of the salad.

Chill and cover the salad until ready to serve, up to 3 hours.

When ready to serve, drizzle oil and vinegar over the top and add black pepper to taste.

Serves 4. Each 1 cup serving: 148 calories, 8g fat, 1g saturated fat, 0gtrans fat, 0mg cholesterol, 18mg sodium, 20g carbohydrate, 4g fiber, 4gsugars, 4g protein.© Food and Health CommunicationsAnother article in the blog on Corn-on-the-Cob

Shucks with the husks

Freezing the Taste of Summer

One of the great tastes of summer  is corn-on-the-cob. Lots of people try to retain that great flavor for later in the year by freezing corn when it’s at its peak.

People are always looking for quick and easy ways to do things and the internet tends to perpetuate this with the latest fads and quick-you-have-to-try recipes. Preserving corn-on-the-cob is frequently a topic. I’ve heard two new corn “ideas” this year. While neither are “unsafe”, the quality of the final products may not be so great.

One of these  methods is freezing corn cut off-the-cob  in a mixture of water, sugar and salt in lieu of blanching. There is no research to prove that this sugar and salt brine would be a substitute for heat to inactivate enzymes.

Another  “tip” going around is to put the corn directly in the freezer (husks and silk and all). This method obviously doesn’t include blanching either.  For my personal thoughts on cooking in the husks see an earlier blog post Shucks with the Husks .

If you’re going to freeze corn, blanching is highly recommended.  This is for quality not safety. Blanching inactivates enzymes within the food. If not destroyed,  these enzymes can cause loss of flavor, color and texture in the frozen food. Blanching is scalding vegetables in boiling water or steam for a short time and the immediately cooling in ice water.  Without blanching you may have a very poor quality product.

Fresh sweet corn may be frozen cut-off or on-the-cob. I usually tend to avoid frozen corn-on-the-cob because sometimes it’s mushy, watery and “cobby” tasting  when cooked. If you really love eating corn from the cob, here are some tips that can help you be successful:

According to the National  Center for Home Food Preservation  http://nchfp.uga.edu/how/freeze/corn.html medium ears of corn should be blanched for 7 minutes. One of the key steps to keep this corn from tasting like the cob when thawed is to leave them in the ice water and even adding more ice to completely chill the cobs after blanching.  The general “rule of thumb” is to chill the corn for as long as it was blanched. Don’t allow it to stay too long or it will get soggy and allow to drain well before freezing. Another tip to get better quality results is to slightly thaw the corn-on-the-cob before cooking.

I usually suggest to people to try freezing a few ears and then prepare and see if you and your family likes them before getting carried away and using a lot of freezer space on something you won’t like come January.

Here are a few more tips from Chef Judy Doherty to savor your favorite foods this summer:

  1. Berries can be frozen in zip bags so they are ready for smoothies, muffins, pies, sauces/purees, and cobblers. Mix them for a fun new flavor sensation or keep them separate.
  2. Tomatoes can be cooked into sauce or salsa and frozen in a zip storage bag.
  3. Herbs can be made into pesto or frozen in tupperware so they can be slipped into your favorite foods and dishes. To make a simple pesto, puree your favorite herbs with a little olive oil then freeze on foil, slice and freeze the squared in a zip storeage bag.
  4. Corn should be steamed and then cut off the cob for the best results. Or just cut it off the cob and then steam before freezing. The problem with freezing a whole cob is that you will overcook your corn trying to heat the whole cob.
  5. For peaches and tree fruits, cut them into wedges, freeze on a sheet, then put them into zip bags.
  6. Spinach and other greens may be flash steamed (steam quickly) and then stored in zip bags or plastic containers in small serving sizes.
  7. If you have a lot of fresh mint consider freezing it in ice cubes so you can flavor water or tea.
  8. Grate zucchini and carrots and freeze them in ziplock bags so they are ready for muffins and quick breads.

Cheryle Jones Syracuse, MS
Professor Emeritus, The Ohio State University
 

Check out our new materials now at