We all know that local corn-on-the-cob tastes the best. One of the reasons is that corn’s natural sugars change quickly after harvest causing the corn to lose its sweetness quickly. Corn is one of those great summer farm market treats.
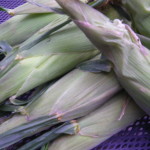
When selecting sweet corn look for husks with good bright green color that are snug to the corn ear and the silk dark brown. Avoid silk with worms or decay. Select ears that are full of kernels. These kernels should be well developed and plump, tender and milky. If they are too large or too dark they can be tough, chewy and pasty.
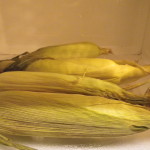
For best quality, store corn in the husks uncovered in the refrigerator. If you have corn without the husks, put them in a perforated plastic bag. Corn is best when eaten within two days. After removing the husks and silk, wash the corn in cool running water before eating, cooking or preserving.
Nutritionally corn is a good source of carbohydrates as well as small amounts of Vitamins A and C. It is sodium-free and low in fat. Depending upon the size, corn can yield 2/3 to 1 cup of corn per ear. One medium ear of corn contains about 90 calories. Corn provides folate and thiamin as well as fiber. It can also be a source of zeaxanthin, an antioxidant that may protect against age-related eye disease, such as macular degeneration.
Even though corn is a starchy vegetable, it can still fit into a healthy balanced diet. According the 2015-2020 Dietary Guidelines for Americans we should try to eat 2-2 1/2 cups of vegetables each day and this can include 5 cups of starchy vegetables a week. https://health.gov/dietaryguidelines/2015/guidelines/appendix-3/ The key here again is balance and moderation and an occasional ear of corn-on-the cob when it’s fresh adds variety.
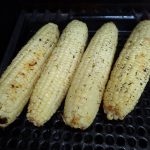
Instead of the traditional boiled and slathered with butter and salt corn-on-the-cob, try roasting on the grill with a little olive oil. I recently placed husked corn in a zip-top bag with a small amount of olive oil and added an herb blend. I turned the bag over several times to coat the ears with the oil and seasoning. Then I took the cobs out of the bag and placed the cobs directly on a hot grill turning them several times until the kernels were slightly charred and golden. The flavor was great and there was no need to add extra salt or butter. Do be careful to watch the corn as it cooks, you don’t want it to overcook and dry out.
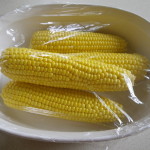
Judy’s favorite method for grilled corn is to start in the microwave and then finish on the grill at the same time the other items are cooking. That keeps it sweet and from getting tough and burnt. She cooks it in husks or in a covered dish for 2 minutes per ear. See her recipe below for corn salad using leftover cooked corn.

Cheryle Jones Syracuse, MS
Professor Emeritus, The Ohio State University
Here is one of Food and Health Communication’s Favorite recipes for corn:

Fresh Corn Salad
Serves: 4 | Serving Size: 1 cup
Total Time: 15 min | Prep: 15 min | Cook: 0 min
Ingredients:
6 cups dark green lettuce, preferably red leaf
2 ears of corn, shucked and cooked
1 large, ripe tomato
1/2 medium-sized, ripe avocado
1 tablespoon olive oil
2 tablespoons flavored vinegar
Black pepper to taste
Directions:
Cut the lettuce into bite-sized pieces and soak in a large amount of cold water; allow to stand so the dirt sinks to the bottom. Drain the lettuce well in a colander. Place the lettuce in a salad bowl.
Cut the corn off the cob and place on top of the lettuce. Core and dice the tomato and place on top of the salad. Cut the avocado in half, remove the pit and scoop out the flesh from the rind. Dice the avocado and place it on top of the salad.
Chill and cover the salad until ready to serve, up to 3 hours.
When ready to serve, drizzle oil and vinegar over the top and add black pepper to taste.
Serves 4. Each 1 cup serving: 148 calories, 8g fat, 1g saturated fat, 0gtrans fat, 0mg cholesterol, 18mg sodium, 20g carbohydrate, 4g fiber, 4gsugars, 4g protein.© Another article in the blog on Corn-on-the-Cob


 I’ve been cooking corn-on-the-cob in my microwave for many years. It’s fast and easy, especially for just one or two people. But once you start cooking more than a few ears of corn, it takes less time to boil them on the stove or cook them on the grill.
