Doggy Bag Safety

I love “doggy bags.”

We don’t have a dog and most of the time those leftovers are for me.

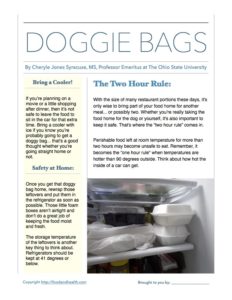
With the size of many restaurant portions these days, it’s only wise to bring part of your food home for another meal… or possibly two. Whether you’re really taking the food home for the dog or yourself, it’s also important to keep it safe.

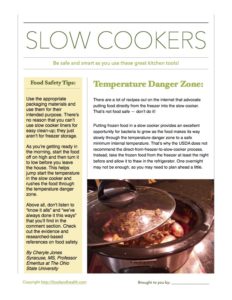
That’s where the “two hour rule” comes in.

Doggy Bag

Perishable food left at room temperature for more than two hours may become unsafe to eat. Remember, it becomes the “one hour rule” when temperatures are hotter than 90 degrees outside. Think about how hot the inside of a car can get. Bacteria grow very quickly at these temperatures.

If you’re planning on a movie or a little shopping after dinner, then it’s not safe to leave the food to sit in the car for that extra time. Bring a cooler with ice if you know you’re probably going to get a doggy bag… that’s a good thought whether you’re going straight home or not.

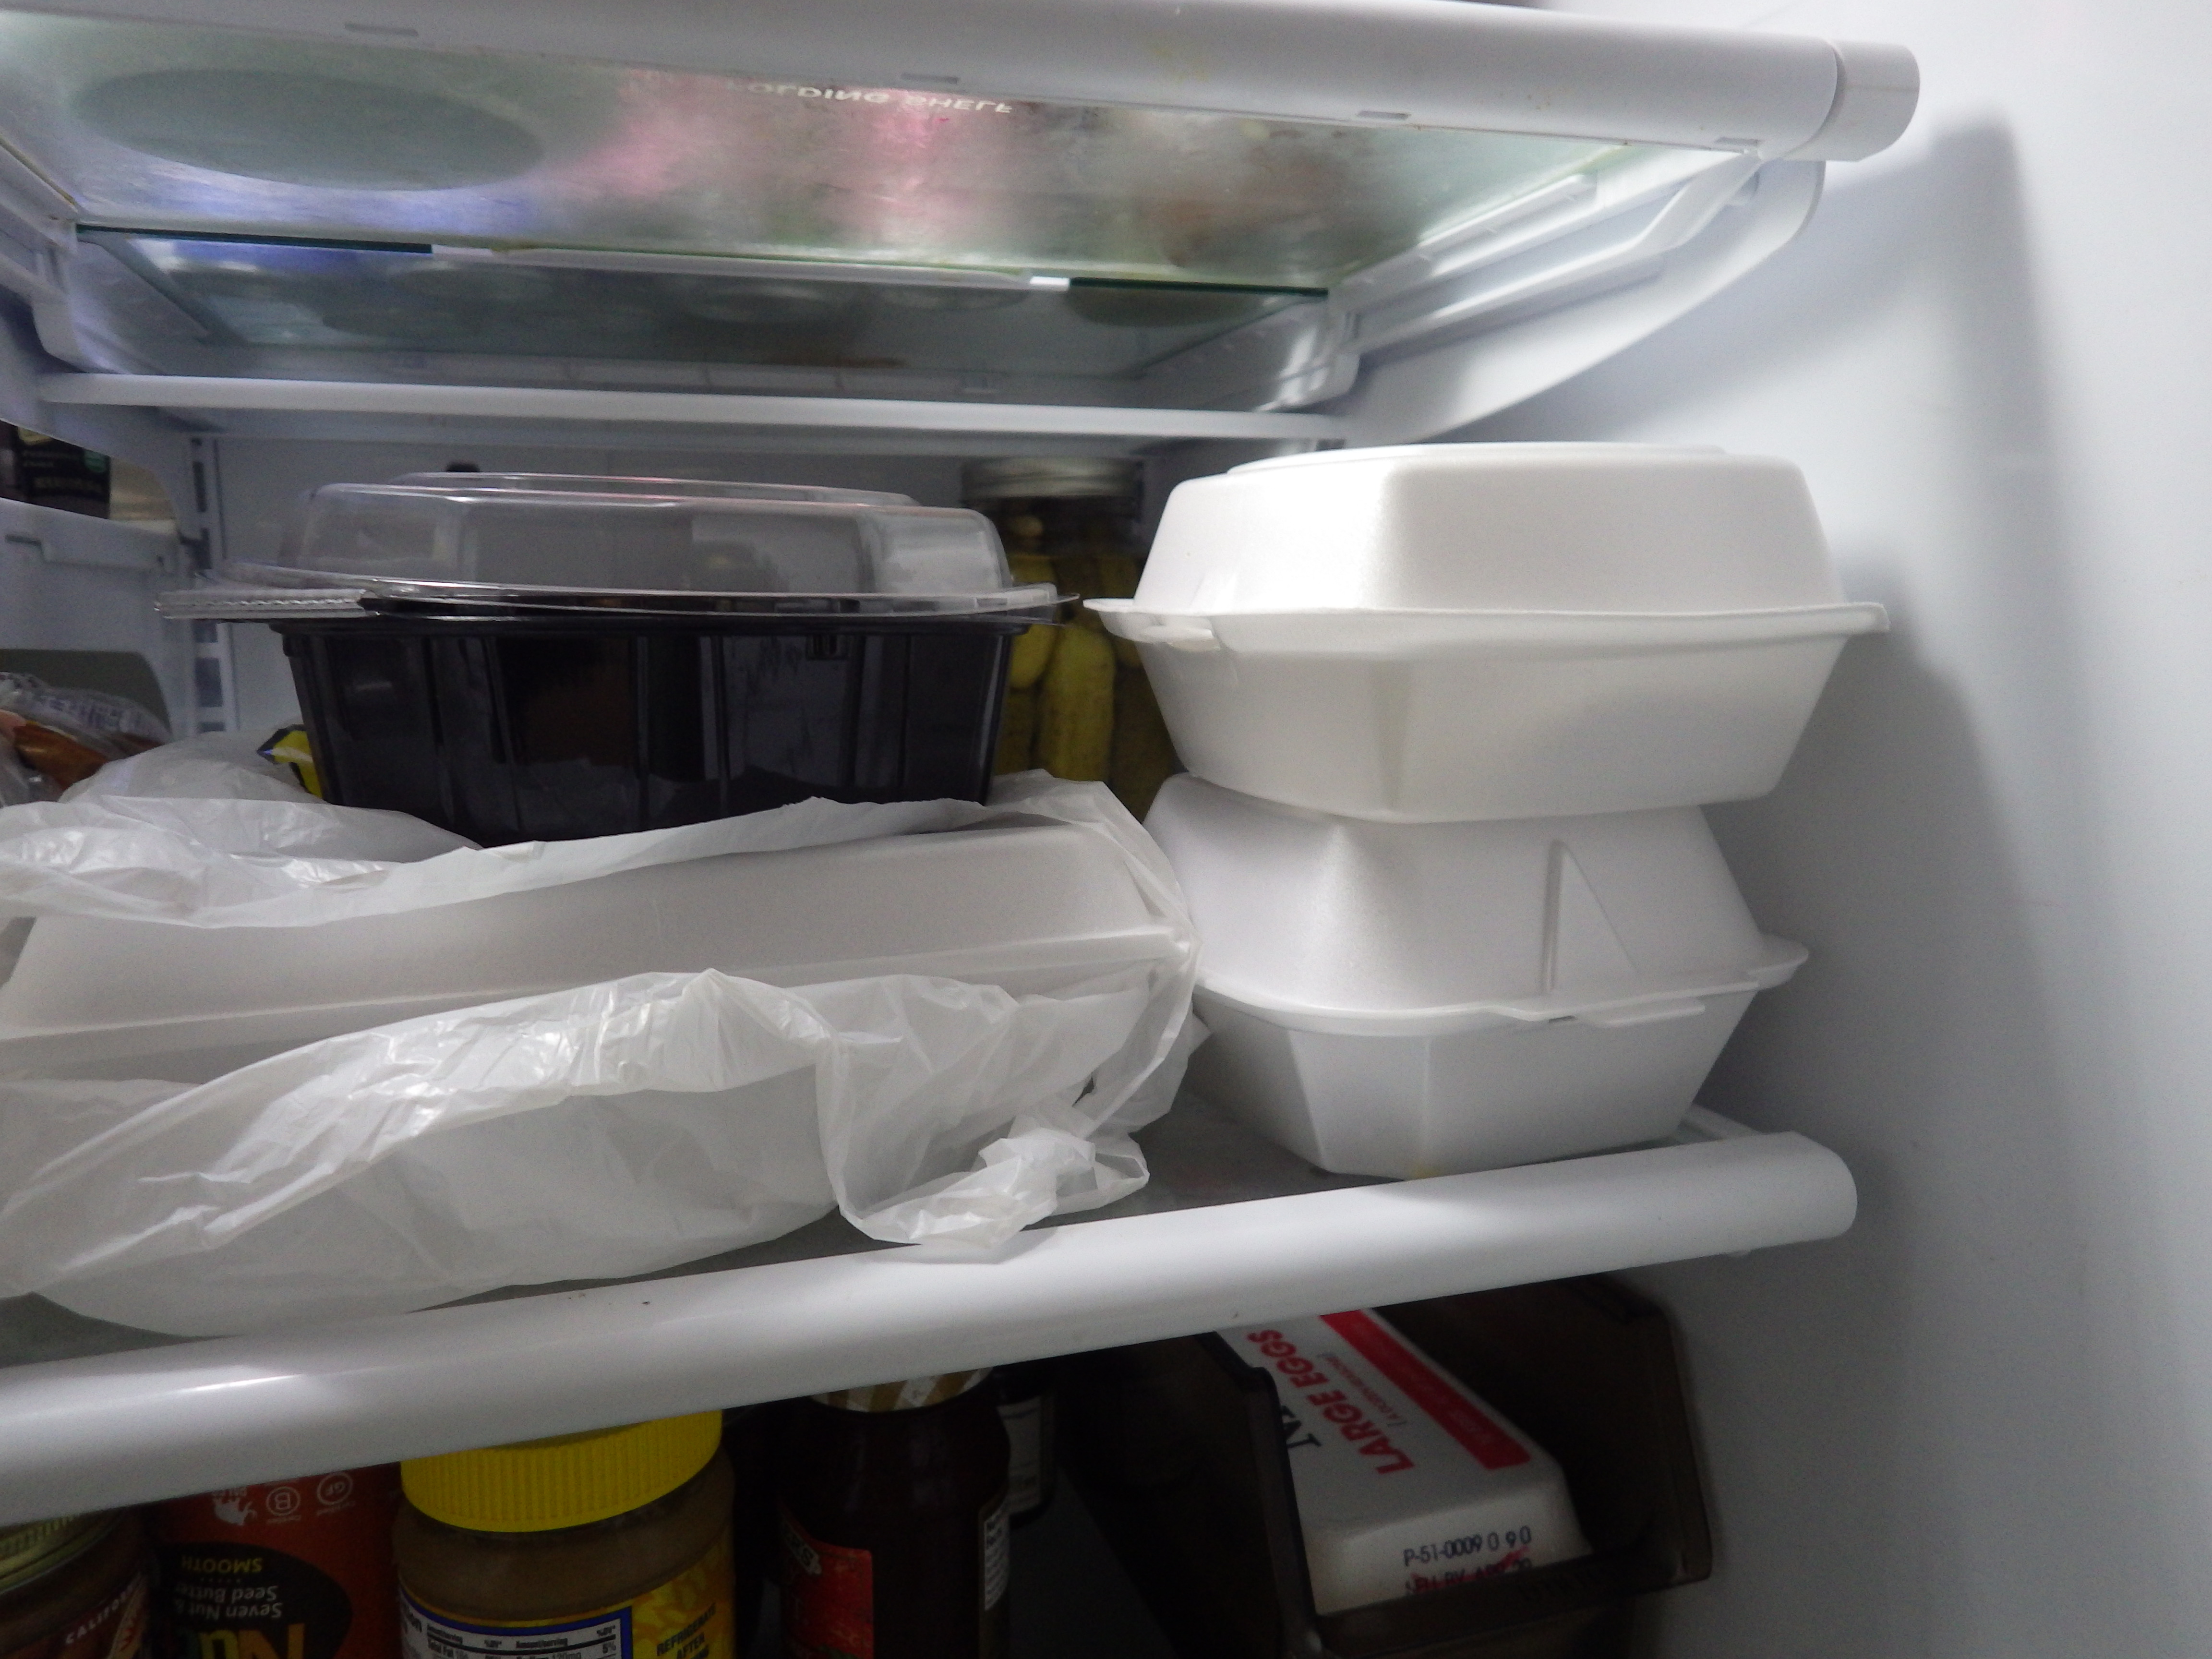
Once you get that doggy bag safely home, think about rewrapping those leftovers and putting them in the refrigerator as soon as possible. Those little foam boxes aren’t airtight and don’t do a great job of keeping the food moist and fresh.

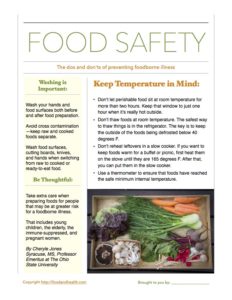
The storage temperature of the leftovers is another key thing to think about. Refrigerators should be kept at 41 degrees or below.

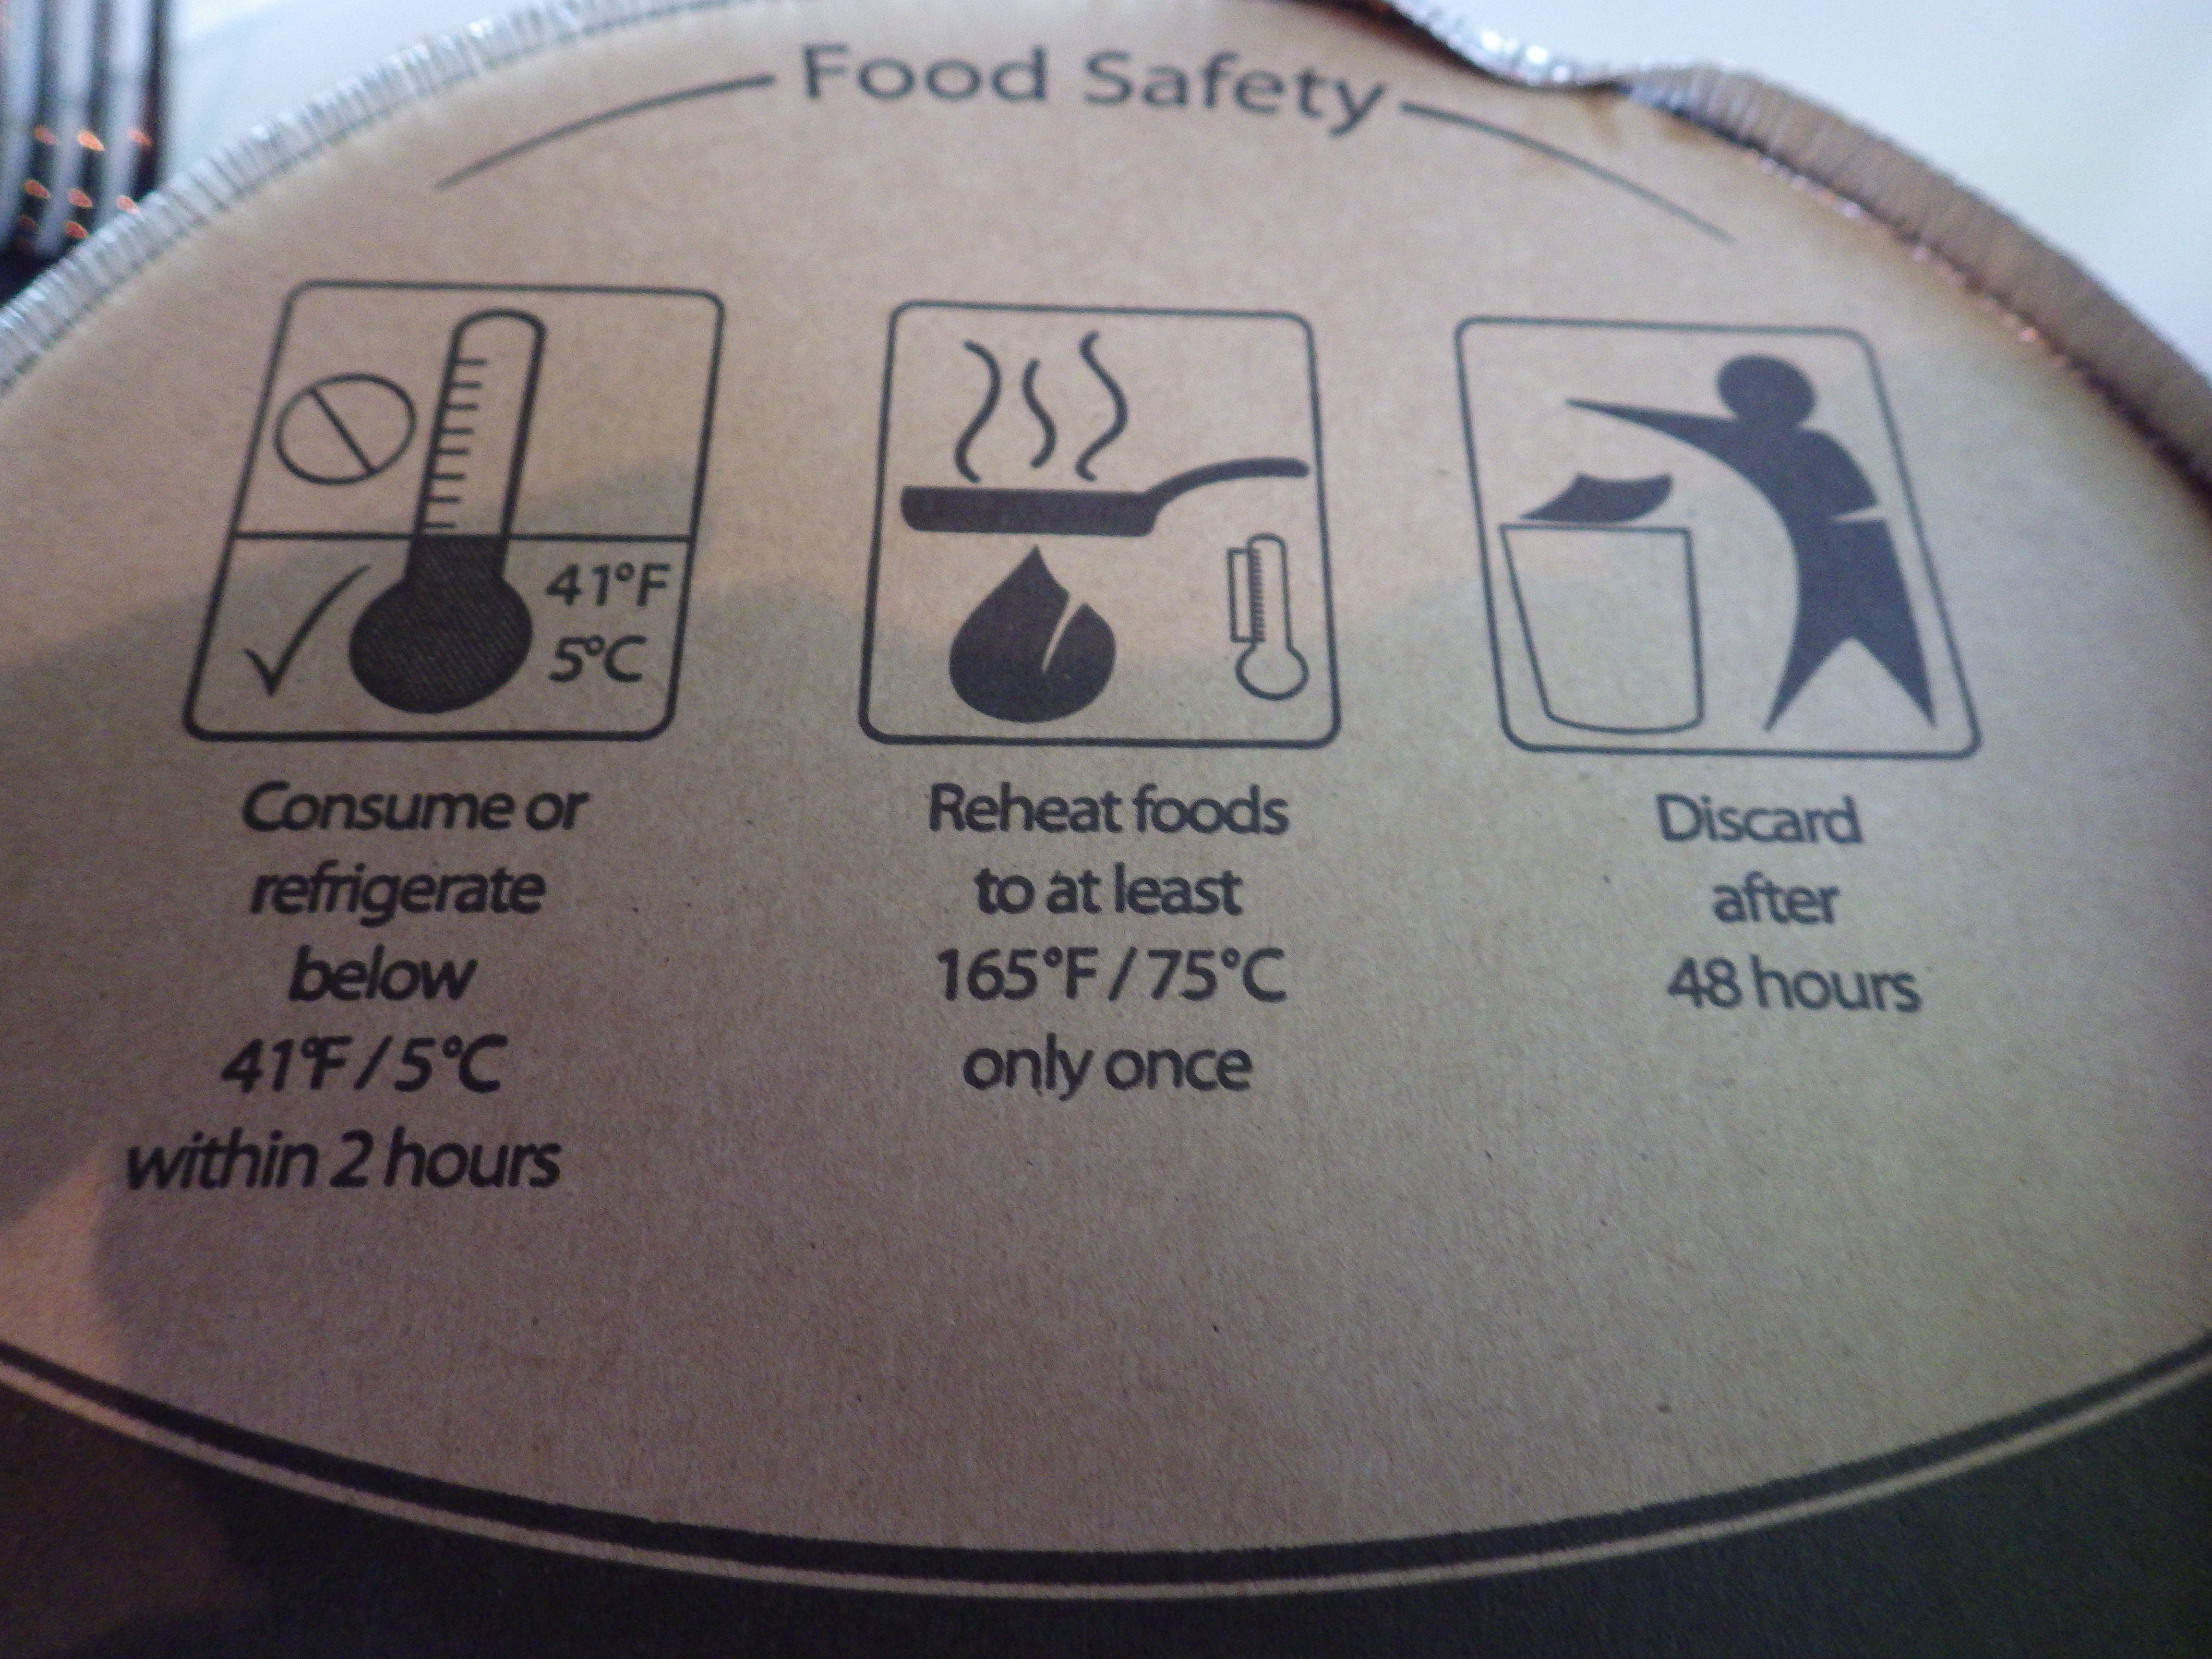
I was recently impressed when my container of restaurant leftovers came with food safety instructions. I think this was smart of them, wanting to keep their customers safe. This container was also sealed a little tigher than most.  As well as not spilling in the car on the way home, it helped to keep odors from other foods in the refrigerator from co-mingling with my leftover pasta. Their instructions for keeping the food safe were even a little more strict than I usually go by. But, less can be better in this instance.

Storage Instructions

Refrigerated food doesn’t keep forever. If you dine out a lot, then those little  containers tend to multiply uneaten in the refrigerator. The best recommendation is to plan on eating those leftovers within three to four days of bringing them home. Remember that you can’t always see, taste, or smell the bacteria in food that may make you sick.

For safety’s sake, leftover food should be heated thoroughly before eating.

This means to heat it to 165 degrees F. The only way to make sure you’re doing that is to use a food thermometer. When heating in a microwave, stir during cooking and allow some standing time for the temperatures to unify.

While it may seem wasteful, keep in mind the old saying: “when in doubt… throw it out!” Wasting a little food is not worth the risk of a foodborne illness. If you can’t keep the food safe, then you may as well leave it in the restaurant in the first place.

By Cheryle Jones Syracuse, MS, Professor Emeritus at The Ohio State University

Using a Doggy Bag for Calorie Savings:

Provided that you keep your doggy bag food safe, you can save some serious calories by cutting your restaurant entree in half.

Here are some examples:

  • The Lasagna Classico at Olive Garden weighs in at 930 calories per plate, with 470 of those calories coming from fat. If you split the meal and saved half for a different day, storing the rest in a doggie bag for later, then you would only consume 465 calories in the restaurant, which is a much more reasonable portion than the original.
  • The Ultimate Bacon Burger at Chili’s is another contender for the doggie bag approach. If you split the burger in half and save half for another meal, you’ll save 515 calories! Now if you ate the whole thing, the grand total for this meal (without fries!) would be 1030 calories. Do you see how a doggie bag can make a huge difference in portion control?
  • An All-American Slam breakfast at Denny’s has 990 calories per plate. If you only ate half, you’d bring the portion size down to a much more reasonable 495 calories.

If you were to make all 3 of these changes, you would save 1,475 calories over the course of those meals!

Plus, by putting the rest of a given meal in a doggy bag and following food-safe methods, you will have a whole other meal at your disposal. This in turn makes your restaurant choices stretch farther on a budget.

Here are some additional portion control resources…

And here’s a doggy bag safety handout, just for you!

Food Safety When Taking Restaurant Meals Home: A Handout

DoggieBagFoodSafety

The Trials We Face as Educators

It’s time for a little venting session.

My family thinks that I’m obsessive when it comes to food safety. They get upset when I get up from a dinner table and start to put food into the refrigerator and I always hear them say things like, “it’s OK to leave those beans out,” or “this is still hot, let’s let it set out for a while.”

Here are a few examples.

The Family Reunion: For a recent gathering, my cousin made his favorite baked beans recipe. It included sausage, hamburger and hot peppers, and he prepared it the day before and put it in the refrigerator. The day of the reunion, at about 1 p.m. he brought a small slow cooker, overflowing (at the point that the lid didn’t even close) with these cold baked beans and turned it on. We were going to eat at about 3 p.m!

First off, leftovers shouldn’t be re-heated in a slow cooker.

Second, this was way too full.

To make things a bit safer, I took action. When everyone else was outside, I took the baked beans out of the slow cooker and heated them on the stove to 165 degrees F. After that, I washed out the slow cooler and then put the beans back in on low.

Last Thanksgiving: For our celebration last year, we went to a friends’ home with my mother for the holiday weekend. The plan was for them to get the turkey, then I would cook it.  Unfortunately, we arrived Wednesday evening to find the frozen bird in a cooler. Yikes!

As I was looking a little upset about this turkey situation, my mother said “It’s alright, honey.”

It isn’t alright.

Could I save the turkey? My first thought was about the temperature, so I put a thermometer into the cooler. Luckily, my friend had added some ice packs. The temperature was below 40 degrees F, and the turkey was still mostly frozen. I put it into the refrigerator ASAP and no, we didn’t have to cancel Thanksgiving.

At the same Thanksgiving, the daughter-in-law of the host brought homemade pumpkin pie, at room temperature. I heard her say: “I just make it last night, it doesn’t need to be in the fridge.”

In my opinion, there was no saving it. It may have been safe because of the amount of sugar added, but how can you be sure with a homemade custard pie? I whispered to my husband, “don’t eat the pie.”

Maybe I should have been more forceful with the rest of the family. After all my mother was there.  She and our friend are both over 80 years old and more susceptible to foodborne illness. The last thing they need is to get sick.

If this were a class, I’d call it a teachable moment. However, being the educator at a family event can be hard. How do you not be the “Grinch that ruined the special occasion with your family?”

Well, look at the consequences. Diarrhea or barfing all night would definitely spoil a holiday.

I’ve heard other food safety educators talk about this topic. Some don’t eat at their mother-in-law’s. Others won’t go to pot luck dinners.  Many of their spouses also know that “I-wouldn’t-eat-that-if-I-were-you” look.

I just wanted to share with other educators… it’s not just you! 

I’m not sure that I have any good advice on this topic. I guess we just have to keep trying to be good role models and do the best we can to educate, even educating those that are the closest to us.

By Cheryle Jones Syracuse, MS, Professor Emeritus at The Ohio State University

To help you teach about food safety, I’ve also made a new printable food safety handout with lots of tips and “dos and don’ts.” I hope you like it!

Food Safety TipsheetAnd here are some other educator resources that can make your work easier…

Food Safety at Pick-Your-Own Fields

I can make a long list of why pick-your-own fruit and vegetable fields are great. After all, they provide local foods that are as fresh as possible. Other positive aspects include exercise, family activities, fun, education, great prices, and a chance to teach children about where our food comes from.

I could also add a couple negatives to the list. For example, you could be exposed to bacteria and microorganisms that can cause foodborne illnesses. The last thing you want to do at a pick-your-own market is pick up your own (or your neighbors’) germs along with the produce.

GAPs

One way that pick-your-own fields are helping to reduce foodborne illness risks is by putting up a sign that recognizes Good Agricultural Practices (GAPs).  The signs encourage customers to do their part in keeping the food safe. Specifics included:

  • Wash your hands before you pick
  • Make sure children wash their hands, too
  • Wash the fruit before eating it

These tips may sound really simple and basic, but washing your hands both before and after going into the field can help prevent contamination.

Most people think to wash after, but not before picking. Washing your hands before going to the field helps keep the produce clean and avoids possible contamination from hands that have not been washed after going to the bathroom, after smoking, after sneezing, blowing your nose, or coughing. All of these things could make your hands contaminated and then unknowingly you could contaminate the produce. It’s not just your food you’re protecting, but it’s the next customers’ food too!

Wash Your Hands

I made a comment to one of the women working the scales at the market, telling her I thought that that was a great sign and that I appreciated the efforts made to keep the produce safe.  I asked if many folks did wash their hands. She said “sadly, most don’t and it’s really important, but [she] can’t make people do it.”

Some savvy farmers (like the one I visited) are also providing portable sinks that make it easy for folks to wash their hands.

To me these signs and the sinks are sending a positive message about this farm — a message of concern for our health. Contamination can take place anywhere along the field-to-fork continuum. By following GAPs during growing, harvesting, sorting, packaging, and the storage of fresh fruits and vegetables, our farmers are working to keep our food safe.

By Cheryle Jones Syracuse, MS, Professor Emeritus at The Ohio State University

Here’s a printable handout with the key points of today’s post…

PickYourOwn

And if you’d like more resources to support food safety lessons, don’t miss the following options…

Supporting Healthy Eating Patterns: Walking the Talk

We have a wonderful group of neighbors in a dining group, and each month we gather for drinks before going to a local restaurant for dinner. Each couple takes their turn hosting the get-together, and some folks go all out and serve a buffet of appetizers and other nibbles. In fact, quite often the guests complain that they’ve eaten too much before dinner. I often wonder why people (even those that are usually very mindful of what they personally eat)  always seem to pull out the most unhealthful, high calorie, and high fat foods they can find when they have people over.

Slice that Melon

This month it was our turn to host. Everyone knows that I personally try to eat and serve healthful foods when possible. The neighbors also know that I frequently write and teach about healthful eating. So I really felt that I needed to “walk the talk” at this gathering.

The pressure was on. What to offer?

I wanted something in addition to the ubiquitous carrots and celery sticks that often make up the “healthful option” at gatherings. To me, fruit was the obvious answer and watermelon was plentiful. I’d seen some Pinterest photos of “the right way to cut a melon,” so I thought I’d give it a try.

Sliced Watermelon, Pinterest Style

The concept was to cut the watermelon into sticks, leaving the rind attached so that guests could use their fingers when eating the “spears” of fruit.  My version didn’t look as good as those I saw in the photos online, but it was well-received by our guests!

Here are a few things I noticed about this particular way to prepare watermelon, in case you’d like to try it too…

  • There were pieces near the edges that were more white rind than fruit—so I pitched them.
  • Don’t try to move your watermelon after cutting it!

Watermelon Spears

One of the key messages from the new Dietary Guidelines for Americans is “everyone has a role in supporting healthy eating patterns.” This doesn’t only have to be in governmental, organizational, or educational settings. We can always encourage healthful eating patterns whenever possible, even closer to home with family and friends.

It’s always a challenge to “walk the talk” For those who try… keep up the good work!

By Cheryle Jones Syracuse, MS, Professor Emeritus at The Ohio State University

Here are some other resources that can help you walk the talk at work and at home…

And here’s a free printable handout with instructions on how to make this simple summer appetizer…

Watermelon Appetizer

Watermelon Basics

TendrilsJuly is National Watermelon Month… celebrate in style!

Nutrition: All melons are low in calories, fat, and cholesterol. They’re also sodium free.

Watermelon is a good source of Vitamins A and C. It also provides vitamin B6 and potassium. Pink watermelon contains the potent carotenoid antioxidant, lycopene, and has higher concentrations of lycopene than any other fresh fruit or vegetable, including tomatoes. A two cup serving of watermelon contains only 80 calories and counts for two of the eight servings of fruits and vegetables recommended per day.

Picking a watermelon: A good watermelon should be symmetrical, heavy for its size, and firm with no cuts, dents, or bruises. Look for the pale or buttery yellow “belly.” Tendrils (like pig tails) near the fruit stem should be dry and brown. When selecting a cut watermelon, the more red flesh and less white rind you see, the riper the melon is. White seeds usually indicate that the melon was picked too early. Although so-called “seedless” watermelons have far fewer seeds than the seeded varieties, they generally contain at least a few soft and pale seeds.

Wash that melon!Storage: Uncut melons can be stored for up to 2 weeks at room temperature depending on ripeness. Once cut, store all melon in a tightly closed container — its aroma easily mingles with other foods. Cut slices or chunks of melon should never be left out or held at room temperature for an extended period of time. Use cut melon within 3-4 days.

Safety: Bacteria can adhere to the surface of a melon and be passed to the flesh when the fruit is cut or handled. The melon’s skin should be washed and scrubbed with water, even if you don’t eat the rind or skin. If selecting a cut melon, be sure that it has been refrigerated during display.

Looking for some other articles or ideas to use to write or teach about watermelon?  Here a past post from the archives that can help: To Thump or Not to Thump? A Watermelon Quiz

By Cheryle Jones Syracuse, MS, Professor Emeritus at The Ohio State University

And here are some other fun summer resources…

Last but not least, here’s a new printable handout that you can use as you see fit!

Watermelon Month

Farmers’ Markets Dos and Don’ts

I have a problem at farmers’ markets.

In the fieldsYou see, I absolutely adore farmers’ markets. The problem is that I tend to get carried away when I visit them. I’m always so excited to see all the fresh fruits and vegetables that I end up buying much more than I really need. My eyes are bigger than my refrigerator.

After a visit to the farmers’ market the other day, we had fresh tomatoes, green beans, tiny new potatoes, and corn on the cob for dinner. I served all that with oven-baked walleye from the freezer. Even the fish had been caught locally — we got it last summer on a trip to Lake Erie.

You can’t get much more of a local meal than that.

Since I go to farmers’ markets so often and have been going for so many years, I’ve learned quite a few “dos and don’ts.” Now I’d like to share them with you…

Farmers’ Market Dos:

  • Do eat fruits and vegetables.
  • Do enjoy the fresh, local availability of a wide range of foods.
  • Do try something new and different.
  • Do make a quick trip around the market before you make any purchases.
    • This allows you to see what’s fresh.
    • It also helps you get a sense of how much each kind of food will cost.
    • Once you’ve made your lap, go back to the stalls that offer the items you want at the best prices.
  • TomatoesDo bring cash. Growers don’t always accept credit cards.
    • Keep your money easily accessible.
    • This will make your transactions easier and faster.
  • Do wear a hat, sunglasses, sunscreen, and comfortable shoes.
  • Do bring water to drink.
  • Do bring a reusable or recycled bag to help carry your purchases.
  • Do put a cooler with ice in your car.
    • This will help the items you buy stay fresh until you get home.
  • Do go early in the day.
    • If you’re there at the start of the market, then you’ll get the best selection and quality.
    • Yes, you might get a good deal on any items left near closing time, but you also might miss out on what was available.
  • Do get to know the vendors.
    • Many are your neighbors.
    • Become a regular.
    • Spend some time talking with the growers. They can let you know what’s in season and what to expect in upcoming weeks.
  • Do ask about bulk purchases.
    • If you’re planning on purchasing a few items to preserve (freeze, can, or pickle) then you might get a deal if you buy large quantities.
    • Again, this is the time to talk with the grower and arrange for these large orders ahead of time.
  • Pea Shoots Do keep food safety in mind.
    • While you may be tempted to taste a bite of fresh melon or tomato, look around and make sure that the person offering it has used good practices.
    • Good practices include washing the produce, wearing clean gloves, offering toothpicks, using a clean knife, and keeping the food items cold if necessary.
    • Don’t take risks.
  • Do be considerate of the farmer and the next customer.
  • Do keep control of your kids and dogs.
  • Do come back next week.

Farmers’ Market Don’ts:

  • Don’t sample anything if the food isn’t offered to you or labeled as a sample.
  • Don’t expect the farmers to deal with you on price.
  • Don’t pinch, squeeze, drop, peel (like corn), or stick your fingernails in foods and then leave said foods for someone else.
    • Respect the food and your fellow customers.
    • By messing with the food, you may be making it unsellable.
  • Don’t block a vendor if you’re not buying.
    • If you’re visiting with a friend, move away from a display so others can get by and shop.
  • Don’t get carried away (like I do).
    • A deal isn’t a deal if the food goes to waste.
    • Be sure to only purchase what you’re able to eat while the food still has good quality.
  • Don’t forget, you can always go back next week.

Cheryle Jones Syracuse, MS, Professor Emeritus at The Ohio State University

Find more farmers’ market educational resources in the Nutrition Education Store. The most popular ones include…

Farmers’ Market Photo Posters

Enjoy Your Farmers’ Market Handout

Real Food Grows Banner

PS Have you visited the free clipart library? Check out the fruit and vegetable clipart, try an infographic, or just browse the full selection!

Food Safety and the Slow Cooker

RIMG6853 RIMG6873The food safety nerd in me just had another (as my husband would say) “food safety fit”.

This was the result of a post on Facebook, shared by a friend who thought it looked like a good idea: 31 slow cooker freezer meals.

Actually I like the idea. The post looked promising — planning meals ahead of time (wow, that’s a concept), buying all the ingredients for 31 meals at one time, doing all the chopping and prep work at one time and then freezing what was left. This isn’t really a new theory, but what makes this specific post or collection of recipes unique is that it the food is eventually cooked in the slow cooker.

What gave me the fit was the thought of the frozen food going directly into a slow cooker on low. The recipe author says that she looked up the food safety procedures and does not recommend putting frozen food directly into the slow cooker. Most of the recipes say to thaw in the refrigerator overnight before putting them in to cook.

There were lots of comments from folks who were either for or against this process.

Several mentioned that the USDA does not recommend the direct-from-freezer-to-slow-cooker process. Yeah!

Several others commented that they’ve been putting frozen meat in the slow cooker for years… and they’re still alive. (You know how I feel about that one).

The reality is that putting frozen food in a slow cooker provides an excellent opportunity for bacteria to grow as the food and the slow cooker make their way slowly through the temperature danger zone (TDZ) to a safe minimum internal temperature.

One reader commented that she took the bag of frozen food out of the freezer and threw it in the sink while getting dressed in the morning, then just put the frozen food in the slow cooker. Thawing at room temperature and then putting on low temperature to cook is just asking for trouble with bacteria growth.

Other comments revealed more unique ideas on this topic. One suggested leaving the food in the zip-top freezer bag and popping it directly into the slow cooker, like a slow cooker liner. That’s another recipe for trouble. Remember: while freezer-quality bags are great for freezing, they are not designed to for long-term heating.

Another person suggested freezing directly in the slow cooker liner bags. Again, these liners were not designed for this purpose and using them this way may result in loss of quality.

I really do love the idea of planning ahead and doing some “mass preparation” to save time and have food ready to go when needed. So, what would make these recipes a little more appealing and safer?

Check out the recipes you’d really like and start with only a few meals. Make sure your family likes the outcomes and that many slow cooked meals before you get a freezer full. This will also eliminate the possibility of overloading the freezer.

Then, freeze the vegetable/seasonings and meat in separate bags. This would allow you to brown the meat before putting it in the slow cooker in the morning. Taking the time to do this can provide better color and flavor to the final product and also it helps speed the meat through the temperature danger zone.

Most of the recipes say to take the bag from the freezer the night before and allow it to thaw in the refrigerator.  While thawing in the refrigerator is the best method, one overnight may not be enough, so you may need to plan ahead a little more.

Use the appropriate packaging materials and then use them for their intended purpose.  There’s no reason that you can’t use slow cooker liners for easy clean-up, they just aren’t intended for freezer storage.

As you’re getting ready in the morning, start the food off on high and then turn it to low before you leave the house. This helps jump start the temperature in the slow cooker and rushes the food through the TDZ.

And above all, don’t listen to “know it alls” “old wives tales” and “we’ve always done it this way” that you’ll find in the comment sections on Facebook. Check out the evidence and researched-based references on food safety.

By Cheryle Jones Syracuse, MS, Professor Emeritus at The Ohio State University

Here’s a handout with the highlights of slow cooker food safety!

Slow Cooker Safety

Check out these additional kitchen safety resources…

Confessions of a Juice Drinker

RIMG6810You would have thought I had committed a heinous crime when I admitted to a group of women that I frequently drink orange juice in the morning.  I know that eating whole fruit is a better choice, but I like juice.

Their astonished comments were accompanied by what they thought was a known fact that there was lots of sugar in juice. OK I admit this. One eight-ounce glass of juice contains 21 grams of sugar. However, if you drink only pure 100% juice, then that sugar is all from the fruit itself, not added sugar.

After their admonishments, I’m still trying to convince myself that drinking juice is acceptable. One of my rationalizations is that I make an effort to seek out juice that has added calcium and vitamin D. At least I’m getting those extra nutrients.

I also admit that I like lots of pulp. The pulp in orange juice is real orange pulp, but it doesn’t amount to any significant fiber. That said, I still like it. The majority of orange juice sold is pulp free, so the pulp is actually removed at the beginning of the process and then added back into juices that have pulp.

It takes about three oranges to make a cup of juice. Juice allows for a lot of calories to be consumed quickly. There are 71 calories in one orange, yet 8 ounces of orange juice provides 112 calories. If I ate three oranges instead of drinking the juice, I certainly would feel a lot fuller! Part of that is due to the three grams of dietary fiber in each orange.RIMG6848

It seems I’m not the only person who likes juice. According to the latest Dietary Guidelines for Americans, 1/3 of all fruit consumption in America is in the form of juice. The most commonly consumed fruit juices are orange, apple, and grape.

The Dietary Guidelines for Americans recommend that we “shift to mostly whole fruits, in nutrient-dense forms.” The guidelines also say that “although fruit juice can be part of a healthy eating pattern, it is lower than whole fruit in dietary fiber and when consumed in excess can contribute extra calories. Therefore, at least half of the recommended amount of fruit eaten daily should come from whole fruits.” They also go on to say that when juices are consumed, they should be 100% juice, without added sugar.

Here’s a tip when it comes to children and juice: the amount of fruit juice allowed in the USDA Food Patterns for young children aligns with the recommendation from the American Academy of Pediatrics. Young children should consume no more than 4 to 6 ounces of 100% fruit juice per day.

RIMG6844Let’s end with a comparison:

Whole fruit: offers fewer calories for the satiety it provides, features more dietary fiber, takes longer to eat and therefore provides more eating satisfaction

Juice: offers a quick and easy way to reach daily fruit servings and could be enriched with needed nutrients

Here are the take home messages:

  • Seek moderation in all things.
  • Watch the amount of juice consumed.
  • Make that “shift” to whole fruit whenever possible.

Some habits are hard to break.

By Cheryle Jones Syracuse, MS, Professor Emeritus, The Ohio State University

PS Here’s a printable handout that features the highlights of today’s post.

Juice

Make Great Grilled Salads at Home!

Sliced RomaineI’m always on the lookout for ways to eat, serve, and enjoy more vegetables. Salads are winners, but sometimes the toppings tend to pile on more calories and sodium than I want.

Caesar salad is a great example. It sounds healthy in the beginning, but the high-fat dressing, huge dose of cheese, and heaps of croutons frequently outweigh the benefits of the dark green leafy Romaine lettuce. A tablespoon of a typical Caesar dressing contains around 8.5 grams of fat and roughly 80 calories. This can be cut a little by using a lower-calorie version, but then you increase the amount of sugar and maybe even sodium.

But the foundation is sound. Romaine is a great green, high in vitamins K, A and folate. Like other greens, it’s almost fat-free and low in calories, with about 50 calories in a half a head and a bonus of dietary fiber (6.5 grams that same half head). Romaine is usually the basis for the Caesar salad, so let’s capitalize on it.

How?

By putting it on the grill.

Recently my husband and I went to a new restaurant in our community. I was surprised to see a “grilled Caesar salad” on the menu.  It brought back memories of a similar salad I had in a restaurant in Baltimore over 15 years ago. I was so glad to be reminded of something I had enjoyed, and that in turn inspired me to give my own twist on this other way to enjoy a salad.

I fired up the grill and decided to try a grilled salad of my own. It’s so simple and a winner! Plus, it really doesn’t need dressing or croutons and a small amount of cheese goes a long way! When I served it for the first time, I had guests going back for seconds on salads. Now how often does that happen?!

Want to try it for yourself?

Here’s what I did.

On the grill!I started with full heads of Romaine lettuce. I washed and pulled of any wilted leaves, leaving much of the core intact so that the leaves still clung together. (Nutrition tip: keep as many of those dark green outer leaves as possible).

I then cut the heads in half and washed them again. After that, I put a small amount of olive oil (about one tablespoon) and some (about 1 ½ teaspoon) dried garlic seasoning into a large zip-top bag and shook it around. I used garlic seasoning since it’s in a Caesar salad, but you could experiment with anything. Then I added the Romaine heads and refrigerated them in the marinade, shaking the bag a couple of times to coat the lettuce with the oil and seasoning.

I’ve seen recipes online that didn’t put the lettuce in a bag and brushed the leaves with oil just before putting on the grill.  I’m guessing this would work well, too. This was just my way of getting the work done early. It also eliminated a brush and allowed me to take the seasoned lettuce straight to the grill.

Once you’ve got the Romaine on the grill, the key is timing. It doesn’t take long:three to four minutes on each side at the most. The lettuce should be slightly charred and a little smoky. I topped each head with grated Parmesan cheese and served it to my guests. I don’t think it needed any other dressing, but a small amount of low-fat Caesar dressing could be added. Yum!

By Cheryle Jones Syracuse, MS, Professor Emeritus at The Ohio State University

And here’s a printable handout with the recipe! How will you use your copy?

Grilled Caesar Salad

Don’t miss these other amazing salad resources from the Nutrition Education Store!

The #1 Way to Prevent Foodborne Illness

Wash Your HandsYou’ve probably seen these signs posted in public restrooms — in fact, health departments in most states require them for restaurant and food service workers.

What signs am I talking about?

The handwashing signs. You know, the ones that state: “Employees must wash their hands before going back to work.”

While I do feel strongly that all employees must wash their hands after using the restroom, I really wonder if the signs make a difference. Would you remember to wash your hands after seeing this sign if you weren’t inclined to do it anyway?

That said, if these signs remind just one worker, it’s a plus.

But now I want to talk about a different sign I saw recently. On the back of the door of a fast food restaurant, I found a sign that said “Our employees wash their hands… and so should you!”

YEAH!

Handwashing is considered the number one way to prevent foodborne illness. The Centers for Disease Control and Prevention (aka the CDC) call handwashing a “do-it-yourself” vaccine that you can do to reduce the spread of illness.

Regular handwashing, particularly before and after certain activities (like going to the restroom) is one of the best ways to remove germs and prevent the spread of germs to others.

You see, human feces are a source of germs like salmonella, E.coli, and norovirus. These pathogens can get onto hands after people use the restroom. Research by Franks et al. in 1998 showed that a single gram of human feces can contain one trillion germs. If not washed off, these germs can contaminate surfaces like tabletops, door knobs, and handrails, along with getting into food and drinks.

YUCK!

Now I know that this isn’t rocket science, or even new information. I was recently teaching food safety at a local restaurant and they showed me an old sign in their employee restroom. They said it has been there since 1958, before they owned the restaurant. It’s still hanging next to the current version of the handwashing sign.  Perhaps the two signs together will at least catch the attention of their workers.
I like what this older sign say “State law and COMMON DECENCY… require that every food handler wash his hands after a visit to a toilet…” and so should you.

By Cheryle Jones Syracuse, MS, Professor Emeritus at The Ohio State University

Help spread the word about the importance of handwashing with this fantastic PDF handout!

Wash Your Hands

And here are a few more health and wellness resources, straight from the Nutrition Education Store!

Flu Prevention Poster

Food Safety Video

Healthy Kitchen Poster