2018 Cooking Demo Ideas

Do you have an audience who needs to eat more fruits, vegetables, and legumes? Perhaps they have picky tastes or they do not know how to cook and plan meals? Or maybe they love to cook and they are looking to you for inspiration and healthy eating ideas? Whatever the cause, a cooking demo is a great way to help people learn to eat healthfully. They can be used as part of a wellness program, for marketing a program, or in a classroom setting. You don’t even have to heat anything you can make salads, snacks, and desserts without cooking. Of course you can also go hog wild and cook a few dishes or meals.

Chances are you have a few favorite dishes and cooking techniques that others will want to learn. There is a reason why most parties end up in a kitchen! But if you want some great ideas you are in luck! Here are new ideas for 2018 for fabulous cooking demonstrations.

InstantPot – I have a friend who likes to work very hard and very late in her dental practice. She is a total foodie who loves to cook so she is not giving it up but she is doing it faster! She actually owns two InstantPots and is cooking all of her meals in them. On the day that I visited her kitchen she was slowly cooking a turkey breast in one and a soup in another one. It is all about hands free, fast cooking.

Salad – Develop your own delicious salad using local seasonal ingredients. It could be fun to assemble and prep a bunch of salad fixings and allow people to come up and make their own concoction. Or maybe you want to have a salad challenge on your social media channels.

Dessert – everyone loves dessert. Why not make up some great fruit desserts? Our favorite is banana split with fresh bananas, chocolate sauce, whipped cream, and toasted nuts. Or you can make a fruit soup with blended fresh fruits. And if you really want something clever consider our all-time classic apples with Greek yogurt, honey, and toasted nuts!

Bean tour – what can they do with canned and dried beans? Why not have a bean bootcamp to make soups, chili dishes, dips, and salads using canned and or dried beans? These cook really fast in a pressure cooker or InstantPot and canned are always easy, too. Our favorite lentils cook in just 20 minutes without soaking.

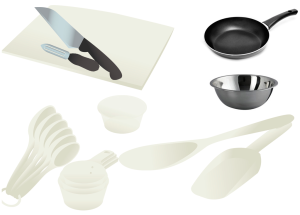
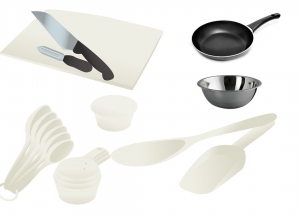
Equipment – maybe you are a total foodie and have some really neat well-vetted equipment or tools that are very useful. You could have a day where you review equipment and how to use it. Of course this could be as simple as a peeler, knives, and a cutting board. Or it could add in InstantPots, microplane graters, Japanese mandolins, food processors, and a variety of steamers. Or maybe it is all about what a rice steamer can do? or how to wash greens in a lettuce spinner?

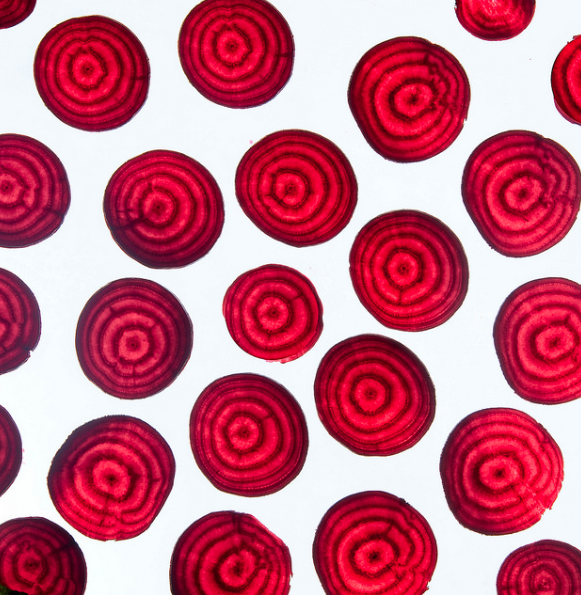
Local foods – Did you know that millenials are fast becoming part of an $8 billion local food industry? Check out local foods at various markets and farmer’s markets and show how to make what is in season right now.

Regardless of your topic, don’t forget your audience’s skills, culture and budget and remember to consider what your facility looks like. But most importantly be yourself and don’t worry that your ideas and skills won’t impress. Each person has a unique way of cooking and everyone loves to learn a new idea or way of doing things in the kitchen.

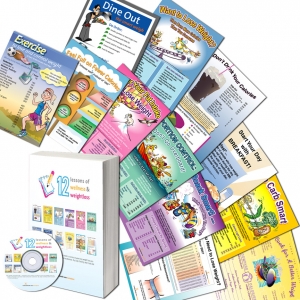
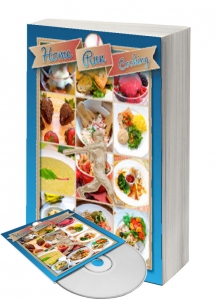
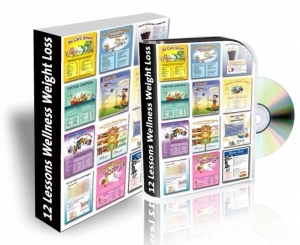
If you really want to polish your skills consider one of our books, a salad theme,

or our new upcoming webinar, 10 Successful Strategies for Cooking Demonstrations.

Got a question? Ask us!

Activity Idea: Crostini Bar

You guys, I just got the coolest request from longtime reader Pat Hunter.

Pat wrote…

I am working on a simple demo for a table I am planning on the topic of plant-based meals. I thought a crostini bar might be an inviting stop for customers. Everyone enjoys make-your-own bars. I would like to use a whole grain cracker, hummus, etc. Have you ever created a handout on this topic?

I haven’t made a handout on this particular topic, but today I want to share a bunch of strategies in this blog post.

Here’s everything you need to build a tasty and appealing crostini bar that’s also good for health!

The Bases:

Crostini make the most sense as the base for a crostini bar. For a nutrient boost, make sure that you’re slicing and toasting whole wheat bread or using pre-made crostini that highlight whole grains.

As Pat suggested, whole grain crackers are also a delightful base for the toppings, and in this day and age it might be wise to throw in some healthful gluten-free crackers as well.

Sliced cucumbers can also be good bases for the toppings in this bar if people are looking to go low-carb or get an extra veggie boost.

The Middles:

Plain hummus is a great topping for the next section of the crostini. Its mild flavor complements the toppings to follow, and its creamy texture makes it an effective “glue” for holding the toppings to the bases. Set out a few different flavors of hummus and let participants try their favorites.

Artichoke tapenade, olive tapenade, and red pepper tapenade are all also colorful and tasty options for the “middle” section of the crostini bar. Choose the options with the lowest sodium to keep your bar heart-healthy.

Finally, bean dip makes a great high-fiber addition to this crostini bar.

The Toppings:

Now let’s add some color! Sliced and diced raw vegetables are phenomenal toppings for a crostini bar. Plus, they add the necessary visual appeal and crunch that a topping should provide. Go for a mix of things like shredded carrots, halved grape tomatoes, ribboned cucumber (use a peeler to make thin ribbons), diced celery, sliced radishes, chopped bell peppers — really whatever is in season and looks appealing would be great at this part of the bar.

A shredded green salad with a light dressing can also be a great crostini topper. Consider ribbons of raw kale or chard, bulked up with shredded carrots or Brussels sprouts, then tossed with a bit of oil and fresh lemon juice.

You can also add steamed and sliced beets with goat cheese as a final option in the toppings section of your bar.

The Finishing Touches:

Salt, pepper, olive oil, citrus juice, fresh herbs, toasted and chopped/sliced nuts, and/or salad dressings can all add the perfect “finishing touch” to a crostini bar. Consider setting out a selection of those ingredients at the end of the bar for people to add to their creations before they eat them.

So, what do you think? Are you ready to build a crostini bar for your next presentation or event?

Nutrition Month at the Worksite: Activity, Display, and Presentation Ideas

Want to celebrate Nutrition Month at your worksite? Check out these inspirational ideas, and let us know your plans by tweeting us @foodandhealth or writing on our Facebook wall

  • Create a Nutrition Education Display board and display it in the lobby. It’s a great resource for employees and community members who are seeking services.
  • Make Nutrition Education bulletin boards available for all clinic sites to display.
  • Set up a 5 for 5 Challenge. This challenge will encourage employees to eat at least 5 servings of fruits or vegetables every day. It can also include an exercise component, calling for everyone to exercise for at least 30 minutes on each of the 5 workdays during the week. Employees will have a tracking form to keep up with their progress towards the challenge. If they complete the form, then that person’s name will be entered into a drawing at the end of the month’s activities. Feel free to offer prizes that you think would work best for your site.
  • Have a smoothie and healthful snack taste testing week. Make healthful snacks and smoothies will available for a one hour period at your workplace. Offer recipes and supporting materials to anyone who stops by to taste test the treats. Employees that participate could also enter their names into the drawings to be held at the end of the month’s activities.
  • Hold a healthful cooking demonstration. We had success with a 1-hour nutrition education session, which included the preparation of multiple recipes to encourage healthful eating and vegetable consumption. RSVPs were be requested for the session. Employees that participated could also be entered into the drawings to be held at the end of the month’s activities.
  • At the end of the month, drawings will be held for the people that participated in at least one of the month’s activities. Drawing prizes could include the following… MyPlate magnetsa professional apronMyPlate wristbands, assorted kitchen tools, or even a cookbook. You could also work with the HR department to give work-related prizes like an extra vacation day.

By Kelly Whipker, RD, LDN

The Nutrition Education Store has everything you need for fantastic worksite wellness programs or fun Nutrition Month activities…


New Presentation Tips

I’m so excited because I’ve finally gotten the tools I need to share an amazing new resource with you…

A Sauce Painting Kit!

This kit features the 3 tools that you need to arrange beautiful plates at your next cooking demonstration or presentation. It includes…

  • Stainless steel sauce spoon – This special spoon makes it easy to arrange sauce on a plate.
  • 4 ounce squeeze bottle – Put a sauce that you want drizzled on a plate into this bottle and see how beautiful your presentation will look. Plus, you can wash and reuse the bottle as many times as you want!
  • Silicone pastry brush – The is perfect for brushing thick sauces on a plate so that your food presentation looks like it was done by a professional chef!

Now I want to share a few fun ways that you can use the tools in this kit to create amazing presentations for different dishes. Know that you don’t have to actually buy this kit to make the most of these tips — the kit will just make it easier. Feel free to improvise with resources that you already have!

  1. Add a sauce to an entree plate by drizzling the sauce over the top of your food with the sauce bottle. You can also use the spoon to smear a colorful and flavorful sauce on the plate before adding a protein item, or you could even use the brush to put a highly-flavored sauce on the plate in a beautiful, artistic pattern.
  2. Use the spoon to add a beautiful dessert sauce and then drizzle a design into it.
  3. Use the brush to brush a sauce across the plate before placing food on top of it.
  4. Use the bottle to create dots in the white space around the food you’ve plated.
  5. Use the bottle to drizzle a sauce on top of anything.
  6. Use the spoon to pull a sauce or dressing across the plate before adding your food items.

With this trio of tools, anything is possible! Plus, with this kit, you will be taking your cooking skills and presentations to the next level for you and your family and clients!

And here are a few other resources that would be great for your next cooking demonstration or presentation…

Safe Cooking Demonstration Tips

While watching cooking shows is usually fun, every once in a while they just make me sick. Recently, in just one 30-minute show, I counted three food safety errors.  

What about your food demonstrations? Do you follow good food safety practices? Your audience might be there to learn how to cook or about a new food or technique… but you are also teaching food safety without even knowing it.

 Things to keep in mind:

  • Wash your hands before you cook. Make it obvious.
  • Watch your clothing and jewelry. Avoid long sleeves, watches, rings, bracelets, and earrings.
  • Avoid bare hand contact with ready-to-eat food and explain why you aren’t touching it.
  • Use separate cutting boards for ready-to-eat and raw foods. Different colors are a plus.
  • Keep foods refrigerated until you’re ready to use them.
  • Follow the two hour rule. Don’t allow folks to eat food that has been sitting at room temperature for more than two hours.
  • Wash fruits and vegetables. Again, make it obvious.
  • Use a food thermometer. Demonstrate how to use it and encourage its use for all foods, not just meats.
  • If you’re serving samples, kept them at the proper temperature and make sure the serving utensils are clean.
  • Don’t lick the beaters.
  • Don’t put the tasting spoon in the food.
  • Don’t lick your fingers.
  • If you’re wearing gloves, use care to keep them clean.  Change the gloves when you change tasks. Wash your hands before you put your gloves on.
  • Don’t talk on your phone while you’re wearing the gloves.
  • Don’t play with your hair.
  • If you’re only partially cooking something due to time, do not allow folks to eat this food before it is thoroughly cooked.

You know the saying “do as I say?”  Well why don’t you make it “do as I do,” too?  People mimic each other and will learn healthful techniques if they see you practicing what you preach.

By Cheryle Jones Syracuse, MS, Professor Emeritus at The Ohio State University

PS: We’re giving away a free guide to organizing your next cooking demonstration. Download your copy today!

Cooking Demo Checklist

That guide is excerpted from the Cooking Demo Ideas book, so if you like what you see, get the whole book today!

The Cooking Demo Book

Want more tools for great cooking demonstrations? Check out the materials at the Nutrition Education Store! More favorites are below…

Home Run Cooking Demonstration Program

Celebrate Your Inner Chef PowerPoint Presentation

Food Safety Poster

Presentation Idea: Make an Artful Display

Cooking Demo ToolsWhen you’re giving a cooking demonstration, the way you present your ingredients can really make a difference in audience engagement. If you have things haphazardly tossed into bowls and plates, or even just zip lock bags, the instructions won’t be as clear and you won’t look as professional as you could.

Gather pretty prep bowls and other items that will make your presentation ingredients look more appealing. Be sure that all your tools and ingredients are ready to go before your class arrives to view the demonstration.

Linda L. Rankin, PhD, RD, LD, FADA, Professor and Assistant Dean at Idaho State University’s Division of Health Sciences and the Department of Health and Nutrition Sciences, uses gorgeous glass containers for her cooking classes. They’re called Prodyne Spice Towers. She told Food and Health, “I bought three and am going to use them in my Healthful Cooking class – 1 for legumes, 1 for rice, and 1 for grains. They will also be great for presentations, TV spots, and individual counseling.”

We loved these towers so much that we even pinned them to our list of favorite kitchen equipment on Pinterest. Check us out at http://pinterest.com/foodandhealth!

For more great ideas for your next cooking demonstration, check out the options below…

Home Run Cooking: Book and Demo Program

Cooking Demonstration Kit

Cooking Demonstration Guide

Nutrition Apron