Microwaving Nutrients

Is there anything new out there about nutrition and microwave cooking?

VeggiesOne of our readers asked about this a few weeks ago, and since I’ve written several posts about microwave cooking, I got the chance to take a closer look at this topic.

I immediately took to the web. After a quick search, I decided to check in with some former colleagues and equipment experts. After that, it was back to government websites, and chats with some university researchers.

Overall, the consensus seems to be that there is not much to be concerned about.

Let’s take a closer look at the research. There have been studies in the area of commercial microwave processing, but there doesn’t appear to be much that’s new when it comes to home microwave cooking. The general wisdom has been that microwave ovens help food retain more nutrients than conventional cooking does, and this is still the case.

Early studies about microwave cooking stated that cooking in the microwave had minimal nutritional effect on proteins, lipids, carbohydrates, and minerals. Most of the research back in the early 1980s looked at vitamins in food and the conclusion was that there were only slight differences in vitamin retention when it came to microwave vs. conventional cooking.

Let’s go back to what we know about nutrient retention in the first place. Heat is one of the major factors. This is the same no matter how the food is cooked: in the oven, on top of the stove, or in the microwave. Vitamin C is one of the first vitamins to dissipate with heat. The longer something is heated, the more vitamins are lost. So, if you’re cooking quickly in the microwave, then you theoretically will lose less of heat-sensitive vitamins than you would if you were cooking slowly on a stove.

ZucchiniWe also know that cooking water is a source of nutrient loss. When vegetables are cooked in water, the water-soluble nutrients leach into the water. So, again, microwaves could “win” here because the recommendations are to use only small amounts of water when cooking in the microwave. Generally, cooking anything in the microwave uses less time and less water, which translates to less nutrient loss. You get similar results with steaming and stir-frying. Boiling seems to be the biggest source of water-based vitamin loss. Folic acid, Vitamin C, retinol, and thiamine (B1) are the most heat-sensitive and water-soluble vitamins. Fat-soluble vitamins (A, D, E, and K) aren’t usually lost in cooking (3). It also appears that microwave cooking enhances mineral retention in vegetables if they’re cooked for a short time in minimal water (2).

Australia’s national science agency, the Commonwealth Scientific and Industrial Research Organisation (CSIRO) shares that there have not been any reports of non-heat-related effects on the carbohydrates, protein, or fat of foods when they are cooked in the microwave oven. According to CSIRO, the quality of protein is higher in microwaved food than in conventionally-cooked food because less oxidation occurs in the meat (2). CSIRO also stresses that foods cooked in the microwave do not have a radiation risk, stating that microwaves do not remain in the food and are not capable of making the food or the oven radioactive.

Moreover, the Harvard Medical School Health Guide (4) reported that “Italian researchers published results in 2008 of an experiment comparing three cooking methods—boiling, steaming and frying—and the effect they had on the nutritional content of broccoli, carrots and zucchini. Boiling carrots actually increased their carotenoid content, while steaming and frying reduced it. One possible explanation is that it takes longer for vegetables to get tender when they are steamed, so the extra cooking time results in more degradation of some nutrients and longer exposure to oxygen and light” (5).

MicrowaveCooking can cause some destruction of phytochemicals and antioxidants because some are water-soluble and sensitive to heat and air. But other compounds like lycopene become more available when heated (3). Since microwave cooking is so quick, there may be a trade-off of fewer carotenoids for more heat- and water-soluble vitamins.

Several websites state that studies have shown that there is substantial loss of the anti-infective properties of breast milk if it is microwaved at too high heat (5). However, further research explained that it is excess heat (microwave or conventional) that has this effect. The Centers for Disease Control and Prevention (CDC) recommend avoiding the microwave when heating expressed human milk due to the fact that microwaves do not heat liquids evenly, and this uneven heating could easily scald a baby. Bottles may also explode if left in the microwave too long. Plus, excess heat can destroy the nutrient quality of the expressed milk (6).

So, let’s review.

Overall, not much has changed about nutrient retention and microwave cooking.

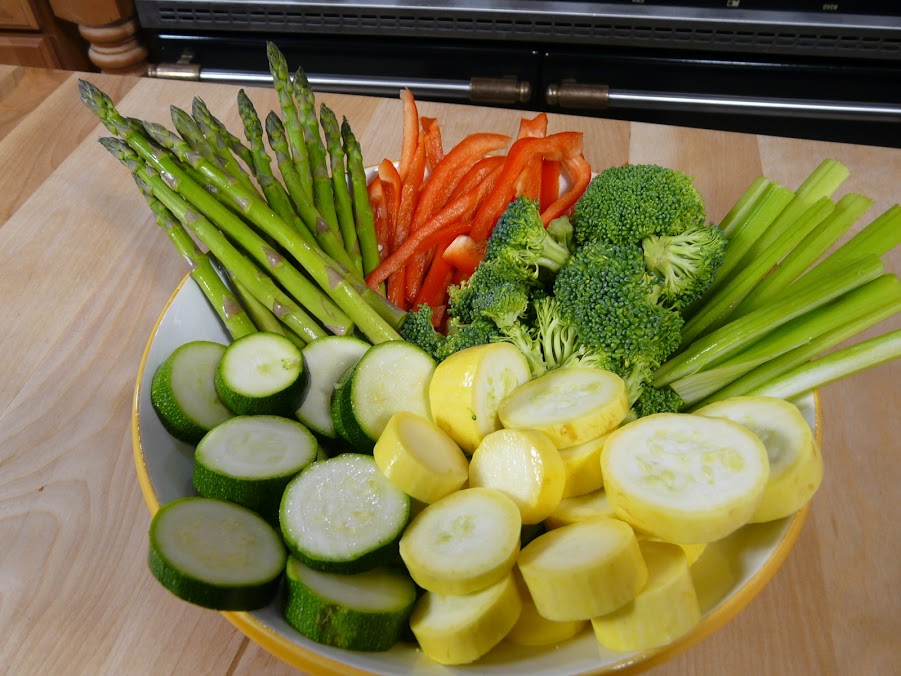
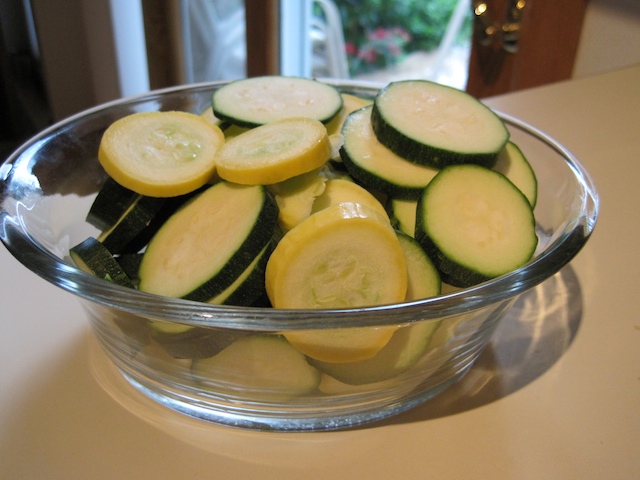
Quick cooking times combined with small amounts of water seem to have a positive effect on nutrient loss — especially when cooking vegetables, which I think are the best and easiest foods to cook in the microwave. Maybe microwave cooking will encourage people to eat more vegetables, which would be another win for the microwave.

By Cheryle Jones Syracuse, MS, Professor Emeritus at The Ohio State University

References

  1. Leskova, Emila, et al. “Vitamin Losses: Retention During Heat Treatment and Continual Changes Expressed by Mathematical Models.” Journal of Food Composition and Analysis (2006); (19) 4: 252-76.
  2. CSIRO The Safety of Microwave Ovens http://www.csiro.au/Outcomes/Food-and-Agriculture/safety-of-microwave-ovens.aspx
  3. About the Buzz: Microwaving Fruits and Vegetables Kills All their Essential Nutrients? http://www.fruitsandveggiesmorematters.org/microwaving-fruits-vegetables-kills-all-their-essential-nutrientss
  4. The Harvard Medical School, Family Health Guide, Microwave cooking and nutrition http://www.health.harvard.edu/fhg/updates/Microwave-cooking-and-nutritio
  5. Quan, R, et al. “Effects of microwave radiation on anti-infective factors in human milk.” Pediatrics, 1992 April; 667-9. http://www.ncbi.nlm.nih.gov/pubmed/1557249
  6. Centers for Disease Control and Prevention, Proper Handling and Storage of Human Breast Milk, http://www.cdc.gov/breastfeeding/recommendations/handling_breastmilk.htmn.shtm

But wait, there’s more! If you want to help your clients learn about how they can use microwaves to prepare healthful and delicious dishes, then you’ll definitely enjoy this two-page handout about using a microwave. Get a free copy today!

Free Handout

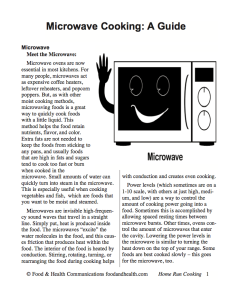
This handout is excerpted from our popular book, Home Run Cooking. If you like what you see, get the rest of the program!

Home Run Cookbook and Cooking Demo Program

More than a popcorn maker

IMGP0086

I’m talking about the microwave oven. 

For many it’s an expensive coffee heater, popcorn popper and leftover re-heater. When microwaves first came out many people taught (me included) and took microwave cooking classes.  These classes are definitely a thing of the past. Every home has at least one microwave and they are just as common as a coffeemaker and no one ever takes coffeemaker classes.

There is a whole generation of people out there who just pushes buttons and doesn’t really understand how the microwave oven works.  Here are some tips that could make your microwaving more successful.

Give it a rest. Due to conduction, heat continues to travel to the center of the food after the microwave shuts off. Standing time allows the food to continue cooking for more even heating of the food.That’s why instructions for baking potatoes always say to let stand 5-10 minutes after the microwave shuts off—but does anyone really do this?  Even cook-in-the-bag frozen vegetable instructions say to let stand for a minute or so before opening the packet.  If you don’t allow for the standing time the food will not be completely cooked and most people are tempted to put it back in and “nuke” it for another minute or two. This usually results in overcooking the food.  Give it a rest.

Use the power levels to your advantage.  Power levels adjust the amount of cooking power going into the food.  Lowering the power level in the microwave is similar to turning the heat down on the top of your range.  Some foods are best cooked slower conventionally; this goes for the microwave, too.

Be patient. Defrosting  takes time and is usually done at lower power levels.  You must allow for standing time afterwards. Don’t get impatient and put it back in and zap for a couple more minutes—that’s when you get cooked, dried edges surrounding a frozen center.

Water is important.  Microwaves are attracted to water, not ice. This is why many of the frozen vegetable instructions have you add a little water to the veggies. This water quickly turns to steam and cooks the vegetables.  Have you ever noticed that vegetables that are cooked without added water tend to be dry and tough?  They need this little bit of water to attract the microwaves and get the process started.

Put a lid on it. Most foods should be covered in the microwave. Use plastic wrap or a glass lid when you want the food to steam.  Paper towels or clean dish towels are good for foods that you want a slightly less steamed exterior such as baked potatoes and baked goods.  A cover also helps to keep the splatters and clean up to a minimum.

When microwaves were new many people tried to do everything in them and soon found that perhaps it isn’t the best way to cook some foods.  But with a little thought and care you can do more than basic heating and reheating.

Cheryle Jones Syracuse, MS
Professor Emeritus, The Ohio State University

Here are fantastic programs to help folks cook better:

Defrosting Donuts

We’re an instant society these days. With email, texting, cell phones and Instagram (don’t really understand this one) people want things right now. This includes their food.  Microwave ovens are as common place in most kitchens as the coffee maker and toaster.   They can help with this “instant” society and cook food quickly.

However,  if you’re trying to defrost food in the microwave it’s going to take a little patience.  It isn’t going to happen instantly—but you can be successful with very acceptable results.

To understand how microwaves defrost you must first understand how they work.  Microwaves are invisible high frequency radio waves that cause water molecule in food to vibrate. This causes “friction” that produces heat within the food.  Microwaves do not penetrate deep into the food, so the interior of the food is heated by conduction—the heat from the outside moving into the center. Understanding this concept, you can immediately see why defrosting something in the microwave can be problematic.

How can you make it work?

Check the power levels. Defrosting takes time and the defrosting time will depend upon the amount of food, the shape of the food and the density of the food.  Defrosting is usually done at a lower power (30% or 50% of full).   If your microwave does not have separate powers or a “defrost” setting you can “simulate” this by turning the microwave oven on for a short period of time, allowing for an equal or double amount of standing time and then turning on again and repeating. Trying to defrost on “high” will just result in overdone outsides and frozen insides.

Standing time is also essential. Heat continues to travel to the center of the food even after the microwave shuts off. This allows for even heating of the food. Not allowing for standing time frequently results in over cooking. This is why frozen packaged foods usually directs you to allow the food to “stand” for several minutes before serving.

Don’t be impatient when defrosting.  It takes 3-5 minutes on defrost (or low or 30% power) in the microwave oven to defrost one pound of frozen ground meat.  But you also need to allow for 5-10 minutes of standing time for the process to be complete.  Don’t get impatient and put it back in and zap for a couple more minutes—that’s when you get cooked, dried edges.  IMGP1330

The shape is important. A trick I like to use is freezing foods in a “donut” shape.   If you have an option, freeze ground meat, casseroles or even leftovers without  a center.  The middle of the frozen food is the hardest to defrost, so by freezing with a hole in the middle you eliminate that problem.  The hole allows the microwaves to enter the frozen food from the center as well as the outside.  Also, for quicker defrosting, when freezing foods try to keep them 3” thick or less.

If freezing in a “donut” shape is not possible, turn, stir or break-up the food as soon as possible to allow the heat to evenly distribute through the food for quicker defrosting.

Also keep food safety in mind.  Once you defrost something in the microwave you need to finish cooking it immediately.  

Cheryle Jones Syracuse, MS
Professor Emeritus, The Ohio State University

Check out our newest materials on healthful cooking instruction:

Top your bowl with a lily pad

IMGP0699 IMGP0691 IMGP0689 IMGP0675 IMGP0659

Some things are just hard to resist.  For me they were silicone lids that look like flowers and plants.

I originally saw them when a friend showed me her set shaped like lily pads. They looked very real to me. I searched several “upscale” kitchen gadget stores and finally found them for sale.

These lids are made of silicone and seal tight on smooth rims of glasses and bowls.  Not only are they pretty, but they create an airtight and watertight seal on glass, plastic and stainless steel.

They are designed by Charles Viancin (www.charlesviancin.com). Let me be right up front with you. I don’t work for them. I do not get any money from them for writing about the lids. And, no, I did not get a discount or free product  for writing this post.  I paid full price—and they are not cheap!  The large (11”) lily pad lid was $13.99.   But, I think they are great and worth letting readers know about these cute and useful kitchen gadgets.

These silicone lids are designed to prevent spills and save on plastic wrap. They can be used in the refrigerated, freezer, microwave and even the oven (maximum 428 degrees F).  They’re great for putting in the microwave to prevent spattering or on top of an irregular shaped bowl in the refrigerator. They look great and attract a lot of attention on the serving table. As a lid they can be washed over and over again (dishwasher safe, too).  I like them for bowls and glasses that didn’t come with their own lids. There are even large “banana leaf” lids that would fit and 8 ½” x 11” dish.

The only problem I see with them is the small little knob in the center does not allow for stacking inside the refrigerator.

 I think they are a great gift idea, bridal showers or weddings or birthdays.  I like to give people things that they  might not spend the money for themselves.

I loved them so much I bought a set of the pink hyacinth ones for my sister as a birthday gift. She loved them.

Cheryle Jones Syracuse, MS
Professor Emeritus, The Ohio State University

For more gifts for cooks see what we have in the store:

Shucks with the husks

IMGP0539
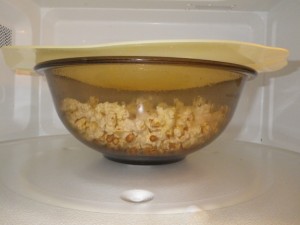
I’ve been cooking corn-on-the-cob in my microwave for many years.  It’s fast and easy, especially for just one or two people. But once you start cooking more than a  few ears of corn, it takes less time to boil them on the stove or cook them on the grill.

 My way:  I remove the husks and silk from the corn and  then wash in fresh water. Place in a microwave safe dish, add  ¼ cup  water and cover with a tight lid or plastic wrap. Then I microwave on high about 3-5 minutes per ear. The time multiplies exponentially when you add more ears:  2 ears is 4-10 minutes and 4 ears 10-17 minutes.  Let stand 5 minutes after cooking. IMGP0377

A friend recently shared how to cook corn in the microwave with the husks left on.  Guess where she got this recipe?  You got it, on the web. I checked, there are many different websites that show this method.  She simply placed the corn in the microwave, husks and silk and all and microwaved 4 minutes per ear. She then cut the stem end off and pulled the husks straight off the cob, the silks came off it slick. It appeared to work great.

 Now, I hate to be a wet blanket (or maybe I should say “wet husk”)  about this, but I was immediately concerned with this method for four reasons:

1)      Most of the instructions on the web don’t mention washing the corn.  I wash all my produce.  Pesticides, dirt, mold, rotten spots and not to mention worms might be inside.  If I were using this method, I’d pull back the husks and rinse well with fresh water.  So, I admit, this requires removing the silk before cooking and eliminates one of the so called advantages of cooking with the silks and husks in place—easier peeling and cleaning. An alternative, when selecting corn, check for worms or worm damage in the silks.

2)      Damage to the microwave. All microwave oven instruction books caution you not to use the microwave without food inside.  It’s the water in the food that absorbs the microwaves and creates the heat, without water there is no cooking.  This method of cooking corn does not add any water so the only moisture is that in the corn itself.  With all the husks and cobs in the microwave, there are lots of dry materials inside the oven in comparison to the corn. With no place for microwaves to go, this could damage and shorten the life of or damage the magnetron in the microwave. Some instructions on the web suggested soaking the corn with husks before microwaving, t hat might help.  Be sure to select moist, fresh corn because it will be cooking in its own moisture (this is good to remember for all corn!).

3)      Fire in the oven. This relates back to #2 and is probably the biggest concern.  The fire risk goes up with the amount of corn being placed in the oven and the added cooking time for each ear. The cobs are dry and the husks are dry and they seemed to get drier during the cooking.  I noted a couple of comments by people on the web that tried this method and did have fires. If you’re going to try this, be sure to select corn that has fresh green husks, moist stem ends, check that the silk is free of decay and avoid yellowed or dried husks.

4)      Burns.  Use caution while husking the hot corn and watch the hot steam. My friend uses hot mitts.

IMGP0549

I also checked with an Extension colleague and she says she doesn’t know of any research on the safety of this method. She also has a concern about fire.

I personally don’t have problems with shucking corn. I know I’m perhaps overly cautious, but  I think I’ll stick to a tried-and-true method. Shucks! 

Try our barbecued corn recipe.

Cheryle Jones Syracuse, MS
Professor Emeritus, The Ohio State University

Eggs in the Microwave

IMGP0066Years ago when microwave ovens were still new in most kitchens I taught many how-to classes.  I remember telling folks that eggs were difficult to do in the microwave.  There are always exceptions to every rule.

Recently while visiting my mom she showed me how to poach an egg in less than 45 seconds. She has a specially designed “egg cup” to use in the microwave.

I’m not sure what the original instructions are…but let me tell you how she does it.  Place one teaspoon of water in the bottom of the cup. Drop in the egg –you don’t need to pierce the yolk.  Put the lid on and microwave for 30 seconds.  Open the door, take the lid off and look at it.  Put the lid back on and microwave for 13 seconds more.  It worked. IMGP0078

Now, as the “microwave teacher” in the family, I said OK…I can do this too. I thought that part about stopping the oven and looking at the egg was pointless.  So, I put the water in the cup, added the egg and put the lid on and microwaved for 43 seconds.  Wrong. The egg exploded all over the oven.

Obviously you need that “rest” in the middle for the egg to continue to cook and the steam not to build up too quickly in the yolk.  I admit, mother knows best.

The time on the second step can be adjusted a little depending upon how hard you like your eggs poached. Also, they do continue to cook for a short while after taking them out of the microwave, so don’t overcook. It  takes some experimenting based on your specific oven.  But it can be done.

Mom’s not really sure where she got her microwave egg cups, but it’s one of those cooking gadgets that she really uses.  I checked on E-bay and there are several different styles available, seems other people have known about these for years.

Judy Doherty, President of Food and Health Communications shared that she has great success with eggs in the microwave, too.  She makes a breakfast sandwich using egg whites that she says is a winner!

The National Egg Board emphasizes that egg wisdom dictates you shouldn’t try to cook an egg in the shell in the microwave because steam builds up too quickly inside and the eggs are likely to explode. IMGP0081

What’s great about both of these recipes, no added fat, no dirty fry pan and a fast easy protein-rich breakfast. Another plus, no need to turn on the stove, so something that kids or people with limited skills or mobility could do.

Cheryle Jones Syracuse, MS
Professor Emeritus, The Ohio State University