Got Mayo?

dillpotatosalad2 SpinachSaladDress4

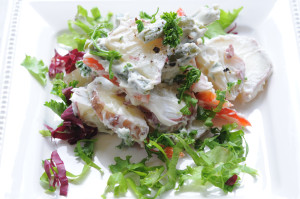
A couple weeks ago while traveling I saw a billboard with the words “Got Mayo?”  It was accompanied by a photo of potato salad and the address and phone number of a local hospital.  Obviously they were hinting (if a billboard that size can hint) that if you have food poisoning while in this area you should go to that hospital.

Apparently the advertising person from this health establishment did not talk with someone who knows anything about food borne illness before they put up this sign.  They were perpetuating the “old wives tale” that says mayo is the bad guy when it comes to food borne illnesses.

I’d like to set the record straight about a common food safety belief about foods like macaroni salad, tuna salad and deviled eggs.  These are all foods made with mayonnaise or salad dressings. Folks seem to worry a lot about them. Yes, they can be potentially risky and care should be taken to keep them at the proper temperatures—but don’t blame the mayonnaise. 

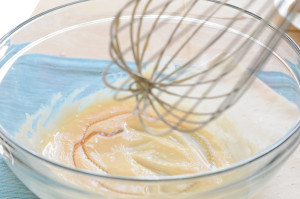
I’m not sure how this belief got started; perhaps it was a holdover from when people made their own “real mayonnaise” with raw egg, lemon juice and oil.  That product would be exceptionally risky when left unrefrigerated.

But, let’s be honest. When was the last time you made your own mayo for a cookout?

Commercially-made mayonnaise and salad dressings do not have some of the same food safety concerns as their homemade counterparts.  All commercial dressings are cooked, eliminating the raw egg problem. Most also have a high acid content—usually vinegar.  Acids tend to inhibit the growth of pathogens that cause a foodborne illness or food poisoning.

OK. So you may think to yourself,  if mayo isn’t the problem can I just throw “caution to the wind” and not worry about these foods any more? No.  Usually the foods that we mix with mayo and salad dressings are highly susceptible to bacterial growth themselves. Think about it…eggs, cooked and chopped vegetables, cooked meats and seafood…these are all on the list of “potentially hazardous”  foods…whether mixed with mayo or not.

The general rule-of-thumb is that food (mayo added or not) should not be left at room temperature for more than two hours and this goes down to one hour when it’s one of those really hot over 90 degree summer days.

While I was ranting and raving about the stupidity of a hospital putting up this sign, my husband calmly said, “well it did what it was supposed to do”.  It might not technically be correct, but it did get my attention.

Cheryle Jones Syracuse, MS
Professor Emeritus, The Ohio State University

For great salad recipes, see our Salad Secrets Book:

Eggs in the Microwave

IMGP0066Years ago when microwave ovens were still new in most kitchens I taught many how-to classes.  I remember telling folks that eggs were difficult to do in the microwave.  There are always exceptions to every rule.

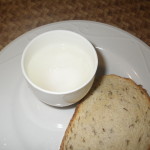
Recently while visiting my mom she showed me how to poach an egg in less than 45 seconds. She has a specially designed “egg cup” to use in the microwave.

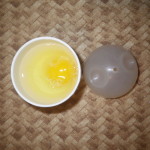
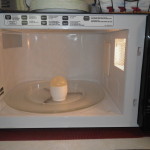
I’m not sure what the original instructions are…but let me tell you how she does it.  Place one teaspoon of water in the bottom of the cup. Drop in the egg –you don’t need to pierce the yolk.  Put the lid on and microwave for 30 seconds.  Open the door, take the lid off and look at it.  Put the lid back on and microwave for 13 seconds more.  It worked. IMGP0078

Now, as the “microwave teacher” in the family, I said OK…I can do this too. I thought that part about stopping the oven and looking at the egg was pointless.  So, I put the water in the cup, added the egg and put the lid on and microwaved for 43 seconds.  Wrong. The egg exploded all over the oven.

Obviously you need that “rest” in the middle for the egg to continue to cook and the steam not to build up too quickly in the yolk.  I admit, mother knows best.

The time on the second step can be adjusted a little depending upon how hard you like your eggs poached. Also, they do continue to cook for a short while after taking them out of the microwave, so don’t overcook. It  takes some experimenting based on your specific oven.  But it can be done.

Mom’s not really sure where she got her microwave egg cups, but it’s one of those cooking gadgets that she really uses.  I checked on E-bay and there are several different styles available, seems other people have known about these for years.

Judy Doherty, President of Food and Health Communications shared that she has great success with eggs in the microwave, too.  She makes a breakfast sandwich using egg whites that she says is a winner!

The National Egg Board emphasizes that egg wisdom dictates you shouldn’t try to cook an egg in the shell in the microwave because steam builds up too quickly inside and the eggs are likely to explode. IMGP0081

What’s great about both of these recipes, no added fat, no dirty fry pan and a fast easy protein-rich breakfast. Another plus, no need to turn on the stove, so something that kids or people with limited skills or mobility could do.

Cheryle Jones Syracuse, MS
Professor Emeritus, The Ohio State University

Roasted eggs—why?

The craze on Pinterest and Facebook this week seems to be roasting eggs. I’ve had several friends post instructions on how to hard cook eggs in the oven.

Linnette Goard, Extension Field Specialist in Food Safety and Assistant Professor with Ohio State University has concerns with this latest rage.  She says the eggs could easily explode when heat builds up inside the shell. It would be similar to what happens when you try to cook an egg in the shell in the microwave.  It’s not that you would get a food-borne illness from this cooking method—the eggs are cooked—but you might get hurt from the hot flying food.   Not to mention the possible mess in the oven.

In searching the internet, I found several references to this method.  One source baked the eggs in muffin tins and another directly on the oven racks.  I noted that one of the recipes says to put a baking sheet underneath “just in case the egg breaks.”  The typical baking time is about 30 minutes. Many of those that have tried it say they think it’s easy and the eggs come out creamy.

Another potential problem: the eggs could scorch because of the direct heat contact with the muffin tin.  Comments mention that this method takes longer than cooking them the regular way.   And what about the energy use? It seems to me that 30 minutes in an oven would use more energy than cooking them on top of the stove.

I’ll admit I haven’t tried to roast any eggs.  I just keep wondering “why”? Hard cooking eggs isn’t that difficult the “old fashion” way. (See my earlier post on how to make “hard cooked” eggs for instructions.)

I’m inclined to say DON’T TRY THIS AT HOME.

Cheryle Jones Syracuse, MS

Professor Emeritus, The Ohio State University

Egg-actly

chef_2_eggtakerOne of the most important steps in cooking is planning ahead.  That goes the same for your Easter eggs. This is a simple suggestion: buy your eggs this week.

For easier peeling, eggs should be 7-10 days old. This isn’t rocket science. When an egg is fresh the white is very attached to the shell.  As the egg gets a little older it starts to dehydrate. This forms a small air sac around the egg that helps to separate the egg membrane from the shell.  Thus, when you hard cook the “older” egg it’s easier to peel.

To help make peeling even easier, the American Egg Board (http://www.incredibleegg.org)  says to peel the egg  soon after cooling because cooling causes it to contract slightly in the shell.  They also recommend to gently tap the egg on the countertop until the shell is finely crackled all over. Then roll the egg between your hands to loosen in the shell.  Start peeling at the large end. Holding  the egg under cold running water helps ease the shell off.

I know there are lots of suggestions out there on what you can do to help make peeling an egg easier…everything from putting pinholes in the shell to adding vinegar or salt to the water.  But none of these ideas really work and some may actually allow bacteria to enter the egg.  The best bet is to plan ahead and use just a little “older” eggs.

A quick food safety reminder:  age does count after the eggs are cooked.  Hard cooked eggs should be stored in the refrigerator and eaten within a week.

Speaking of hard cooked eggs. I have a personal “pet peeve”.  I know it’s semantics or just me being picky, but it really bugs me when people say “hard-boiled eggs”.  I always try to say “hard-cooked eggs”, because I learned a long time ago that eggs should NEVER be boiled.

Overcooking—as is frequently done when boiling an egg—causes that ugly green “halo” around the yolk. This green ring is harmless but doesn’t look very appetizing when making deviled eggs or serving hard cooked eggs. It is a reaction between the sulfur in the egg white and the iron in the egg yolk that occurs when the eggs have been cooked too long or at too high a temperature.

These recommendations come from the National Egg Board (incredibleegg.org)—sadly, they call them “hard-boiled” too.  I thought of all people they’d stress cooking not boiling.

To hard cook eggs: place the raw eggs in a saucepan large enough to hold them in a single layer.  Add cold water to cover eggs by one inch. Cook over high heat JUST to boiling.  REMOVE from burner and cover pan.  Let the eggs stand in the hot water for about 12 minutes for large eggs (9 minutes for medium and 15 minutes for extra-large.)  Drain immediately and serve warm or cool quickly and completely under cold running water or in a bowl of ice water. If you don’t cool them quickly you may still get that green ring, because the eggs continue to cook inside the shell. Store the cooled eggs in the refrigerator.

Although we all frequently think of decorating with eggs….if you want other “Easter ideas” check out our Easter Rabbit Fruit Salad. And see our fun article, 5 Things We Love About Peeps.

Here is a basic recipe to color the hard cooked eggs:

  • 2 tsp vinegar
  • 22 drops of food color
  • 1 cup hot water from tap
  1. Place ingredients in glass bowl or measuring cup that is deep enough to submerge the eggs.
  2. Allow the eggs to set for 5 to 8 minutes depending on the color intensity desired.
  3. Remove with a fork and allow to dry on a rack.
  4. You can use crayons to make patterns on the eggs. And you can re-dye eggs again for various color combos.
  5. Store in the refrigerator until ready to eat. They make fun after-school snacks and can be used on salads during the week.

Cheryle Jones Syracuse, MS

Professor Emeritus, The Ohio State Univerisity