The Lowdown on Vinegar

It’s time for another reader request!

A few weeks ago, Stephanie Correnti, RD, asked me about vinegars, writing…

Hi,

Hope all is well.  Have a request.  Do you have a sheet on the different types of vinegars (white, balsamic, red wine, etc) and what they are good on i.e. salads, marinades, etc.  I am especially interested in the difference between rice wine vinegar and rice vinegar (this ones has conflicting info).

How they are made, etc.

Thanks,
Stephanie Correnti, RD

How could I resist?

My team and I went to work immediately, and after hours of research and chasing down leads, we have come up with this comprehensive guide to common vinegars. Oh, and we just had to make a fun infographic as well. Here it is — enjoy!

How Vinegar Is Made:

Vinegar is made through a process called double fermentation. The first round of fermentation usually uses yeast to turn a sugary liquid like fruit juice or a starchy food like grain into alcohol. The second round of fermentation turns that alcohol into acetic acid, which is then diluted to make vinegar. Why dilute? Well, the acid is roughly 10% acidic, which is too harsh for cooking, so it is diluted to between 4% and 7% acidity before being sold.

Many vinegar manufacturers only do the second round of fermentation, buying wine stock or distilled alcohol from other sources and taking over the vinegar-making process from there.

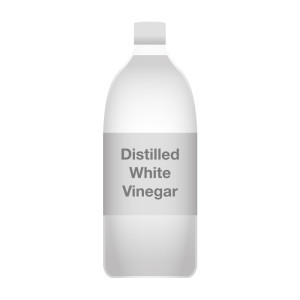
DistilledDistilled White Vinegar:

Also known as plain old vinegar, distilled white vinegar is mildly acidic and super versatile. Its title is actually a bit misleading, since it isn’t the distilling process that creates white vinegar. Instead, this kind of vinegar is made by fermenting distilled alcohol. It is usually made from either malt or corn.

How does it taste?

This type of vinegar has roughly 5% acidity, which makes it a pretty mild vinegar. People typically use it in pickling and baking because its gentle flavor adds a quiet bite that doesn’t distract from the flavor of the food being prepared. Try it in our recipes for Anise Barbecue Sauce or Chocolate Beet Cake!

Oh, and fun fact: this kind of vinegar is very common for household cleaning as well.

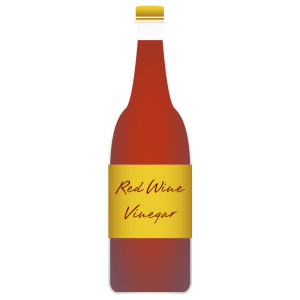
Red WineRed Wine Vinegar:

When it comes to vinegars with additional flavor, red wine vinegar is one of the most popular. This high-selling type of vinegar has many different varieties, but all of them are made from red wine. The vinegar is often aged in wooden barrels, and can be “matured” for up to 2 years.

When it comes to quality, there is a wide range. Some versions can have really complex flavors, while others are bitterly sour one-note packages. A good rule of thumb is to look at how long the vinegar has been aged — the longer the better. Some fancy red wine vinegars only use one type of wine or even a single kind of grape. Try a few varieties and see which ones you like best!

How does it taste?

Red wine vinegar has a much more complex and layered flavor than distilled white vinegar. It is perfect for salad dressings or fruit desserts, and it is a very common element in marinades. Give it a whirl by making a Classic Marinade or Berry Brûlée!

White WineWhite Wine Vinegar:

Like red wine vinegar, white wine vinegar is made from wine that has been further aged in order to produce vinegar. It too is often matured in wooden containers. Less popular than red wine vinegar, white wine vinegar is still super versatile and its flavor profile can vary widely by brand. Look for well-aged varieties and have a taste test to find the flavors that work best for you.

How does it taste?

White wine vinegar’s flavor varies widely from brand to brand. Some options are malty and sour, while others are floral and light. In general, white wine vinegar is great for sauces and salad dressings (especially when the hue matters and you want a light dressing). It complements delicate flavors like the ones found in fish or fruit especially well. Try it in Salmon Macaroni Salad or Peach Salsa.

A note about wine vinegars: As mentioned above, some wine vinegars use a particular kind of wine or only one type of grape to produce their vinegar. If you’d like to further explore the realm of wine vinegars, try champagne vinegar, pinot gris vinegar, or sherry vinegar. There are lots of varieties out there, so feel free to explore!

BalsamicBalsamic Vinegar:

Oh balsamic vinegar. This syrupy, dark, sweet vinegar has been a darling of the food scene for quite some time, adding pep to healthful dishes and depth to indulgent treats. Balsamic vinegar is a versatile flavor powerhouse.

With popularity, however, comes variation and a wide range of quality. All balsamic vinegars must be made from a grape product (no, there’s no balsam in it), but that’s really where the similarities end. Traditional balsamic vinegar comes from the must of white Trebbiano grapes and is aged in wood casks for quite some time, with the aging process lasting anywhere between 12 and 100 years. You can spot this kind of vinegar by its “Protected Designation of Origin” marks — it must come from either the Reggiano Emiliano or Modena provinces of Italy and be aged for at least 12 years.

The more common, less expensive, and by-no-means-traditional form of balsamic vinegar is called “balsamic vinegar of Modena” or simply “balsamic vinegar.” Instead of using the must of white Trebbiano grapes and aging it for many years, this type of vinegar is made by mixing concentrated grape juice with strong vinegar. Artificial colors and flavors are also added — even caramel or sugar.

How does it taste?

The thick and almost syrupy texture of traditional balsamic vinegar masks a relatively high acidity level, creating a mild but layered flavor with undertones determined by the aging process and types of wood casks used. Commercial balsamic vinegar mimics these flavors, though at a shallower and less-developed level. Balsamic vinegar has a very notable taste, so use it when you want a dash of sweet and sour with deeper layers. It makes a great salad dressing and draws out the flavor of ripe fruits, especially berries. It’s also a popular flavoring agent in Italian food, adding zing to everything from bruschetta to panzanella to caprese salads. Once you have some balsamic vinegar of your very own, give it a test run with some Open-Faced Garden Pitas or a Pear and Almond Salad!

A note about white balsamic vinegar: Though it shares the word “balsamic” with traditional balsamic vinegar, that is practically where the similarity ends. White balsamic vinegar is made by cooking grapes under pressure, stopping any caramelization, before aging for one year in un-charred oak barrels. With a light and fruity flavor, this vinegar is a pale yellow color that makes it perfect for light sauces and salads.

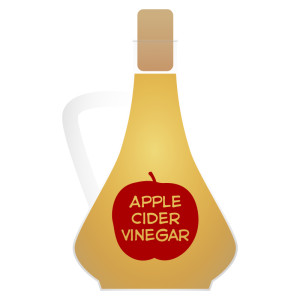
Apple CiderApple Cider Vinegar:

This mild vinegar is made from either cider or apple must, fermenting the mixture until a delicate and sweet vinegar is ready for sale. This inexpensive vinegar is a toasty gold color and lends itself well to a variety of culinary uses. Many people buy unfiltered apple cider vinegar for its health benefits, though more research is needed to substantiate those health claims.

What does it taste like?

This mild and fruity vinegar has a distinct apple flavor that is balanced by a gently sour bite. It is a fantastic ingredient in marinades, especially for chicken or fish, but it also peps up chutneys and vinaigrettes. Some home cooks prefer it over distilled white vinegar for quick-pickling fresh produce in the refrigerator. At our test kitchen, we found that apple cider vinegar really perks up the flavor of root vegetables, especially in an Indigo Beet Salad or Sweet Potatoes with Raisin Sauce.

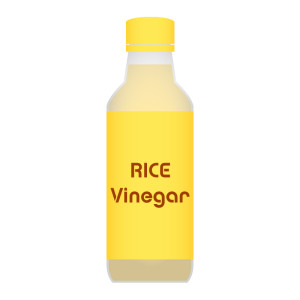
RiceRice Vinegar:

And here’s where the crux of Stephanie’s question lies — what is the difference between rice and rice wine vinegar? After much research, it appears as though rice wine vinegar is a type of rice vinegar, and the two can be used interchangeably in recipes. Rice vinegar can be made from fermented rice itself, rice concentrate, or from rice wine. Rice wine vinegar, as the name might imply, is made only from rice wine. Their flavors are very similar, and either can be used when rice vinegar is called for.

Rice vinegar’s flavor profile changes depending on the region it comes from, and variations like red rice vinegar and black rice vinegar are made from entirely different kinds of rice, with much stronger flavors. For the purposes of this writeup, we’re going to focus on the most common kind of rice vinegar, known as “rice vinegar” or “white rice vinegar.”

What does it taste like?

The rice vinegar that’s most easily available in the United States is a bit harsher than the varieties sold in China and Japan, but it is still notable for a mild and sweet flavor, especially when compared to most other vinegars. With the lowest acidity levels allowed to vinegars sold in the U.S., rice wine vinegar doesn’t have much bite, which makes it perfect for mild boosts of flavor. It’s great in dipping sauces and stir-fries. Try it in Stuffed Baked Potatoes or a Peanut Cabbage Stir-Fry Salad!

There are many varieties of rice vinegar, and lots of them are sweetened or seasoned in some way. This can pep up their flavor profile or get in the way of what you’re cooking, so be sure to choose the right vinegar for the job. Have a taste test and see which options are best for you!

MaltMalt Vinegar

Making malt vinegar is an interesting process. First barley must be “malted,” transforming the starch in the barley to maltose. From there, the mixture is fermented until it becomes ale, and then it’s aged until it reaches the proper acidity and consistency. Other grains can be malted to make this vinegar, but barley is the most common.

What does it taste like?

Full-bodied and toasty, malt vinegar is most commonly seen as an accompaniment to fish and chips or other British treats. Its deep brown color makes it easy to spot in a lineup of vinegars, and it also makes a great marinade or component of darker sauces. Use it when you want to add a toasty bite to whatever you’re cooking.

Let’s end this post with a free infographic that compares a lineup of the vinegars we’ve explored today! Here’s a PDF just for you.

Vinegar Infographic


Keep those requests coming!

Judy Doherty, PC II, Founder of Food and Health Communications, Inc.

Perfect for Wellness Fairs!

10K Steps Banner and Stand

Great for kids!

7 Basic Nutrition Posters

Wonderful Display Resource!

MyPlate Brochure Card

Internal Cooking Temperatures: Simply Confusing

It seems so simple.

Food TemperatureThere are four basic steps to food safety: wash, separate, cook, and refrigerate. Today I’m focusing on cook.

This recommendation seems simple to me: “cook food to a proper internal temperature and use a food thermometer.” So, why is it so hard?

Let’s take a minute to explore what preparing food safely actually entails. A couple of months ago, Judy Doherty, founder of Food and Health Communications, asked me to help her develop a food safety temperature poster.  She was looking to do something specifically about food temperatures. We started at 0 degrees Fahrenheit (freezer temperature) and went all the way up to 240 degrees (pressure canning). Although it may seem predictable, filling the space in between wasn’t so easy.

I teach a lot of restaurant food safety, so the first reference I want to was the Food and Drug Association’s (FDA) Food Code. In it, they list the recommended minimum internal cooking temperatures for food service. So far so good. But then I looked at the United States Department of Agriculture and found a different chart for minimum internal temperatures. This one was designed for consumers. All the recommended temperatures were the same or higher than the food code temperatures. That’s a little confusing. If there really is one “proper internal temperature,” then how can these differ?

I talked with a consumer adviser from the USDA’s Meat and Poultry Hotline and asked about this difference. The response was that their information was designed for consumers who cook at home. This makes the authors of the chart more conservative than they are with food code guidelines. I can understand this, since restaurant and food service folks have standard operating procedures for food safety that are not found in most homes.

After my call, I went to the National Turkey Federation to confirm the recommended internal temperatures for poultry. In checking several recipes, I found at least three different temperatures for roasted turkey. On their website, the National Turkey Federation does a nice job explaining the rationale for these differing temperatures, saying:

“The FDA recommendations are for safety-temperatures at a sufficient level to kill bacteria that may be present. Our own recommended temperatures are somewhat higher in many cases. We have chosen these temperatures because we believe they will enable you to achieve optimum quality. In addition, turkey will be easier to carve or slice when heated/cooked to these temperatures.”

OK. This makes sense. When in doubt, use the higher temperature. Here is the USDA information:

Safe Minimum Internal Temperature Chart

Safe steps in food handling, cooking, and storage are essential in preventing foodborne illness. You can’t see, smell, or taste harmful bacteria that may cause illness. In every step of food preparation, follow the four guidelines to keep food safe:

  • Clean—Wash hands and surfaces often.
  • Separate—Separate raw meat from other foods.
  • Cook—Cook to the right temperature.
  • Chill—Refrigerate food promptly.

Cook all food to these minimum internal temperatures as measured with a food thermometer before removing food from the heat source. For reasons of personal preference, consumers may choose to cook food to higher temperatures.

Product Minimum Internal Temperature & Rest Time
Beef, Pork, Veal & Lamb
Steaks, chops, roasts
145 °F (62.8 °C) and allow to rest for at least 3 minutes
Ground meats 160 °F (71.1 °C)
Ham, fresh or smoked (uncooked) 145 °F (60 °C) and allow to rest for at least 3 minutes
Fully Cooked Ham
(to reheat)
Reheat cooked hams packaged in USDA-inspected plants to 140 °F (60 °C) and all others to 165 °F (73.9 °C).


Product Minimum Internal Temperature
All Poultry (breasts, whole bird, legs, thighs, and wings, ground poultry, and stuffing) 165 °F (73.9 °C)
Eggs 160 °F (71.1 °C)
Fish & Shellfish 145 °F (62.8 °C)
Leftovers 165 °F (73.9 °C)
Casseroles 165 °F (73.9 °C)

My concern is not to haggle over a few degrees here or there. My goal as a teacher and writer is to encourage people to use that thermometer. USDA studies show that 65% of consumers use food thermometers on Thanksgiving, but only 3% use them when cooking everyday foods like burgers. Why skip the thermometer?

“Cook” is one of the key steps to food safety. Cooking food so that it reaches a safe internal temperature is crucial to keeping food safe. Using thermometer is the only way to tell for sure whether food has reached a high enough temperature to destroy harmful bacteria.

The bottom line is simple: are your clients using a food thermometer? Do they know the temperature of the food they’re eating and serving?

By Cheryle Jones Syracuse, MS, Professor Emeritus, The Ohio State University

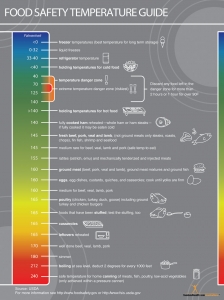
Here is the new food safety temperature chart poster based on USDA temperature guides:

And one on food safety:

4 Steps of Food Safety Poster

4 Steps of Food Safety Poster

And more great resources!

Cooking Demo Package

Cooking Demo Display Kit

Testing Recipes from the Internet

I’ll warn you before you start reading — today I’m on my own personal soap box.

Healthful SnacksThis box is all about recipes on the internet.

It starts small. A new recipe appears somewhere on the internet. It’s got a great photo, a clever name, and a health claim to fame. It asserts that it is “Diet-friendly!” with “No Added Sugars!” It could announce that it is a “Sweet treat without the splurge!” or “Better than candy!” The options are endless.

I watch as this recipe spreads across the internet. It hits Pinterest, then gets shared on Facebook. People tweet it and blog about it. It gets featured on news sites and healthy living guides. All this time I keep seeing it again and again. “NO ADDED SUGAR!!!!” it screams. “AMAZING FOR YOUR DIET!!!” it raves. So what’s the problem?

Sugar.

Yes, there is no sugar added to those miracle banana bars or healthified refrigerator cookies. Yes, the ingredients are all actual foods. But there’s something that these recipes don’t seem to consider, and that is the calorie and sugar content of the actual ingredients.

Why do people think that just because you don’t add sugar to a recipe that it doesn’t have calories or natural sugars?

Let’s look at an example. A super-popular oatmeal banana bar recipe had hit social media (and my inbox) hard. Since I was looking for snack ideas for my ongoing weight loss class, I gave it a try.

As soon as I started to cook, I wondered if anyone who had sent this recipe to me or posted a link to it had actually tried it. After all, it didn’t specify what size pan I needed. I tried an 8×8 pan and the results were awful. It tasted like cold oatmeal. At this point, I still held out some hope. Maybe it was just me. Maybe my pan guess was wrong. Since I’d gotten this recipe roughly 2,174 times, I figured that I should try again, this time with a 9×13 pan. Sadly, the results were comparable. No matter how long I baked them or the size of the pan, the bars was still really moist and gooey. I even added some nuts for crunch. They worked, but they couldn’t save the dish.

I’m afraid that that’s not where this story ends. Deciding to dig deeper, I did a quick nutrition analysis of the bars using the USDA nutrition database. Since the recipe didn’t specify number of servings or serving size, I really didn’t know how many of these oatmeal banana bars I was supposed to get. Eyeballing the figure, I guessed that each pan held roughly 12 servings. My quick calculations came to 105 calories, 2.4 grams of fiber and 8.5 grams of sugar in one 3-inch square bar from a 9×13 pan. That’s from a recipe whose claim to fame is “no added sugar.” Doesn’t that seem a bit calorie-dense for a healthful sweet treat?

I can think of many other ways to spend my 105 calories in a snack that actually tastes better. A good starting point would be to eat the banana, applesauce, bowl of oatmeal, or raisins that were all called for in this recipe.

Was I alone in my assessment of this social media phenomenon? I took to the internet. Comments on the recipe largely matched my experience, with complaints about sponginess and soggy textures. Claims that these are the perfect healthful snack “if you have a sweet tooth” fell flat. After all, you’d have to be pretty desperate to eat these things.

Okay, let me hop down from my soap box for a while and get to the point.

Just because you saw it on the internet doesn’t mean it’s really good.

Is the recipe truly healthful, or does it just spout health claims? What are the ingredients? How do they come together to form the dish? What is the nutrient content?

I make a point to always test a recipe before I give it to a class or print it in a piece I’m writing. The only exception comes when I know the developers and they are trusted sources. For example, I know that Chef Judy from Food and Health Communications has a strict policy for all the recipes that she publishes. They must work and they also must taste good.

I also realize that not everyone looks at a recipe in the same way. If you’re sharing a recipe, be specific about can sizes, pan sizes, and box sizes. Please don’t make nutrition claims about a recipe unless you know for sure.

So, want to make a tasty snack that actually offers health benefits while staying low in calories? Try Garden Pinwheels, a recipe from Judy Doherty that features fresh veggies and light cream cheese, rolled up in a tasty tortilla and sliced into cute wheels. With only 66 calories and 56% of your daily value for vitamin A, this snack is good for your health and your taste buds! Take a look.

By Cheryle Jones Syracuse, MS, Professor Emeritus, The Ohio State University

Want tried-and-true recipes that you know will work and be healthful at the same time? Check out these resources…

Home Run Cookbook: Healthful Meals and Cooking Tips

Fruit Tooth Dessert Cookbook: Healthful Recipes that Satisfy a Sweet Tooth without Empty Calories

Salad Secrets Cookbook: Salad Doesn’t Have to be Boring

A Prune by Any Other Name

Let’s talk about prunes.

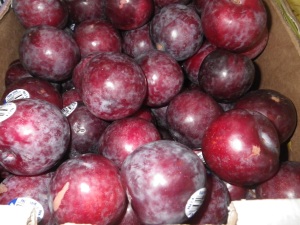
Dried PlumsI know, I know! This is not a topic that most people would consider for dinner conversation. But I do have a few prune stories.

We’ll start with a trip I took. A couple years ago, my mom and my sisters and I went on a cruise. I took advantage of the room service and ordered a bowl of stewed prunes for breakfast every day. My middle sister (always the one who isn’t afraid to say anything) asked, “Why did you order prunes? Are you having problems?”

That seems to be the general consensus about prunes — they have a reputation related to bowel movement, laxatives, and/or as a remedy for other digestive “problems.”

No, I wasn’t having “problems.” I just like prunes and hadn’t thought about buying them at home.

So. That was story #1. Here’s story #2.

We were having dinner at a neighbor’s home and got into a discussion of new foods and favorite things to eat. She was excited to share a new product that she just loved to put in salads.

She showed me the package. They were “dried plum” pieces.

I had to laugh. Those are prunes! Rebranded, of course, but prunes! Once I told my friend what I knew, she thought for a few seconds and then laughed with me. What great marketing.

It seems that back in 2001, the plum growers got together and petitioned the FDA to change the name of their dried fruit. Their argument was that “dried plum” has a more positive connotation than “prune.” The goal was to modernize the product and remarket it as a healthful snack food, instead of something that grandma ate when she needed a laxative. I guess it worked, because my friend bought them!

Of course, I had to go looking for dried plums too. I was surprised to find that while some of the products were in fact called dried plums, most of the items I saw were still called prunes. There were even individually-wrapped dried plums that were marketed as easy-to-take-with you snacks.

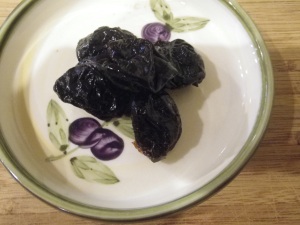
Plums. A Prettier Alternative.It’s interesting to note that the images on the packages of prunes are almost always pictures of fresh plums. You can see why they might choose plums instead of prunes. Just look at the photo above! Along with a bad image, prunes just aren’t very photogenic.

Now I’m not saying that dried plums don’t deserve their reputation as a laxative, because they do. A 1-cup serving of prunes has 12 grams of both soluble and insoluble dietary fiber. In other words, a 1-cup serving of prunes provides about 1/3 of the fiber that men need and almost half the amount that women need each day.

But then let’s not forget that prunes are dried fruit. That makes them a concentrated energy source. One cup of prunes or dried plums is loaded with 418 calories and 111 grams of total carbohydrates. They are also nutrient-dense, providing vitamins K and A, niacin, riboflavin, vitamin B-6,  calcium, phosphorous, potassium, zinc, copper, and manganese. Prunes are virtual powerhouses of nutrients.

Too much of a good thing can lead to that previously-discussed “digestive side effect.” In addition to the fiber, it’s interesting to note that prunes are a natural source of the sugar alcohol sorbitol, which also has a natural laxative effect.

If you’re like me and just like prunes, or if you are looking for a healthful snack/way to increase your dietary fiber consumption, then the California Dried Plum Board says that you can safely eat up to 10-12 prunes a day. That’s a little more than ½ cup of dried fruit. If you’re not used to eating a diet high in fiber, start small — with just four or five prunes — to avoid any undesirable digestive side effects.

So what are you waiting for? Grab some dried plums today!

By Cheryle Jones Syracuse, MS, Professor Emeritus at The Ohio State University

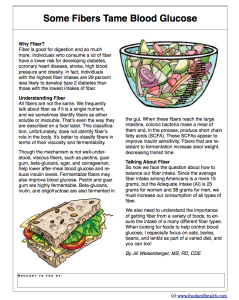
Fiber is one of our favorite topics, so we’ve added a free handout to this post. Check out the guide to fiber and blood glucose and get your copy today! Originally, this page was only accessible to Communicating Food for Health subscribers, so if you like what you see, consider getting a membership.

Fiber and Blood Sugar

It may come as no surprise that there are tons of educational materials about fiber in the store! Check out a few of the most popular options…

Holiday Secrets

Holiday Secrets

Fiber Stars Poster

Fiber PowerPoint and Handout Set

Basic Nutrition Poster Set

Stuffing or Dressing? And What About Food Safety?

What does your family call it? Dressing or stuffing?

No matter what you call it, people are passionate about it at Thanksgiving. Stuffing can be very personal, and everyone seems to have a favorite way to make it. The options are many. Chestnuts or oysters? Cornbread or white bread? Giblets or not? Sausage with sage or chorizo?

I’m not going to debate the ingredients. Those are personal decisions and family traditions. Instead, I want to talk food safety.

Stuffing? Or Dressing?

Most food safety folks agree that, for optimal safety and uniform doneness, stuffing should not be cooked inside the bird. The primary reason for this recommendation is that the stuffing is a great place for bacteria to grow. Think about it. Stuffing is wet and warm, and it goes into the deepest part of the turkey, the spot that will take the longest to heat.

Sometimes the turkey meat is cooked before the stuffing reaches the recommended minimum internal temperature of 165 degrees Fahrenheit. When this happens, there are two options:

  1. Keep cooking the bird and get overcooked meat (this is the recommended alternative).
  2. Eat underdone stuffing (which could be risky).

If you’re cooking stuffing inside the bird, make sure that that stuffing comes to a safe temperature. I’m sorry for the indelicacy, but think about what was in the bird’s cavity before you put the stuffing there.

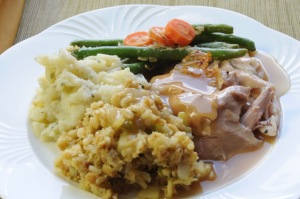
Holiday Plate

Now if you MUST put the stuffing in the bird, there are a few tips that you can try in order to get the stuffing fully cooked while keeping the meat moist and juicy.

  • If you’re using ingredients like oysters, giblets, or sausage in your stuffing, be sure to cook them completely before mixing them with the bread and vegetables. They can still be hot when added to the stuffing and placed inside the turkey, which will help speed the heating time of the stuffing itself.
  • Stuff the turkey loosely. This tasty goodness needs room to expand. If you have extra stuffing that won’t fit in the bird, cook it in a separate casserole dish or freeze it immediately. Don’t keep raw stuffing in the refrigerator.
  • If you purchased a frozen, pre-stuffed turkey, be sure to follow the instructions on the package.
  • Don’t stuff a turkey that you’re going to cook in a fryer. The oil needs to be able to flow inside the bird to allow for quick and even cooking.
  • When testing for doneness, put a thermometer into the deepest part of the stuffing. Yes, this goes for stuffing in a casserole dish too. Make sure that the stuffing reaches 165 degrees Fahrenheit before you take it out of the oven.
  • After dinner, get all of the stuffing out of the turkey and served as soon as possible. If there are leftovers, refrigerate them within 2 hours of their coming out of the oven.
  • When reheating leftover stuffing (is there really ever any leftover stuffing?), use your thermometer again and make sure that the reheated stuffing reaches 165 degrees F. Don’t guess or simply eyeball it. Stuffing is a great place for food-borne illness causing bacteria to multiply and the risk is not worth it.
  • Use leftover stuffing within 2 days.

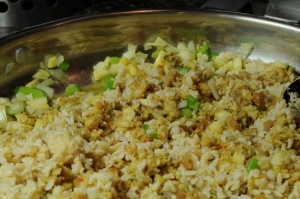
Cooking the Stuffing

Oh and one more stuffing tip. To save time on Thanksgiving morning, you can gather the stuffing’s wet and dry ingredients the day before you need to cook. Chop the vegetables and combine all the wet ingredients in one bowl. Combine all the dry ingredients in another, then store the bowls safely and mix their contents together just before you stuff the bird. Be sure to keep all the perishable items in the refrigerator until you’re ready to use them. This includes the chopped vegetables.

Whether you call it dressing or stuffing, it’s how you take care of it that’s important. Have a food safe holiday!

By Cheryle Jones Syracuse, MS, Professor Emeritus at The Ohio State University

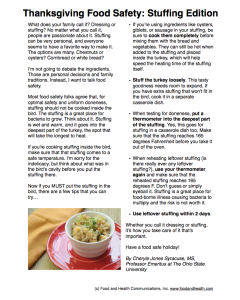
Want to spread the word about Thanksgiving food safety? Get your very own copy of this free handout today!

Thanksgiving Food Safety

The Nutrition Education Store is chock-full of holiday and food safety resources too. Here’s a quick preview of a few of our favorites…

Food Safety Temperature Guide Poster

Food Safety PowerPoint Show and Handout Set

Food Safety Bookmark Set

Food Safety Poster

Meeting Friends in California

Isn’t it funny, the connections you make?

Meeting Friends in CAA few weeks ago, I was in California. My son and I were touring his new college campus (UC Davis, woo!) and I posted about our adventures on Facebook. Imagine my surprise when Communicating Food for Health subscriber and longtime Nutrition Education Store customer Laurie Kamagawachi contacted me and said that she was just around the corner. I just knew we had to meet up.

Laurie is amazing. She is a clinical dietitian that really practices what she preaches. During our visit, I learned that Laurie has completed 41 marathons. Can you believe that?! I was totally wowed.

It’s always great to meet a customer, and Laurie was the epitome of charm and enthusiasm. In addition to using her Communicating Food for Health membership for many years, she’s also downloaded a ton of health and wellness PowerPoint shows. It was such fun to see her get excited about the tools that my team and I have created.

Laurie is retired now, but that isn’t stopping her from going out in the community and making a difference. She teaches wellness classes and she’s studying culinary art. Her explorations of the latter have fanned her enthusiasm for the fun and creative food ideas we feature on Food and Health and in the Nutrition Education Store. She’s been putting those lessons and tips to good use, both in her classes and in her everyday life.

It was such a treat to get to catch up with Laurie. Isn’t it funny, the connections you make?

By Judy Doherty, PC II and Founder of Food and Health Communications, Inc

PS: Like us on Facebook — that’s how Laurie and I connected.

Are you a fan of the nutrition education resources we create? Check out this week’s top sellers!

Communicating Food for Health Resource Membership

Eat to Excel with Phytoman

12 Lessons of Wellness and Weight Loss Program

And don’t forget to visit our amazing clipart database! Download this week’s featured piece of clipart for free today!

More than a popcorn maker

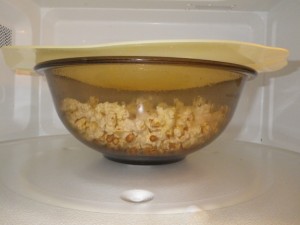
IMGP0086

I’m talking about the microwave oven. 

For many it’s an expensive coffee heater, popcorn popper and leftover re-heater. When microwaves first came out many people taught (me included) and took microwave cooking classes.  These classes are definitely a thing of the past. Every home has at least one microwave and they are just as common as a coffeemaker and no one ever takes coffeemaker classes.

There is a whole generation of people out there who just pushes buttons and doesn’t really understand how the microwave oven works.  Here are some tips that could make your microwaving more successful.

Give it a rest. Due to conduction, heat continues to travel to the center of the food after the microwave shuts off. Standing time allows the food to continue cooking for more even heating of the food.That’s why instructions for baking potatoes always say to let stand 5-10 minutes after the microwave shuts off—but does anyone really do this?  Even cook-in-the-bag frozen vegetable instructions say to let stand for a minute or so before opening the packet.  If you don’t allow for the standing time the food will not be completely cooked and most people are tempted to put it back in and “nuke” it for another minute or two. This usually results in overcooking the food.  Give it a rest.

Use the power levels to your advantage.  Power levels adjust the amount of cooking power going into the food.  Lowering the power level in the microwave is similar to turning the heat down on the top of your range.  Some foods are best cooked slower conventionally; this goes for the microwave, too.

Be patient. Defrosting  takes time and is usually done at lower power levels.  You must allow for standing time afterwards. Don’t get impatient and put it back in and zap for a couple more minutes—that’s when you get cooked, dried edges surrounding a frozen center.

Water is important.  Microwaves are attracted to water, not ice. This is why many of the frozen vegetable instructions have you add a little water to the veggies. This water quickly turns to steam and cooks the vegetables.  Have you ever noticed that vegetables that are cooked without added water tend to be dry and tough?  They need this little bit of water to attract the microwaves and get the process started.

Put a lid on it. Most foods should be covered in the microwave. Use plastic wrap or a glass lid when you want the food to steam.  Paper towels or clean dish towels are good for foods that you want a slightly less steamed exterior such as baked potatoes and baked goods.  A cover also helps to keep the splatters and clean up to a minimum.

When microwaves were new many people tried to do everything in them and soon found that perhaps it isn’t the best way to cook some foods.  But with a little thought and care you can do more than basic heating and reheating.

Cheryle Jones Syracuse, MS
Professor Emeritus, The Ohio State University

Here are fantastic programs to help folks cook better:

Defrosting Donuts

We’re an instant society these days. With email, texting, cell phones and Instagram (don’t really understand this one) people want things right now. This includes their food.  Microwave ovens are as common place in most kitchens as the coffee maker and toaster.   They can help with this “instant” society and cook food quickly.

However,  if you’re trying to defrost food in the microwave it’s going to take a little patience.  It isn’t going to happen instantly—but you can be successful with very acceptable results.

To understand how microwaves defrost you must first understand how they work.  Microwaves are invisible high frequency radio waves that cause water molecule in food to vibrate. This causes “friction” that produces heat within the food.  Microwaves do not penetrate deep into the food, so the interior of the food is heated by conduction—the heat from the outside moving into the center. Understanding this concept, you can immediately see why defrosting something in the microwave can be problematic.

How can you make it work?

Check the power levels. Defrosting takes time and the defrosting time will depend upon the amount of food, the shape of the food and the density of the food.  Defrosting is usually done at a lower power (30% or 50% of full).   If your microwave does not have separate powers or a “defrost” setting you can “simulate” this by turning the microwave oven on for a short period of time, allowing for an equal or double amount of standing time and then turning on again and repeating. Trying to defrost on “high” will just result in overdone outsides and frozen insides.

Standing time is also essential. Heat continues to travel to the center of the food even after the microwave shuts off. This allows for even heating of the food. Not allowing for standing time frequently results in over cooking. This is why frozen packaged foods usually directs you to allow the food to “stand” for several minutes before serving.

Don’t be impatient when defrosting.  It takes 3-5 minutes on defrost (or low or 30% power) in the microwave oven to defrost one pound of frozen ground meat.  But you also need to allow for 5-10 minutes of standing time for the process to be complete.  Don’t get impatient and put it back in and zap for a couple more minutes—that’s when you get cooked, dried edges.  IMGP1330

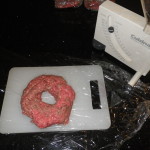
The shape is important. A trick I like to use is freezing foods in a “donut” shape.   If you have an option, freeze ground meat, casseroles or even leftovers without  a center.  The middle of the frozen food is the hardest to defrost, so by freezing with a hole in the middle you eliminate that problem.  The hole allows the microwaves to enter the frozen food from the center as well as the outside.  Also, for quicker defrosting, when freezing foods try to keep them 3” thick or less.

If freezing in a “donut” shape is not possible, turn, stir or break-up the food as soon as possible to allow the heat to evenly distribute through the food for quicker defrosting.

Also keep food safety in mind.  Once you defrost something in the microwave you need to finish cooking it immediately.  

Cheryle Jones Syracuse, MS
Professor Emeritus, The Ohio State University

Check out our newest materials on healthful cooking instruction:

Frost on the tomatoes

IMGP1639

My tomato plants didn’t do too good this year.  My husband currently has it calculated that each cherry tomato we ate cost 33 cents. But there are still a couple  little green tomatoes on the plants, if they ripen that will bring my cost per tomato down a little.

But other people had better luck than I did with their tomato plants. As the days are getting shorter and the nights colder, they are looking for ways to use up or save tomatoes on their plants that haven’t quite ripened.  With special care, green tomatoes will ripen indoors and can be stored 4-6 weeks.  But, it’s important to remember that not all tomatoes can be saved, they must have reached a certain stage of maturity on the vine or they will never ripen.

Obviously, the best way to ripen tomatoes is to leave them on the vine as long as possible. However, as the temperatures cool and there is a risk of frost, it is important to pick the tomatoes. When the temperature goes below 45 degrees for several days, the tomatoes may not ripen satisfactorily or may rot and decay before ripening.

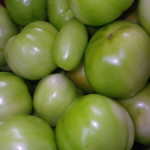
For best results, select the largest, blemish-free tomatoes from healthy plants.  Mature green tomatoes are greenish white on the blossom end, these are the one you’ll have the most luck with ripening.  Hard bright green tomatoes will never ripen.

After harvesting, remove the stems to prevent them from puncturing each other, rinse and let them dry before storage.  Just wiping the soil from the tomatoes is not recommended as it may cause damage which may lead to decay.

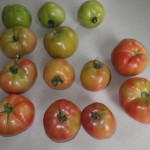
Sort by degree of ripeness, this way you can store then in the order in which they will ripen. To reduce bruising, wrap the tomatoes individually in newspaper. This also helps trap some of the ethylene gasses that the tomatoes give off which helps them to ripen.  Pack the green tomatoes one or two layers deep in shallow boxes or trays.

The tomatoes should be stored in moderately moist airy place.  Too much dampness will promote decay and if the room is too dry the tomatoes will shrivel and dry out before they ripen.  Since homes and garages vary in humidity levels and temperatures, you’ll need to learn by trial and error which works best.

IMGP1737IMGP1739IMGP1743

Mature green tomatoes reach an eating-ripe state in 14 days if held at 65-70 degrees Fahrenheit.  Ripening can be slowed down by holding the tomatoes at 55 degrees.  Storage at temperatures below 50 degrees will slow ripening, but result in poor quality.

Home refrigerators should be set at 40 degrees or slightly lower.  This is too cold for green tomatoes.  Tomatoes held at that temperature for more than a few days will never ripen. Tomatoes may be kept in the refrigerator after they are fully ripe but they may become watery after a couple of days.

Be sure to check your stored tomatoes frequently and remove any damaged one, as one spoiled tomato can ruin the entire batch. 

If your supply of green tomatoes is plentiful you might try then in a green tomato salsa, grill them or oven fry. Nutritionally, according to the USDA data base, a green tomato has slightly more calories– 41 calories— than a raw ripe red tomato at 32 calories per cup (180 grams).  Green tomatoes also have  a little more Vitamin C (70% DV vs. 38% DV) and a little more sugar (7 grams vs. 5 grams.)

With some special care you might be able to have fresh tomatoes for Thanksgiving.

Cheryle Jones Syracuse, MS

Professor Emeritus, The Ohio State University

Bacon, bacon…who’s got the bacon?

IMGP1392

We recently had house guests and served bacon for breakfast.  The husband got all excited, saying “Wow, real bacon, my wife only allows me to have turkey bacon.”  I, personally, had never considered switching to turkey bacon; I’ve always thought that some folks switch to turkey products falsely thinking they are eating more healthful.  But this got me thinking and wondering.

So, I bought two packages of bacon. One turkey and one pork.  At first glance they look similar. But under closer scrutiny the first obvious difference is the turkey bacon was a 12 ounce package. The number of slices differed, too.  You got 15 slices in the 16-ounces of pork and 22 slices in the 12-ounces of turkey.  So, obviously, the weights of the slices were smaller in the turkey bacon. All of this makes in-store comparison difficult.

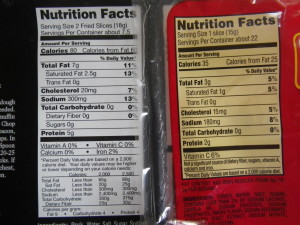
Compare the Nutrition Facts labels for serving sizes:

  • The pork bacon lists serving sizes as 2 slices (I guess they are being practical that no one could eat just one.)
  • The turkey bacon identifies serving size as 1 slice. 

So, let’s compare them slice-to-slice.

                                                                Pork                                       Turkey

Calories:                                               40                                           35

Total fat:                                              3.5  grams                            3 grams

Saturated fat:                                    1.25  grams                         1 gram

Cholesterol:                                         10 mg                                    15 mg

Protein                                                 2.5 grams                             2 grams

Sodium                                                 150 mg                                  180 mg 

The turkey bacon label promotes that their bacon “gives you all the great bacon taste you want with 50% less fat.”   The package says they used the USDA nutrition data for pork  bacon to come up with that statement.  But the math from the two packages I compared just didn’t show that.

IMGP1390

They also list 6% Daily Value of Vitamin C in the turkey bacon.  I don’t usually think about bacon as a source of vitamin C so I called the company. They responded that the Vitamin C comes from the soy. The last item on the ingredient list is soy lecithin.               

I then cooked them and compared the products.

Turkey bacon cooking

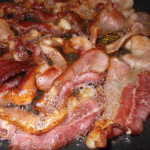
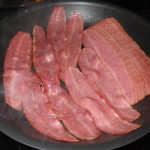
The cooked weight of the pork bacon was 4.2 ounces and the turkey bacon was 6.25 ounces. So there was obviously less loss of fat and moisture in the turkey product. It’s important to note that the turkey bacon was completely pre-cooked.  After cooking there was ½ cup of fat that could be drained from the pork bacon. There was very little fat in the pan where the turkey bacon was cooked.

Comparing the final cooked product: you got lots more turkey bacon on the plate (see photo). The turkey slices didn’t shrink as much. The turkey bacon is “smoked cured turkey chopped and formed”.  That was very obvious in the texture.  It’s hard to describe, but I guess the best way is that it was “chewier”.   This isn’t noticeable when the bacon is added to a sandwich or eaten combined with other foods, but just on a plate for breakfast, this chewy texture was obvious.

Cook comparison pork vs. turkey bacon

12 ounces of turkey bacon, cooked

IMGP1407

So, what’s my overall thought as a result of this comparison? 

  • The overall fat, calories and sodium are very comparable.  Although the turkey product is slightly lower in fat and calories than the pork it is slightly higher in sodium. 
  • Flavor and texture-wise I guess I’d vote for the pork bacon. 
  • If you’re comparing price, you get more cooked edible product for the money in the turkey bacon.   

Bacon (pork or turkey) is really one of those products generally thought of as an “occasional” food.  There is very little “good nutrition” in any kind of bacon.   But, most people like it now and again for the flavor and you can’t beat a BLT sandwich. 

But, you can get a lot of flavor from perhaps a little less bacon.  Maybe go for 2 slices instead of 3 and then only every so often (like when you have special guests for breakfast.)  A small amount of bacon chopped could go a long way to add flavor to a recipe.

They may also be other companies that make different bacon products that might actually give you a little less sodium or little less saturated fat than those I purchased.  You’ll need to do your own nutrition comparisons.  Both products also are considered “processed meats” and do contain nitrates and other preservatives that might be contraindicated in some diets.

But overall I don’t think “whole hog” switching to turkey bacon is doing you any favors nutritionally.

My problem now: What do I do with all this cooked bacon?

Cheryle Jones Syracuse, MS
Professor Emeritus,
The Ohio State University