Teachable Moments

Educators call lessons learned in real life “teachable moments.” That’s the time that is just right for someone to learn something.

Wouldn’t you think that would be true with food safety? Especially when it’s related to cooking.

Cookbooks and on-line recipes could be a really good source of food safety information.  Putting the appropriate information—like cooking temperatures, cross contamination risks or storage times — right into a recipe would provide the cooks the info right when they need it.

This seems so simple. But it’s not being done. A study at North Carolina State University, that was recently published in the British Food Journal* looked at cookbooks and the advice they gave about food safety. The researchers evaluated a total 1,497 recipes from 29 cookbooks that appeared on the New York Times best sellers list for food and diet books.

One thing they specifically looked at was if a recipe did tell the reader to cook the food to a specific internal temperature. In other words—did they encourage the use of a food thermometer?

They also looked to see if the recipe perpetuated food myths. Some of these were cooking poultry until the “juices run clear” or hamburger until it is brown.  Both of these are unreliable for determining if the food has reached a safe temperature.

Some of the cookbooks recommended cooking temperatures. Yeah!  But not very many—only 8% or 123 of the recipes reviewed even mentioned a temperature.  But unfortunately not all of these temperatures were right. So even if a person followed the recipe exactly they may not be cooking the food to a high enough temperature reduce the risk of a foodborne illness.

Overall, only 89 out of 1,497 recipes gave readers reliable information that they could use to reduce their risk of foodborne illness.

This isn’t new info. A similar study was done about 25 years ago, and found similar results. So nothing really has changed in the past quarter of a century.

Ideas for educators:

  • put minimum cooking temperatures into recipes that you share with students
  • when doing food demonstrations use and explain good food safety practices including hand washing, heating to a proper temperature quickly, refrigeration or ice chests to keep cold food cold, avoiding cross contamination on cutting boards and with utensils, and using a food thermometer when appropriate
  • don’t use vague terms such as “cook till done” or “bubbly inside” to describe when a food is done; explain the process like cook chicken until the juices run clear and the internal temperature is 165 degrees F.
  • offer storage tips for finished products like refrigerate in shallow pan immediately

Here is one example from foodandhealth.com

Chili on The Grill

Serves: 4 | Serving Size: 1/2 cup
Total Time: 20 min | Prep: 5 min | Cook: 15 min

Ingredients:

2 cups cooked pinto beans
1 cup cherry tomatoes
1/2 onion chopped
1/2 bell pepper chopped
1/2 jalapeno, chopped fine (no seeds)
Dash of cumin
Dash of chili pepper
Dash of dried oregano
Drizzle of olive oil
Juice of 1 lime

Directions:

Place all items, except for the lime, on foil with the drizzled olive oil. Place on preheated grill of 400 degrees F. Grill until the beans are heated through and the veggies are caramelized and tender, about 15-20 minutes. Sprinkle with lime juice.

Serve the beans and vegetables with grilled chicken that is cooked to an internal temperature of 165 degrees F and steamed brown rice. A side salad is great, too! Serve all food hot immediately. Refrigerate leftovers immediately.

Serves 4. Each 1/2 cup serving: 172 calories, 4g fat, 1g saturated fat, 0g trans fat, 0mg cholesterol, 8mg sodium, 27g carbohydrate, 9g fiber, 2g sugars, 8g protein.
© Food and Health Communications

Cheryle Jones Syracuse, MS
Professor Emeritus, The Ohio State University

*Katrina Levine, Ashley Chaifetz, Benjamin Chapman, (2017) “Evaluating food safety risk messages in popular cookbooks”, British Food Journal, Vol. 119 Issue: 5, pp.1116-1129, https://doi.org/10.1108/BFJ-02-2017-0066

Here is our food safety temperature poster:

Check out our new materials now at 

Boost Spring Fruit and Vegetable Consumption with Greens!

Recently I presented my spring portfolio to my photography class, and it got me thinking about helping your audience eat more spring fruits and vegetables.

After all, what could be more enticing than spring produce?

Here’s the artist statement that I submitted for my photos.

Spring beckons flora to burst forth from the earth. In the context of California farmers’ markets, spring brings new and bright greens, fresh young tubers, and juicy citrus fruits.

This photography exhibition celebrates the unique season that transitions us from winter to summer. The produce you see in the photos comes from local farmers who sell in community markets, and the pictures are designed to inspire people to choose locally-grown fruits and vegetables.

In the farmers’ markets, farmers become entrepreneurs while buyers gain access to fresh and nutritious foods — a community comes together. Accompanying the artistic representation of spring’s seasonal produce is a tribute to the farmers who grew it.

The offerings of a farmers’ market change each week and month as the seasons ebb and flow. This is but a moment in time during one season’s passage, and I hope you enjoy the beauty of spring.

And here’s a collection of engaging images of tasty spring foods.

These images would be fantastic in a display or email blast, or even as decoration for a spring vegetable cooking demonstration.

And speaking of cooking, to help inspire your audience to eat more spring produce, I’d like to share this recipe for a bright kale salad. This is a great way to present spring to your clients and help them focus on fresh and tender greens.

Kale is the Star Salad
Serves: 4 | Serving Size: 2 cups

Ingredients:

  • 1 bunch lacinato kale
  • 6 cups raw baby kale
  • 1 teaspoon olive oil
  • Juice from 1 lemon
  • 1 cup shredded radishes
  • 1 cup diced apples
  • 1 tablespoon black sesame seeds
  • 2 tablespoons light poppy seed dressing

Directions:

  1. Remove the stems from the lacinato kale and rinse well. Place the undried lacinato kale in a covered container and steam lightly in the microwave for 30 seconds to 1 minute. The color will intensify and the leaves will be crisp tender.
  2. Place the lacinato leaves on the plate as pictured.
  3. Toss the baby kale with the olive oil and lemon juice. Put it on a plate and top with the radishes and apples.
  4. Drizzle a thin ribbon of poppy seed dressing over the greens and add the black sesame seeds. Serve immediately.

Nutrition Information:

  • Serves 4. Each serving contains 157 calories, 5 g fat, 1 g saturated fat, 0 g trans fat, 2 mg cholesterol, 213 mg sodium, 27 g carbohydrate, 5 g dietary fiber, 9 g sugar, and 6 g protein.
  • Each serving has 464% DV vitamin A, 320% DV vitamin C, 23% DV calcium, and 16% DV iron.

Did You Know?

  • Kale is high in many different nutrients. It has tons of antioxidants, which protect your cells from free radical damage.
  • One cup of chopped kale has more vitamin C than an orange. A single serving of this salad has 320% of your daily value of vitamin C.
  • Kale plants don’t die after the first frost — they get sweeter! Kale is one of the heartiest leafy greens around and is grown all over the world.
  • Kale is a good source of fiber, manganese, and copper, all of which are key to good health!

And here’s a PDF copy of the recipe handout that you can use however you’d like!

Eat More Oatmeal!

How are you doing with making small changes to your eating pattern that can make a difference in your health? One of the ideas in my New Year’s resolution article was to “eat more oatmeal.” Did you try it? How are you doing?

The concept behind that little goal is to have oatmeal instead of processed cereal. There are several things going on here: saving money by not buying expensive boxes of cereal, knowing exactly what you’re adding to the cereal, and knowing that oatmeal is good for you.

How good? Well, oatmeal is naturally low in fat and sodium and high in fiber. It’s also a good source of iron and provides protein, B vitamins, and other minerals. Oatmeal is an excellent source of whole grains too. Eating oats may even help protect against high blood cholesterol, diabetes, high blood pressure, and obesity.

There used to only be a couple different types of oatmeal available, but now the choices are many. All this variety can get a little confusing, so let me clear some things up. All types of oatmeal start with oat groats, which are oat grains without the hulls. Choose your oatmeal based on the time you have to prepare it, the texture you prefer, and any added ingredients you may or may not want.

  • Scotch or Irish oats have been cut but not rolled. They have a hearty texture with a nutty flavor. The traditional version can take up to 30 minutes to cook, though there are quicker-cooking options.
  • Steel-cut oats are whole oat groats that have been sliced into pieces. These cook in about 20 minutes with a chewy, coarse texture.
  • Rolled or old-fashioned oats are whole oat groats that are steamed and rolled to flatten them; they cook in about five to ten minutes.
  • Quick oats are rolled oats that have been cut into even smaller pieces. These cook in about one to five minutes.
  • Instant oats are whole oat groats that are rolled thinner and cut finer than the others. Since they’re also pre-cooked, you can just add boiling water or heat them in the microwave for about 90 seconds.

According the USDA Nutrient Database, all plain oatmeal types are about the same when it comes to nutrients. One cup of cooked (with water and no salt) old-fashioned or quick oats has 166 calories, 3.5 grams of fat, no sodium, 4 grams of dietary fiber, and less than a gram of sugar. Watch out for instant oatmeal packets, since most of them have added flavors which usually add calories, sodium, and sugars. To steer clear of these, keep an eye on the ingredients list and Nutrition Facts label.

You can make oatmeal in the microwave as quickly as you can pour a bowl of cereal and milk.

To try it for yourself, don’t miss this edition of one of Chef Judy’s recipes:

Ingredients:

  • 1/2 cup old-fashioned oatmeal
  • 1 cup water
  • 1/4 teaspoon ground cinnamon

Directions:

  1. Place all ingredients in a large glass or ceramic bowl. Microwave on high for 3 minutes. The big key here is to make sure you have a large bowl, so that it won’t overflow! I like to make it in a 1 quart measuring cup and then just eat out of the cup. Voilà! Only one dish to clean.
  2. Add your own skim milk, fruit, nuts, raisins, dried cranberries, and spices to the cooked oatmeal — you are in control. To save even more time in the morning, make your own little “instant oatmeal” packs, adding spices or dried fruits. That way, all you’ll need to do in the morning is add water, microwave, and eat!

And what if you don’t think that you have time to make oatmeal every day? My solution is to make a large batch of oatmeal over the weekend and reheat single servings quickly in the microwave. That way, you’ll have a speedy meal without losing any of its nutritional benefits. Cooked oatmeal will keep in the refrigerator for up to a week and makes a quick and healthful breakfast.

By Cheryle Jones Syracuse, MS, Professor Emeritus at The Ohio State University

Here are a few of the other top breakfast resources, just for you!

Make Great Grilled Salads at Home!

Sliced RomaineI’m always on the lookout for ways to eat, serve, and enjoy more vegetables. Salads are winners, but sometimes the toppings tend to pile on more calories and sodium than I want.

Caesar salad is a great example. It sounds healthy in the beginning, but the high-fat dressing, huge dose of cheese, and heaps of croutons frequently outweigh the benefits of the dark green leafy Romaine lettuce. A tablespoon of a typical Caesar dressing contains around 8.5 grams of fat and roughly 80 calories. This can be cut a little by using a lower-calorie version, but then you increase the amount of sugar and maybe even sodium.

But the foundation is sound. Romaine is a great green, high in vitamins K, A and folate. Like other greens, it’s almost fat-free and low in calories, with about 50 calories in a half a head and a bonus of dietary fiber (6.5 grams that same half head). Romaine is usually the basis for the Caesar salad, so let’s capitalize on it.

How?

By putting it on the grill.

Recently my husband and I went to a new restaurant in our community. I was surprised to see a “grilled Caesar salad” on the menu.  It brought back memories of a similar salad I had in a restaurant in Baltimore over 15 years ago. I was so glad to be reminded of something I had enjoyed, and that in turn inspired me to give my own twist on this other way to enjoy a salad.

I fired up the grill and decided to try a grilled salad of my own. It’s so simple and a winner! Plus, it really doesn’t need dressing or croutons and a small amount of cheese goes a long way! When I served it for the first time, I had guests going back for seconds on salads. Now how often does that happen?!

Want to try it for yourself?

Here’s what I did.

On the grill!I started with full heads of Romaine lettuce. I washed and pulled of any wilted leaves, leaving much of the core intact so that the leaves still clung together. (Nutrition tip: keep as many of those dark green outer leaves as possible).

I then cut the heads in half and washed them again. After that, I put a small amount of olive oil (about one tablespoon) and some (about 1 ½ teaspoon) dried garlic seasoning into a large zip-top bag and shook it around. I used garlic seasoning since it’s in a Caesar salad, but you could experiment with anything. Then I added the Romaine heads and refrigerated them in the marinade, shaking the bag a couple of times to coat the lettuce with the oil and seasoning.

I’ve seen recipes online that didn’t put the lettuce in a bag and brushed the leaves with oil just before putting on the grill.  I’m guessing this would work well, too. This was just my way of getting the work done early. It also eliminated a brush and allowed me to take the seasoned lettuce straight to the grill.

Once you’ve got the Romaine on the grill, the key is timing. It doesn’t take long:three to four minutes on each side at the most. The lettuce should be slightly charred and a little smoky. I topped each head with grated Parmesan cheese and served it to my guests. I don’t think it needed any other dressing, but a small amount of low-fat Caesar dressing could be added. Yum!

By Cheryle Jones Syracuse, MS, Professor Emeritus at The Ohio State University

And here’s a printable handout with the recipe! How will you use your copy?

Grilled Caesar Salad

Don’t miss these other amazing salad resources from the Nutrition Education Store!

Eggplant Cooking Tips

Eggplant!I recently got the best gift from a friend — 4 small eggplants from her garden. This is the same friend who brought me several pomegranates a couple years ago. I feel so lucky that I have friends that bring me wonderful fruits and vegetables — what great gifts!

Anyway, back to the eggplant.

I don’t usually buy eggplant, largely because I really don’t know what to do with it. My husband likes eggplant Parmesan, but he usually orders it in restaurants. I’d heard so many rumors and old wives’ tales about how to cook eggplant, and found myself baffled by all the conflicting information. For example, do I need to salt the eggplant? I remember my husband’s aunt always salting her eggplants and then weighing them down with books. On the other hand, according to an archived article from Food and Health Communications, you don’t have to bother with this if the eggplants are very fresh.

So how should I treat my eggplants?

Since salting can help remove the bitterness from an eggplant, I decided to salt mine. If you’d like to salt your eggplants before you cook them, first you need to slice or dice the eggplant into the shape you want to use. Sprinkle everything with about half a teaspoon of salt (not the half cup my husband’s aunt used to use) and then let everything sit in a colander for 30-60 minutes while the eggplant drains. Once that time is up, press out any excess liquid and dry the eggplant with a clean towel. You can also rinse the eggplant to remove extra salt before drying it.

So, there I was with salted eggplant. How did I want to cook it?

Grilled EggplantI dug further into the Food and Health Communications recipe archive and found a few articles about eggplant, along with several healthful recipes. Here are some of my favorites…

With time running short, I decided that I wanted to preserve my eggplants to cook later.

According to the National Center for Home Food Preservation, eggplant can be frozen. As far as I could tell, there is not a research-tested recipe for safely canning eggplant.

So, freezing it was!

To freeze eggplant, fill a large pot with 1 gallon of water and half a cup of lemon juice (the lemon will keep the eggplant from darkening). Bring the mixture to a boil. While you’re waiting for the water to heat up, wash, peel, and slice the eggplant into discs that are half an inch thick. Since eggplant does discolor quickly, prepare only what you you can blanch at one time. When you’re ready, place the eggplant slices in the boiling water for 4 minutes. Pluck the slices out of the water with a slotted spoon and drop into an ice bath for another 4 minutes. Then drain and pack up your eggplant. If you want to fry the slices or layer them into eggplant Parmesan or vegetable lasagna, consider placing freezer wrap between the slices before freezing.

RIMG4637RIMG4670RIMG4677RIMG4732

That’s basically what I did, with one little twist. I put the well-drained eggplant slices on a tray and froze them individually. Then I transferred everything to a freezer bag. Hooray! Now I have two quart bags full of sliced eggplant for later this year!

My research also led me to discover a bunch of great eggplant cooking tips. If you ever find yourself with a spare eggplant or two, consider the following…

  • To avoid browning, wait to cut into the eggplant until you absolutely have to — don’t prep that part a few hours in advance!
  • Leave the skin on! This will help color, shape retention, and optimal nutrition. You can find anthocyanins in the purple skin of an eggplant, and since anthocyanins have a positive impact on blood lipids, it would really be a shame to remove the skin.
  • Eggplants do have a tendency to soak up oil during cooking. To keep your dish light and healthful, sauté eggplant in a small amount of very hot oil in a nonstick pan.
  • Want a quick eggplant side? Spray slices with olive oil cooking spray and roast, grill, or broil them.

Anyway, that’s a brief recap of my eggplant adventures. I hope you liked it!

By Cheryle Jones Syracuse, MS, Professor Emeritus at The Ohio State University

Here’s a handout that features the most helpful points from today’s post. Get your copy today!

Eggplant Handout

And for more fun with eggplant, drop by the Nutrition Education Store!

Fruit and Vegetable Activity Set for Kids

I Heart Fruit and Veggies Bookmark

Vegetable Chopping Guide Poster

When in Greece

SantoriniMy husband and I recently went on a Mediterranean cruise. One of the stops was the beautiful volcanic island of Santorini. I’m sure you’d recognize the place if you saw the photos — it’s a beautiful location with stark white buildings and an occasional blue-roofed church dome overlooking the Aegean Sea. Like thousands of our fellow cruisers, we toured the island and took many photos.

I love visiting local grocery stores when I travel. I like it best if I can check out where the locals really shop — not a tourist attraction. I enjoy looking at the fresh fruits and vegetables, learning about what’s local and what’s in season. It’s also a treat to check out the refrigerated cases and packaged products. During this trip, I found Greek yogurt, pistachios, and olives alongside American foods like Oreos and Starbucks.
Greek store 2

Wanting to prolong our stay on the island and try a little local cuisine, we stopped at a restaurant that had all the pre-requisites — outdoor dining with a view of the ocean, local beer, and an appetizer menu. We ordered tzatziki dip accompanied by a basket of warm pita bread. When I asked the waiter about the ingredients, he said that it was only yogurt, garlic, and cucumbers. I think also tasted a little dill. The tzatziki was thick and rich, but also satisfying. I’m sure that the yogurt they used to make this was full-fat Greek strained yogurt.

Now that we’re home, I’ve recreated this appetizer.

Greek GroceryFirst, I did a lot of research. I found several brands of commercially-prepared tzatziki available in the dairy case. In checking the ingredient lists, I discovered that many contain a yogurt base and sour cream, along with cucumbers, vinegar, garlic, and dill. The nutrition facts vary by brand, but most contain around 40 calories, with 3 grams of fat for a 2 tablespoon serving.

Tzatziki is frequently used as the sauce on gyros, but it can also be a salad dressing, sauce for grilled meats or mild fish, or a dip. Instead of dill you can season tzatziki with mint or parsley.

After I learned about what was available, I asked Chef Judy, President and Founder of Food and Health Communications for an easy recipe for make-at-home tzatziki that is low in fat, but also high in flavor. Judy’s recipe uses low-fat or non-fat plain Greek yogurt and both dill and mint. You can experiment with how much seasoning you like. This recipe contains only 31 calories for ¼ cup (4 tablespoons) and one gram of fat per serving. Serve it by itself as a salad, or as a dip with whole-grain crackers, pita chips, or vegetable crudités.

Tzatziki DipTzatziki Cucumber Salad

Ingredients:

  • 1 cucumber, cut in half and sliced thinly
  • 1 tsp fresh lemon juice
  • 1 clove garlic, finely minced
  • 1/4 tsp dried dill
  • 1 tsp fresh mint, chopped
  • 1/2 cup plain Greek yogurt

Directions:

  1. Toss ingredients together.
  2. Chill until ready to serve.

Thanks, Judy, for helping to recreate these great memories in a healthful way!

By Cheryle Jones Syracuse, MS, Professor Emeritus at The Ohio State University

Would you like to share this with your clients? Here’s a free handout with the recipe and a few fun tzatziki facts!

Tzatziki Dip

And remember, there’s always more in the Nutrition Education Store!

Mediterranean Diet PowerPoint and Handout Set

Complete School Lunch Poster Set

Recipe Card: Watermelon “Cake”

We are here to help you look your very best, right now.

What Do You Know About Figs?

RIMG3864small RIMG3939small RIMG4014smallI just harvested figs from our tree, and I’m feeling very lucky!

Our climate is great for growing figs, so when our neighbors moved north, we adopted their tree.

If you’re not fortunate enough to have your own fig tree, perhaps a friend can share their crop with you. Or you can always find some at a local market, though it can be a challenge to find figs at farmer’s markets, since they don’t store well and have a very short shelf life. But however you try it, get your hands on some fresh figs!

When selecting figs, pick ones that are plump, clean, and dry, with smooth, unbroken skin. They should be soft and yield to the touch, but do not choose mushy ones.

Fresh figs are very perishable. They can be stored in plastic bags in the coldest part of the refrigerator, but they’ll only keep for 2-3 days after picking. If you’re lucky enough to have an abundance of figs, they may be dried, frozen, canned, or made into jam or preserves.

Many people are not familiar with fresh figs. Often their only exposure to this fruit is in the dried form or in baked goods like fig cookies. But figs can be eaten fresh, just as you would any other fruit, and they’re really a treat.

Use figs as another way to add variety to meals, or try them as another interesting fruit that can help you get those desired fruit and vegetable servings each day. Just 3-5 dried figs (about ¼ cup) or ½ cup of fresh figs count as one fruit serving.

More Figs!Now let’s talk nutrition. Figs are known for their high fiber content. They also contain more calcium, more potassium, and more iron than many other common fruits. They’re also full of disease-fighting antioxidants.

Fresh figs are very low in calories. About 3.5 ounces (~100 grams) or nine small figs contain only 74 calories, along with three grams of dietary fiber. On the other hand, dried figs have concentrated sugars and nutrition. 12 dried figs (the same 100 grams) contain 251 calories and 10 grams of dietary fiber. Use some caution with these dried fruits — it’s really easy to eat too many in one sitting.

So, what can you do with fresh figs?

In addition to fig cookies, figs can be used as appetizers, salads, main dishes, and desserts. Cut them in half and put them in a salad or grill them with chicken or fish. You can also mix them with feta cheese and balsamic vinegar for a show-stopping appetizer. I personally, like them chopped and mixed with vanilla Greek yogurt.

How will you enjoy fresh figs?

By Cheryle Jones Syracuse, MS, Professor Emeritus at The Ohio State University

Want to offer your clients a fun way to cook with figs? Get this free recipe handout today!

Fig Recipe Handout

And there are lots more cooking and nutrition resources in the Nutrition Education Store! Which will make your life easier?

Healthy Kitchen Poster Set

PowerPoint — Nutrition: Get the Facts

Introduction to Cooking Cookbook

Avocados: Yea or Nay?

“They’re high in calories.”
“They’re high in fat.”
“But it’s a good fat.”

Those are all statements I frequently hear about the avocado.

What about you? Do you shy away from avocados because of the fat or calories? Or do you make them a part of your diet?

Today, let’s take a look at the pros and cons of the humble avocado.

Pile of Goodness

An avocado is nutrient dense. Nutrient-dense foods provide substantial servings of vitamins, minerals, and other nutrients in proportion to the number of calories they contain. Although avocados are high in fat, most of that fat is heart-healthy monounsaturated fat.

According to the Centers for Disease Control and Prevention, avocados are loaded with dietary fiber, vitamin B6, vitamin C, vitamin E, vitamin K, magnesium, and folate. They’re also cholesterol- and sodium-free. One avocado contains about 700 milligrams of potassium. In fact, avocados have more potassium gram for gram than bananas! Furthermore, avocados are loaded with the phytochemicals that are thought to reduce the risk of some types of cancers and other chronic diseases.

So what about the calories?

The calories in an avocado are not messing around. Two tablespoons of mashed avocado (that’s 1/5 of the whole thing or about 1 oz) provide about 55 calories. So, if you eat a whole avocado, then you’re getting about 275 calories. That’s a lot of calories, especially if you’re on a calorie-restricted diet.

However, the key word is moderation.

A little avocado can add some real nutrition and variety to a meal. Plus, sometimes avocado can offer a nutrient-rich alternative to another less-healthful fat. Try slicing and spreading 2 tablespoons of avocado on your sandwich instead of mayo or butter. This will save you almost 40 calories! Yes, you get the fat, but it’s definitely a better-for-you fat than those other spreads. And you really can’t beat the flavor it adds.

Avocados for Everyone!

When buying avocados, pick fruits that have firm skins, but which yield to gentle pressure and have no soft spots. These are the kind of fruits that will ripen after they’re picked. Put unripe avocados in a paper bag at room temperature and they will ripen in the next 2-5 days. If you want them to ripen more quickly, add a ripe banana or apple to the bag. Why? These fruits give off a natural ethylene gas that helps to ripen the avocados. Once they’re ripe, use them right away. You can also put them in the refrigerator, where they will last for a couple days.

So, when you ask whether you should make avocados a part of your diet, I say yea!

By Cheryle Jones Syracuse, MS, Professor Emeritus at The Ohio State University

Looking for more cooking and nutrition resources? Look no further! We’ve got you covered! We are here when you want to look your very best right now.

Drinks, Portion, Whole Grains, Fruit and Vegetables, and Nutrient Alphabet

Nutrition Poster Set

MyPlate Wristband

Real Food Grows Banner

You made it all the way to the end! For your persistence, please enjoy a brand-new free handout! It’s the perfect guide to avocados.

Avocado Handout

A Fresh Look at Hummus

There are several foods in my refrigerator on a regular basis that weren’t there five years ago. One of these is hummus.

HummusI’ve been buying hummus as an alternative to sour cream or mayo-based dips, and it has now become my favorite appetizer. I try to “walk the talk” as a health educator, and so I put out healthful snacks when we have people over. Hummus goes very well with fresh vegetables, whole grain crackers, or baked pieces of pita bread.

Recently I wondered if I could make my own hummus. Some of this is just my curiosity, but I was also looking for a way to save some money/calories. The commercial versions of hummus are at least $2 for just 12 ounces and declare that 50 calories are in just 2 tablespoons. (This is still better than the typical French onion dip that averages 60 calories per 2 tablespoons, with 75% of the calories from fat). But I was looking for something even more healthful.

ChickpeasThe basic ingredient in hummus is the humble chickpea (a.k.a. garbanzo beans or cece beans). Chickpeas themselves are powerhouses of nutrients. They are high in protein and dietary fiber while staying low in fat and sodium. What a great base for this dish!

In addition to chickpeas, another traditional ingredient in hummus is tahini. Tahini is a paste that is made by grinding up sesame seeds. Not only is it expensive, but it’s really high in fat. According to the Nutrition Facts label on the jar, just 2 tablespoons of tahini contain 260 calories, and 200 of them are from fat! Wow! That adds up fast, especially when recipes call for 1/3 to 1/2 cup of tahini for each 1 and 1/2 to 2 cups of chickpeas.

Now, when it comes to the ingredients, I prefer to take things a bit farther. Most of the hummus recipes I found start with a can of chickpeas. But I wanted to be even more in control of the ingredients in my hummus, so I got dried chickpeas. If you’ve never purchased them, dried chickpeas are with the other dried beans and peas in the grocery store. I soaked them overnight in water, brought everything to a boil on top of the stove, and finished cooking them for 5 hours on low in the slow cooker. Made this way, they were perfect. Chickpeas can be cooked for a shorter period of time on top of the stove, but the slow cooker was easy for me to start and then do something else while the chickpeas cooked.

Mixing It TogetherOnce I had finished preparing my chickpeas, I found that I got 8 cups of cooked beans out of a single pound of dried chickpeas. That’s about four times the amount of beans you’d get in one can. Plus, that larger amount costs the same as a small can of beans, and this version has no added sodium.

I was also impressed with the flavor — I found it to be so much better than the canned version.

Now that the chickpeas were ready to roll, I started to experiment with actual hummus recipes. I found one particularly intriguing recipe from the free recipe database at Food and Health Communications — this recipe used plain yogurt instead of tahini. I tried it that way and loved it, and what a savings in terms of calories and fat!

Hummus!From there, making hummus is a snap! I slowly processed all the ingredients in my food processor, adding more yogurt until I got the consistency I liked. After a few experiments, I found that I prefer Greek yogurt in my hummus because it offers a little more body than more traditional yogurts.

Once it was well blended, I seasoned my hummus with lots of garlic, lemon juice, and parsley. Drizzling it with a little sesame oil and sprinkling with toasted sesame seeds gives it a hint of tahini flavor and makes the presentation super appealing.

I guess I’m not a “hummus purist,” but I like this lower-cost and lower-fat version.

By Cheryle Jones Syracuse, MS, Professor Emeritus, The Ohio State University

Want to offer your clients a guide to healthful, tasty hummus? Get a free PDF recipe right here! This page is an excerpt from The Home Run Cooking Book, which is a fantastic introduction to healthful cooking. It goes over kitchen tips and techniques, discusses cooking equipment, and offers the most popular healthful recipes, all of which have been rigorously tested and audience approved. It’s the perfect educational resource. Try this hummus and see for yourself!

Hummus Recipe

Remember, we are here when you want to look your very best right now. Here are some wonderful options to help encourage your clients to choose balanced diets…

Vitamins, Minerals, Fiber, MyPlate and Much More!

Nutrition Poster Value Set

This CD has our top 6 grocery PowerPoints, all in one place!

Healthful Shopping Presentation

The truth about sugary drinks!

Beverage Banner and Stand

The Lowdown on Vinegar

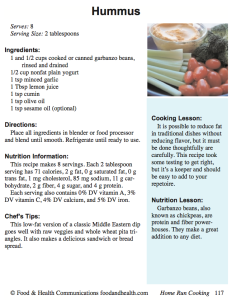
It’s time for another reader request!

A few weeks ago, Stephanie Correnti, RD, asked me about vinegars, writing…

Hi,

Hope all is well.  Have a request.  Do you have a sheet on the different types of vinegars (white, balsamic, red wine, etc) and what they are good on i.e. salads, marinades, etc.  I am especially interested in the difference between rice wine vinegar and rice vinegar (this ones has conflicting info).

How they are made, etc.

Thanks,
Stephanie Correnti, RD

How could I resist?

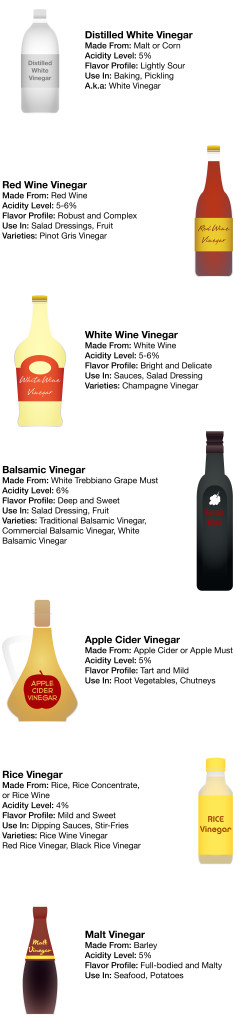
My team and I went to work immediately, and after hours of research and chasing down leads, we have come up with this comprehensive guide to common vinegars. Oh, and we just had to make a fun infographic as well. Here it is — enjoy!

How Vinegar Is Made:

Vinegar is made through a process called double fermentation. The first round of fermentation usually uses yeast to turn a sugary liquid like fruit juice or a starchy food like grain into alcohol. The second round of fermentation turns that alcohol into acetic acid, which is then diluted to make vinegar. Why dilute? Well, the acid is roughly 10% acidic, which is too harsh for cooking, so it is diluted to between 4% and 7% acidity before being sold.

Many vinegar manufacturers only do the second round of fermentation, buying wine stock or distilled alcohol from other sources and taking over the vinegar-making process from there.

Distilled
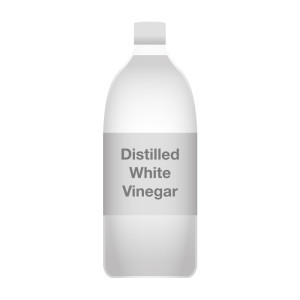
Distilled White Vinegar:

Also known as plain old vinegar, distilled white vinegar is mildly acidic and super versatile. Its title is actually a bit misleading, since it isn’t the distilling process that creates white vinegar. Instead, this kind of vinegar is made by fermenting distilled alcohol. It is usually made from either malt or corn.

How does it taste?

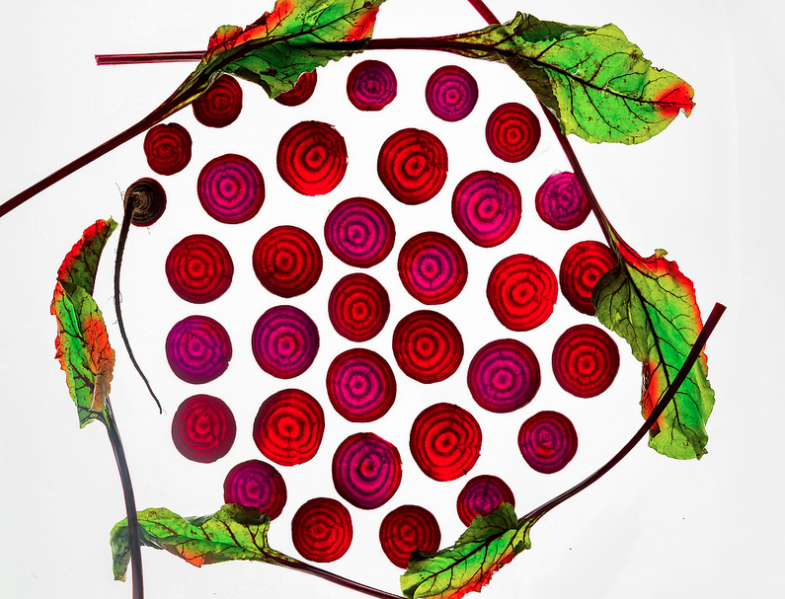
This type of vinegar has roughly 5% acidity, which makes it a pretty mild vinegar. People typically use it in pickling and baking because its gentle flavor adds a quiet bite that doesn’t distract from the flavor of the food being prepared. Try it in our recipes for Anise Barbecue Sauce or Chocolate Beet Cake!

Oh, and fun fact: this kind of vinegar is very common for household cleaning as well.
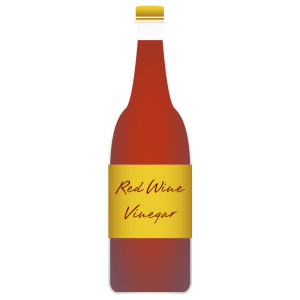
Red WineRed Wine Vinegar:

When it comes to vinegars with additional flavor, red wine vinegar is one of the most popular. This high-selling type of vinegar has many different varieties, but all of them are made from red wine. The vinegar is often aged in wooden barrels, and can be “matured” for up to 2 years.

When it comes to quality, there is a wide range. Some versions can have really complex flavors, while others are bitterly sour one-note packages. A good rule of thumb is to look at how long the vinegar has been aged — the longer the better. Some fancy red wine vinegars only use one type of wine or even a single kind of grape. Try a few varieties and see which ones you like best!

How does it taste?

Red wine vinegar has a much more complex and layered flavor than distilled white vinegar. It is perfect for salad dressings or fruit desserts, and it is a very common element in marinades. Give it a whirl by making a Classic Marinade or Berry Brûlée!

White WineWhite Wine Vinegar:

Like red wine vinegar, white wine vinegar is made from wine that has been further aged in order to produce vinegar. It too is often matured in wooden containers. Less popular than red wine vinegar, white wine vinegar is still super versatile and its flavor profile can vary widely by brand. Look for well-aged varieties and have a taste test to find the flavors that work best for you.

How does it taste?

White wine vinegar’s flavor varies widely from brand to brand. Some options are malty and sour, while others are floral and light. In general, white wine vinegar is great for sauces and salad dressings (especially when the hue matters and you want a light dressing). It complements delicate flavors like the ones found in fish or fruit especially well. Try it in Salmon Macaroni Salad or Peach Salsa.

A note about wine vinegars: As mentioned above, some wine vinegars use a particular kind of wine or only one type of grape to produce their vinegar. If you’d like to further explore the realm of wine vinegars, try champagne vinegar, pinot gris vinegar, or sherry vinegar. There are lots of varieties out there, so feel free to explore!

BalsamicBalsamic Vinegar:

Oh balsamic vinegar. This syrupy, dark, sweet vinegar has been a darling of the food scene for quite some time, adding pep to healthful dishes and depth to indulgent treats. Balsamic vinegar is a versatile flavor powerhouse.

With popularity, however, comes variation and a wide range of quality. All balsamic vinegars must be made from a grape product (no, there’s no balsam in it), but that’s really where the similarities end. Traditional balsamic vinegar comes from the must of white Trebbiano grapes and is aged in wood casks for quite some time, with the aging process lasting anywhere between 12 and 100 years. You can spot this kind of vinegar by its “Protected Designation of Origin” marks — it must come from either the Reggiano Emiliano or Modena provinces of Italy and be aged for at least 12 years.

The more common, less expensive, and by-no-means-traditional form of balsamic vinegar is called “balsamic vinegar of Modena” or simply “balsamic vinegar.” Instead of using the must of white Trebbiano grapes and aging it for many years, this type of vinegar is made by mixing concentrated grape juice with strong vinegar. Artificial colors and flavors are also added — even caramel or sugar.

How does it taste?

The thick and almost syrupy texture of traditional balsamic vinegar masks a relatively high acidity level, creating a mild but layered flavor with undertones determined by the aging process and types of wood casks used. Commercial balsamic vinegar mimics these flavors, though at a shallower and less-developed level. Balsamic vinegar has a very notable taste, so use it when you want a dash of sweet and sour with deeper layers. It makes a great salad dressing and draws out the flavor of ripe fruits, especially berries. It’s also a popular flavoring agent in Italian food, adding zing to everything from bruschetta to panzanella to caprese salads. Once you have some balsamic vinegar of your very own, give it a test run with some Open-Faced Garden Pitas or a Pear and Almond Salad!

A note about white balsamic vinegar: Though it shares the word “balsamic” with traditional balsamic vinegar, that is practically where the similarity ends. White balsamic vinegar is made by cooking grapes under pressure, stopping any caramelization, before aging for one year in un-charred oak barrels. With a light and fruity flavor, this vinegar is a pale yellow color that makes it perfect for light sauces and salads.

Apple CiderApple Cider Vinegar:

This mild vinegar is made from either cider or apple must, fermenting the mixture until a delicate and sweet vinegar is ready for sale. This inexpensive vinegar is a toasty gold color and lends itself well to a variety of culinary uses. Many people buy unfiltered apple cider vinegar for its health benefits, though more research is needed to substantiate those health claims.

What does it taste like?

This mild and fruity vinegar has a distinct apple flavor that is balanced by a gently sour bite. It is a fantastic ingredient in marinades, especially for chicken or fish, but it also peps up chutneys and vinaigrettes. Some home cooks prefer it over distilled white vinegar for quick-pickling fresh produce in the refrigerator. At our test kitchen, we found that apple cider vinegar really perks up the flavor of root vegetables, especially in an Indigo Beet Salad or Sweet Potatoes with Raisin Sauce.
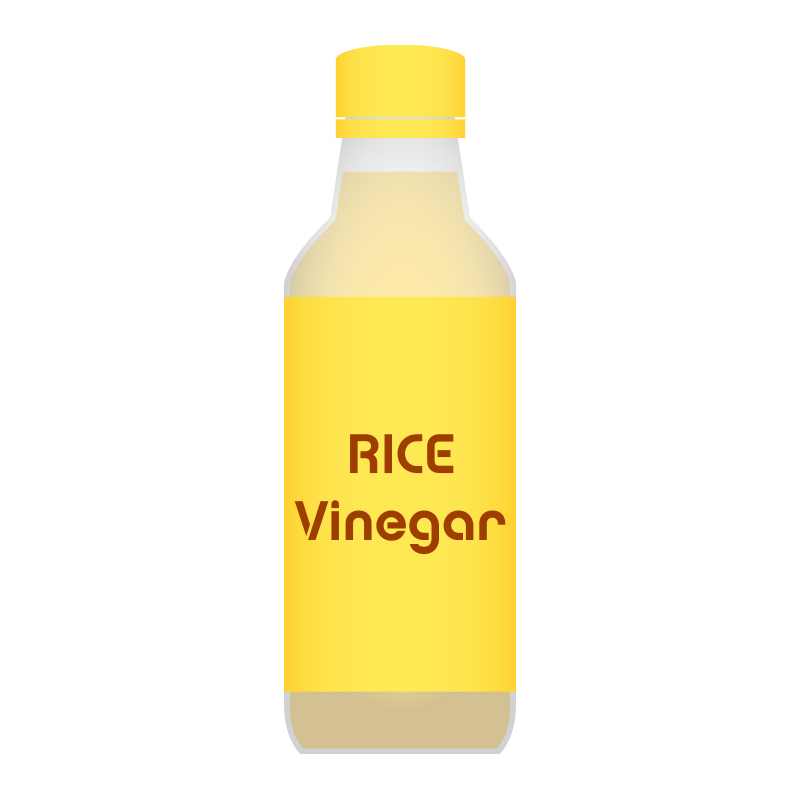
RiceRice Vinegar:

And here’s where the crux of Stephanie’s question lies — what is the difference between rice and rice wine vinegar? After much research, it appears as though rice wine vinegar is a type of rice vinegar, and the two can be used interchangeably in recipes. Rice vinegar can be made from fermented rice itself, rice concentrate, or from rice wine. Rice wine vinegar, as the name might imply, is made only from rice wine. Their flavors are very similar, and either can be used when rice vinegar is called for.

Rice vinegar’s flavor profile changes depending on the region it comes from, and variations like red rice vinegar and black rice vinegar are made from entirely different kinds of rice, with much stronger flavors. For the purposes of this writeup, we’re going to focus on the most common kind of rice vinegar, known as “rice vinegar” or “white rice vinegar.”

What does it taste like?

The rice vinegar that’s most easily available in the United States is a bit harsher than the varieties sold in China and Japan, but it is still notable for a mild and sweet flavor, especially when compared to most other vinegars. With the lowest acidity levels allowed to vinegars sold in the U.S., rice wine vinegar doesn’t have much bite, which makes it perfect for mild boosts of flavor. It’s great in dipping sauces and stir-fries. Try it in Stuffed Baked Potatoes or a Peanut Cabbage Stir-Fry Salad!

There are many varieties of rice vinegar, and lots of them are sweetened or seasoned in some way. This can pep up their flavor profile or get in the way of what you’re cooking, so be sure to choose the right vinegar for the job. Have a taste test and see which options are best for you!
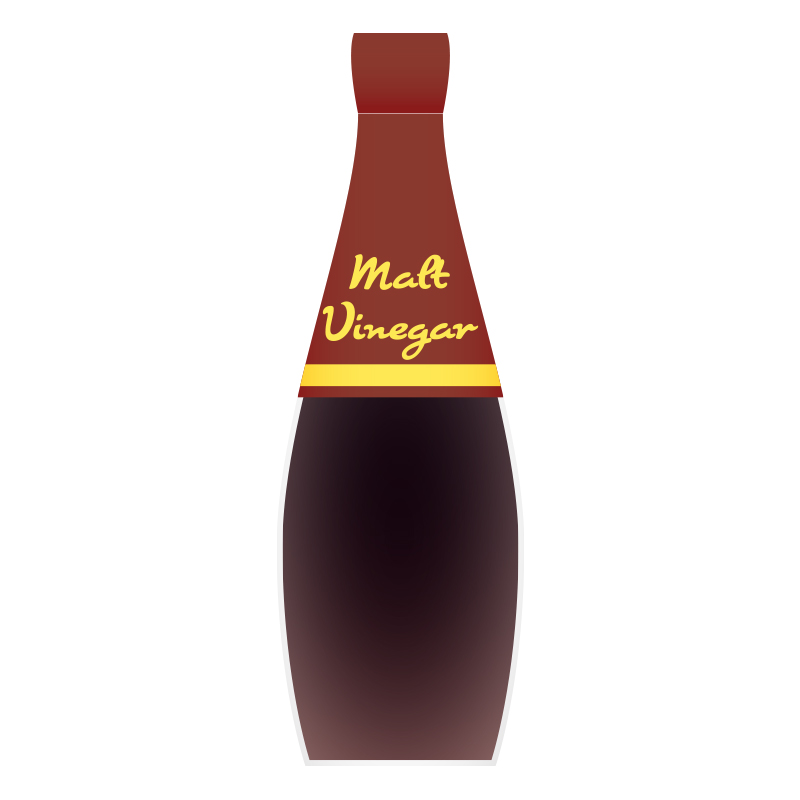
MaltMalt Vinegar

Making malt vinegar is an interesting process. First barley must be “malted,” transforming the starch in the barley to maltose. From there, the mixture is fermented until it becomes ale, and then it’s aged until it reaches the proper acidity and consistency. Other grains can be malted to make this vinegar, but barley is the most common.

What does it taste like?

Full-bodied and toasty, malt vinegar is most commonly seen as an accompaniment to fish and chips or other British treats. Its deep brown color makes it easy to spot in a lineup of vinegars, and it also makes a great marinade or component of darker sauces. Use it when you want to add a toasty bite to whatever you’re cooking.

Let’s end this post with a free infographic that compares a lineup of the vinegars we’ve explored today! Here’s a PDF just for you.

Vinegar Infographic


Keep those requests coming!

Judy Doherty, PC II, Founder of Food and Health Communications, Inc.

Perfect for Wellness Fairs!

10K Steps Banner and Stand

Great for kids!

7 Basic Nutrition Posters

Wonderful Display Resource!

MyPlate Brochure Card